Disclaimer: This post contains two sponsored links and affiliate links. If you make a purchase through these links, I may earn a small commission at no additional cost to you. Thank you for supporting my work and allowing me to continue providing creative content!
There’s something magical about having a dedicated space that works with you, not against you. For the longest time, my painting process looked like a game of creative Jenga—stacked canvases, constant rearranging, and a dash of daily chaos. I was dancing around unstable setups and constantly shifting artwork to make space, poking new holes in the wall every time I had a fresh piece to hang. Honestly, it was a bit of a circus act, minus the applause and popcorn.
Enter: the DIY wall easel.
I first got the idea after seeing how artist Brooke Ring had transformed her studio wall into a functional, flexible painting zone. It clicked. Why not use the wall for what it should be doing—supporting my work both literally and artistically? I wanted something that could grow with my creative process, help me organize finished pieces, and give me a proper station to work on any size canvas without the balancing act.
Now, I’ll be honest—this wasn’t just a one-and-done afternoon project. It took a little bit of experimenting, head-scratching, and yes, a few power tools to get it just right. But once it was installed, I couldn’t imagine going back. It’s sturdy, sleek, and best of all, no more surprise drywall repairs.
So if you’re ready to give your wall a glow-up and build a custom painting setup that actually makes sense, you’re in the right place. Here’s what you’ll need to get started:
To elevate the artistic ambiance of your new easel space, consider adding custom Neon Signs as a stylish accent.
Whether it’s your logo, your name, or a playful design that captures your creative spirit, neon lights can add a warm, inviting glow to inspire you. Hang a neon sign above your easel to create a vibrant and artistic atmosphere. This small touch ties the space together with personality and makes your art area unique.

DIY Wall Easel Supplies You’ll Need
- 1×4 common boards
- Dry wall anchors + screws
- Level
- ½” wood spade bit
- ½” diameter dowel rod
- Tape measure
- Pencil
- Saw
- Power Drill
- Stud Finder
- Paint Primer + Paint Brush
Building the Custom DIY Wall Easel of Your Dreams
Now that you got your supplies, let’s make a wall easel. You can watch this video below or continue reading for step-by-step instructions.
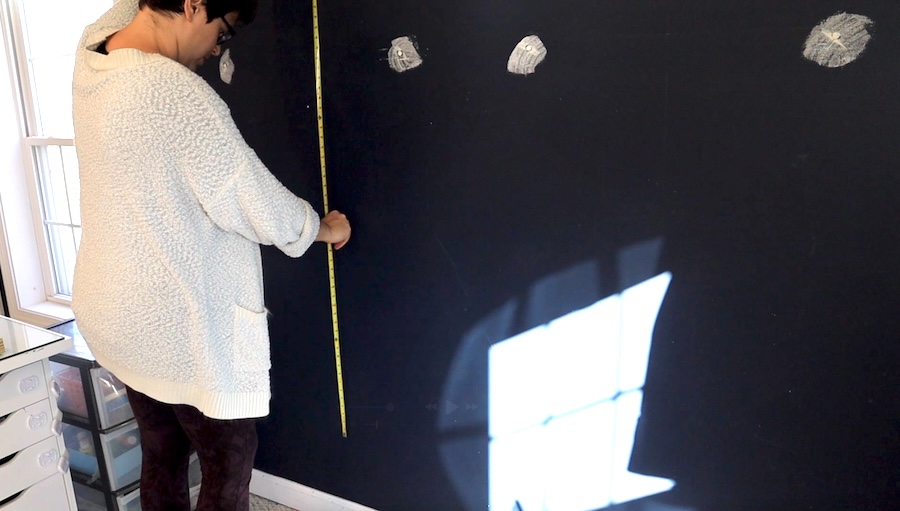
Step 1: Pick a Wall(s) & Measure
You’ll want to pick a wall that you’ll be ok with getting messy (because no artist is ever neat and tidy during the throes of painting passion). I chose three walls in my studio to build my DIY easel system, but for the sake of this tutorial, let’s work on the main wall.
After plenty of sketches and a bit of mental gymnastics, I finally landed on a layout that made sense for my main wall.
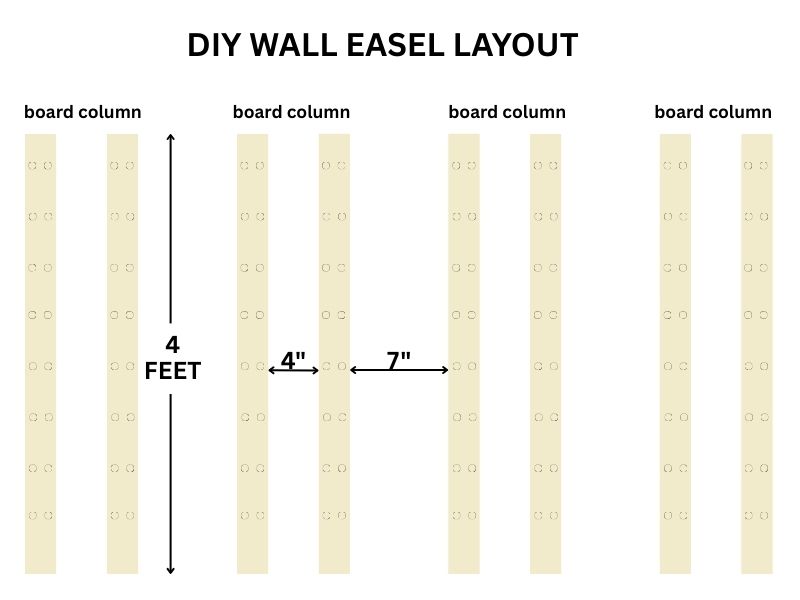
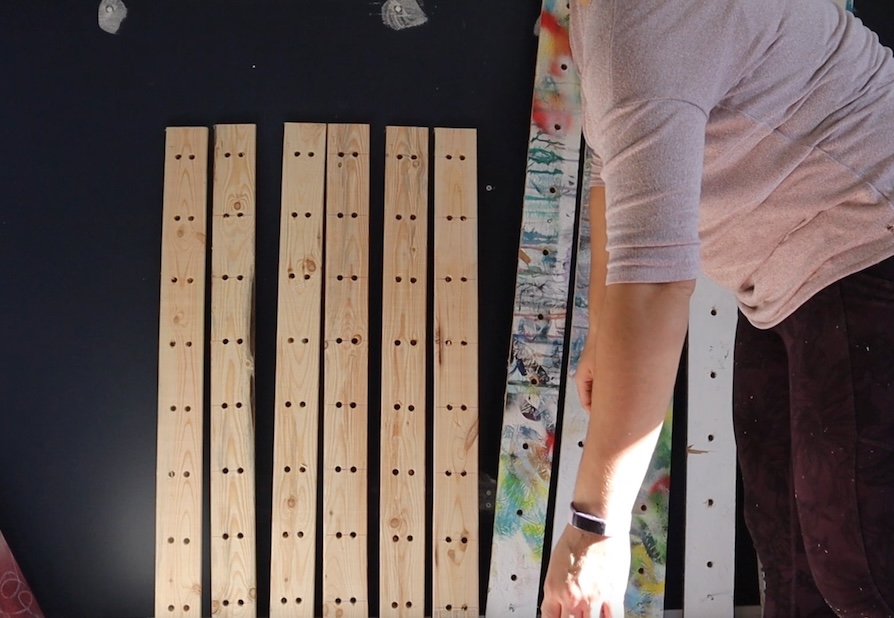
I went with four vertical board “columns,” spacing each column 7” apart, and placing the boards within each column 4” apart from one another. Altogether, this setup spans about 6 feet across the wall. I designed one of the columns to fit my smaller paintings (up to 11×14”), while the others offer more flexibility for larger canvases.
To keep things organized (and save yourself a future headache), use a pencil to lightly mark where each board will go. Trust me—we’ll come back to those markings later!
Step 2: Cut Boards to the Desired Height
Next, measure the height to determine the length of your boards. I cut mine to about 4 feet long and placed them vertically, positioning the top of the board around 8 feet from the floor.
For reference, I’m 5’5″, so this height allows me to adjust canvases comfortably without too much strain. Be sure to adjust your measurements based on your own height for the most ergonomic setup!
Step 3: Cut Your Dowels to Size
Based on the size of the canvases you typically work with, cut your dowels to provide enough support without the risk of them falling.

For my standard canvases, I cut 1” dowels, and for my gallery-wrapped canvases, I used 1.75” dowels. After cutting them to size, I made sure to sand the edges to ensure a smooth fit when inserting them into the drilled holes later.
Step 4: Drill holes into boards
It’s drilling time! To make the holes where your dowels and inevitably your paintings will hang, you’ll want to grab your ½” drill bit and power drill.
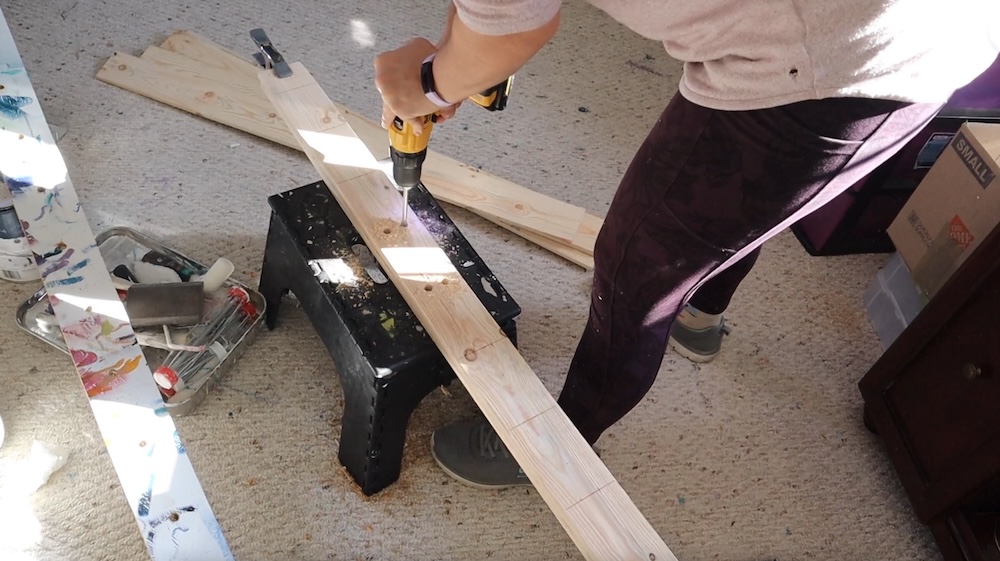
You’ll want to drill two sets of holes every 5” starting from the top and working your way to the bottom. After some trial and error, I decided to go with this two hole approach, spaced about 1.25” apart to allow for even more hanging horizontal flexibility.
My hand was pretty sore after doing this, so allow for breaks and moments to step back and admire your work.
Step 5: Attach boards to the wall
So you’ve measured your wall, cut your boards, and drilled a bajillion holes. Now it’s time to hang everything up and see all your hard work come to life!
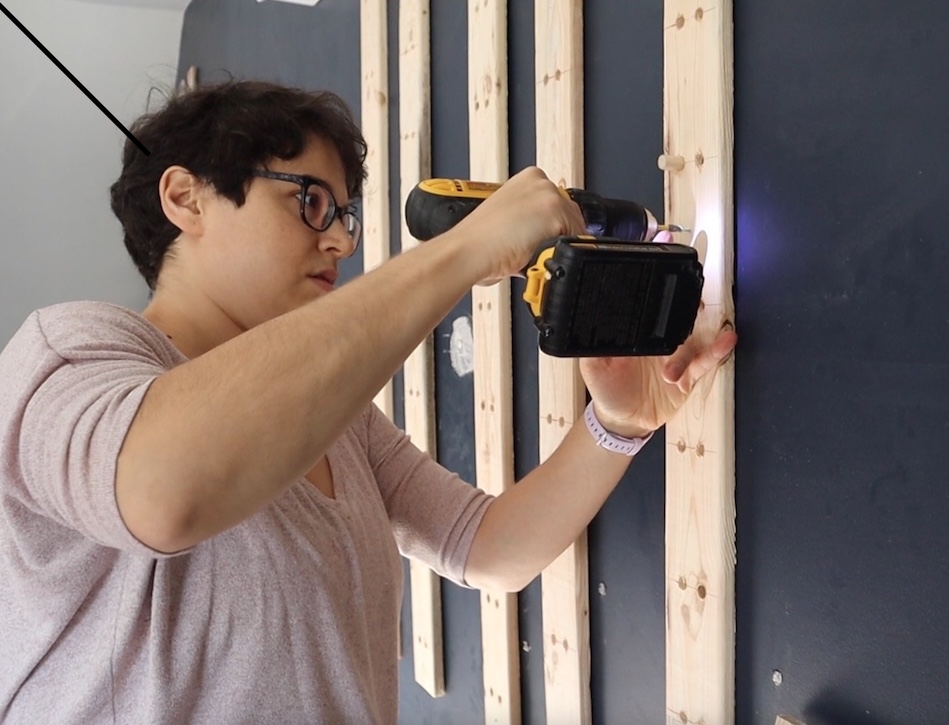
Before you start attaching the boards, revisit the pencil markings you made in Step 1. Now’s the time to check whether any of those spots line up with wall studs.
Use a stud finder to scan each area where a board will go. If a board aligns with a stud, great—just secure it with a screw. If it doesn’t (which was the case for most of my wall), you’ll need to use drywall anchors along with screws to ensure the board stays firmly in place.
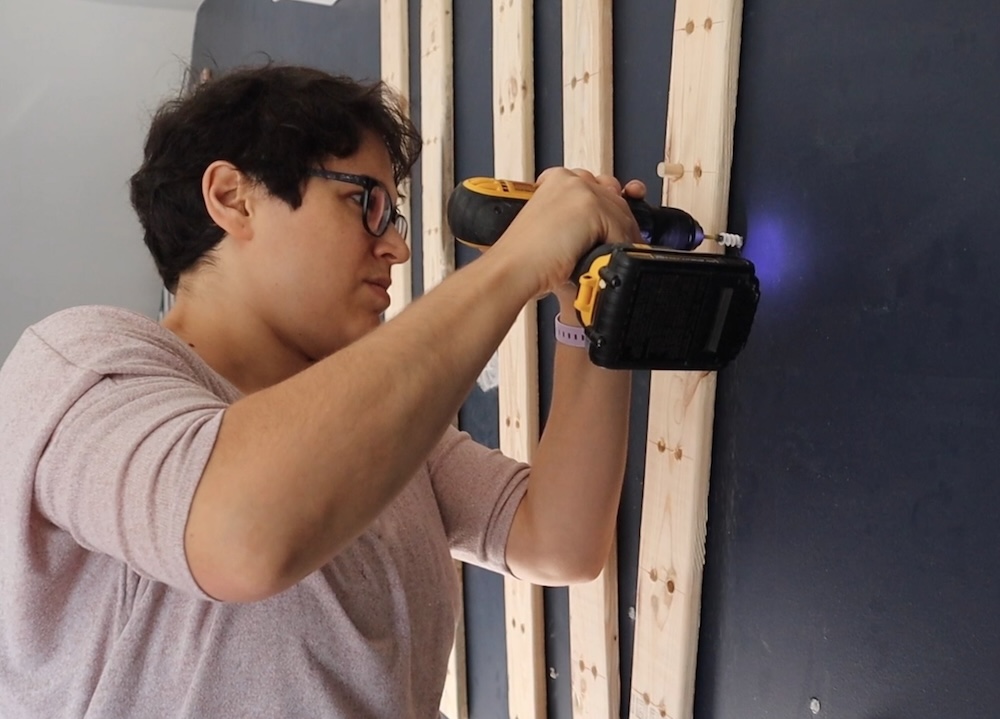
I opted for 1 ¼” self-drilling drywall anchors set to hold 50-75lbs. While you may not be hanging anything quite that heavy, it’s just good to know this easel will not come crashing down on your head mid-painting. #saferthansorry
When it’s time to attach your boards, use a level to make sure each one is straight—both vertically and horizontally—so your dowel holes line up across the wall.

It can be a bit fiddly, but here’s the trick that worked for me: I inserted a dowel into a hole on an already-mounted board, then placed another dowel in the same position on the board I was about to hang. I balanced the level across the two dowels and adjusted the new board until everything lined up perfectly. Once it was level, I marked the hole location and got to drilling.

And then, proceed to rinse and repeat this process for at least a dozen more times.
Step 6: Paint your boards
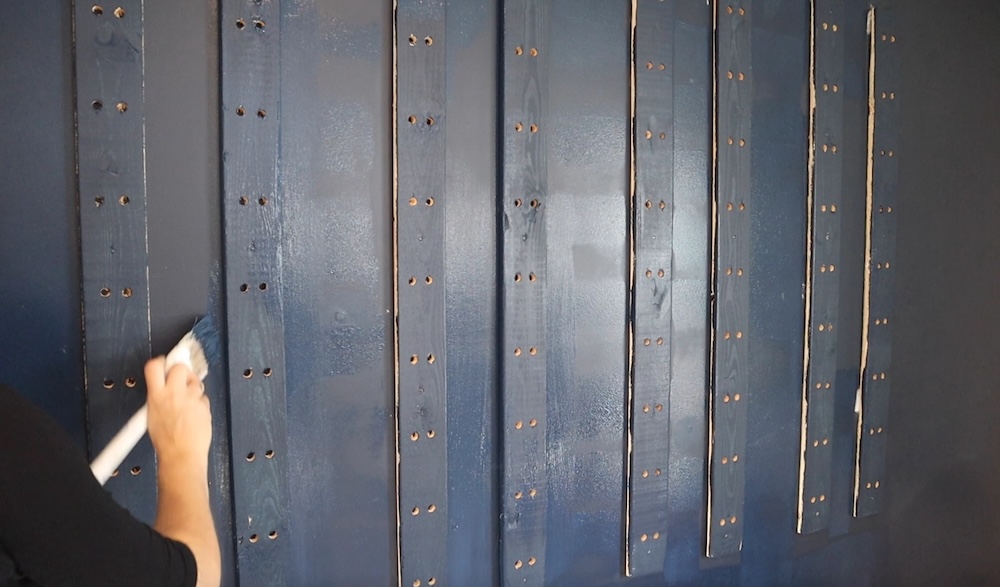
Once your boards are securely attached, it’s time to paint! I recommend starting with a quick coat of primer, then finishing with your color of choice—or keep the natural wood if that’s more your style. I used a roller for the larger surfaces and a brush to get the sides and edges. To create a seamless look, I painted mine the same color as my walls so the whole setup blends right in.
You now have a wall easel to display your paintings and work with.
A note to keep in mind:
Chances are, your dowels are going to feel super tight when you first try to pop them into the drilled holes—and that’s totally normal. Don’t despair! What worked like a charm for me was hammering the dowel into the hole with a mallet (or regular hammer), then pulling it out with a pair of pliers.
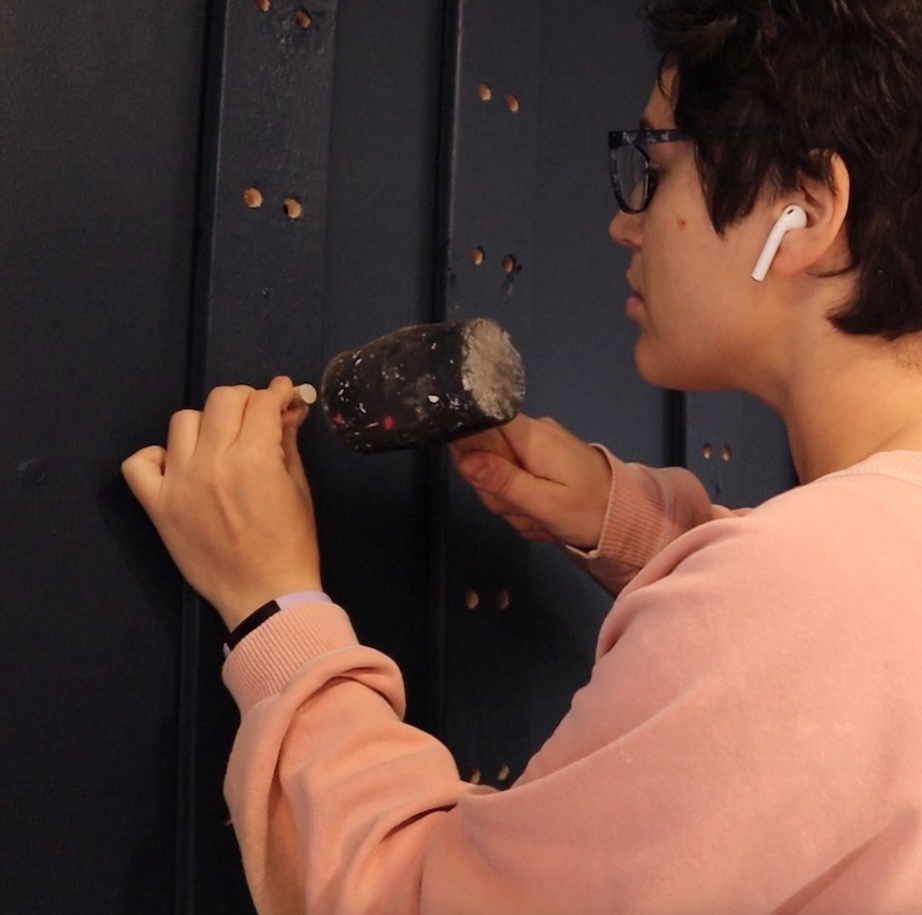
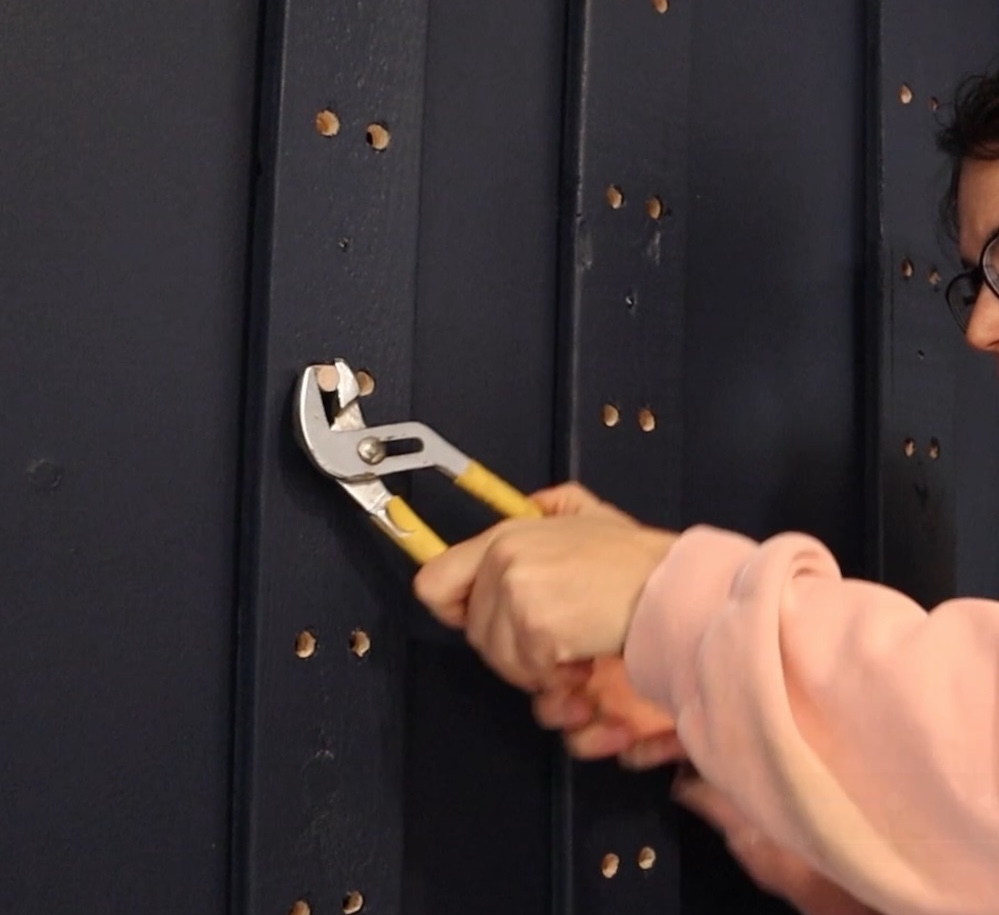
Doing this once or twice helps loosen the fit just enough so you can easily slide them in by hand afterward. It’s a bit of a process, but honestly, it’s pretty satisfying to knock those dowels in after finishing such a big project. (lol!)
Closing Thoughts on Building a DIY Wall Easel
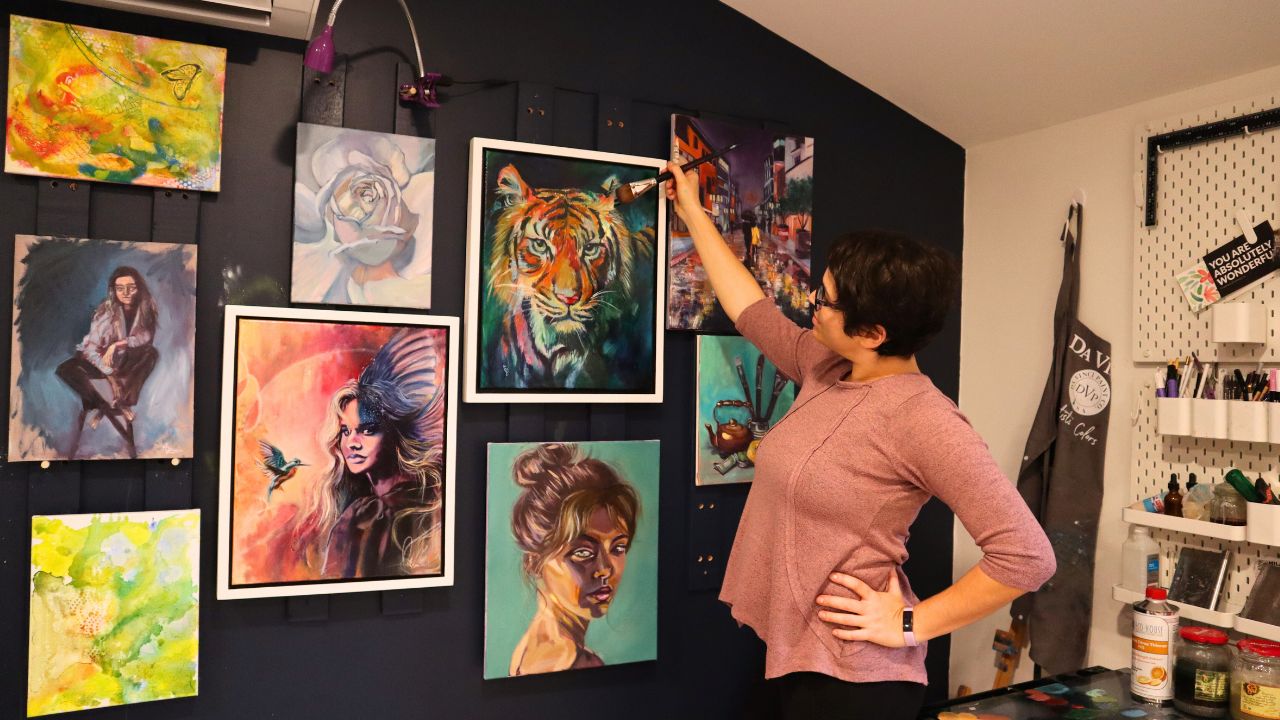
And just like that—you did it! You’ve built a custom DIY wall easel that’s both functional and totally studio-worthy. Whether you’re mid-project or showing off your latest finished piece, this setup offers a flexible, space-saving solution that grows with your creative practice.

No more balancing acts, no more patching holes—just a clean, organized system that supports your art (literally and figuratively).

If you end up building your own, I’d love to see it! Tag me on Instagram or send a pic my way—let’s celebrate your new studio setup together. And if you have any tweaks or creative hacks you added to your version, drop them in the comments.
Happy painting, friend—and enjoy the calm after the DIY storm!