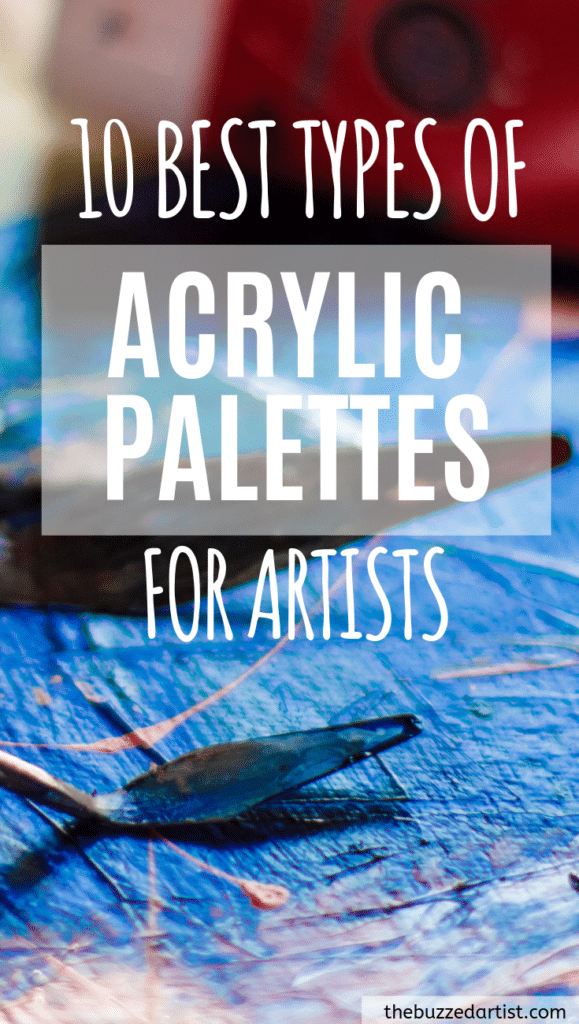
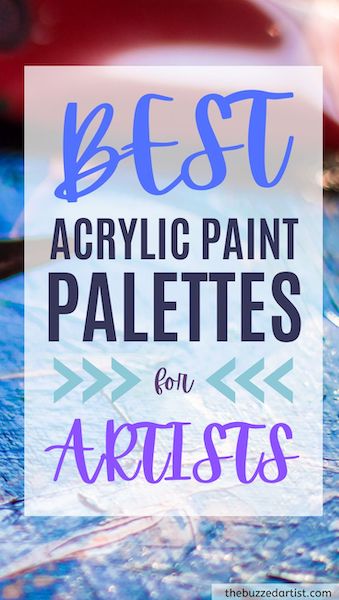
The best palette options to level up your acrylic painting experience
Every artist needs a working flat surface onto which they can grab acrylic paint with brushes, mix their colors, and test out colors before doing the final transfer onto canvas. This working surface is known as an artist’s palette.
The most ideal palettes are sturdy, large, easy to clean, and – most importantly – will not absorb much of the paint it has on it. And they come in lots of different shapes and sizes, based on your personal preference.
In a rush?
✅ This is my ultimate favorite paint palette to use for all my acrylic paintings
Over the years, I have graduated from using the most simple type of palettes to more sophisticated ones. And have developed quite an opinion on the types of palettes I prefer to use during my painting session.
Pin it for later! ⤵

*Links used below are affiliate links, which means I will get a small commission if you use these links, at no extra cost to you. If you want to support me and my blog, use these provided links 🙂 Your love and support is always appreciated.
Best Palettes for Painting with Acrylics
Paint palettes are one of the most important tools an artist will ever have. So, let’s take a look at the various types of palettes you can use as an acrylic painter, starting with the best palette choices down to the -ahem- least desirable choices.
1. Palette Paper
This by far is my favorite choice for dry palettes all acrylic painters must have.
Palette paper meets all the criteria with a large working surface giving me ample room to mix my acrylic colours and organize my paint pigments accordingly. Plus, it can come in lots of different shapes for better handling.

✅ The Canson palette paper itself has a smooth, poly-coated surface to allow for easy mixing without pilling or color absorption using either a brush or palette knife. They even offer palettes with a thumb hole for a better holding experience. #win
I also love the Strathmore palette paper as another great choice, with a large area for mixing: a whopping 12″x16″ working surface!
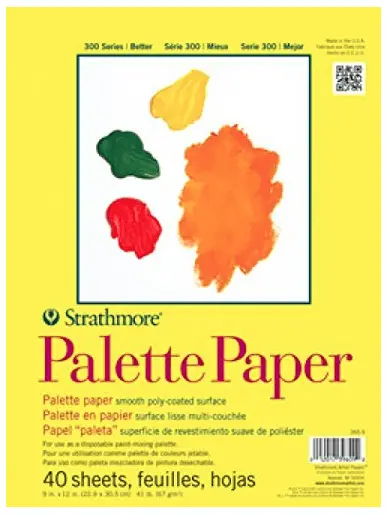
Plus, when you are done with your painting, you can simply tear out the paper and throw it in the trash. No clean up necessary.
Of course, unlike the more permanent palettes out there, you will eventually run out of this stuff, and will need to purchase more. Just something to consider.
- Advantages: Easy clean up, large working surface, great for mixing
- Disadvantages: more waste, not reusable
2. Plastic Hard Palette
A lot of artists recommend that if you are in the market for a new permanent palette, the best kind of material would be plastic – the main reason being the clean up is fairly simple and the plastic material will not absorb the paint.
I recommend looking for plastic palettes that have a broad surface for mixing, as opposed to the “dollar store” round palettes that have a tiny mixing surface. You will not have a good time with those, trust me.
Plus the advantage of plastic palettes is the clean up – simply wait for your paint to dry and then peel it right off.
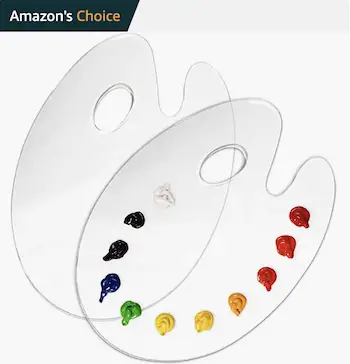
✅ A great palette option in this category is this plastic non-stick palette from USA Art Supply. It has several large non-stick working surface sizes to choose from, and has a thumb hole for easy handling.
- Advantages: Large working surface, will not absorb paint, easy clean up, reusable
- Disadvantage: Does require a bit of cleanup
3. Glass Palette
A glass palette has its own various advantages. On top of being able to resist pigment absorption and promote optimal color mixing, this material also allows for very easy clean up. If some acrylic is still wet, a quick wipe with a damp cloth or under running water will remove the acrylic. If the acrylic is dry, simply using a scraper will get the paint right off.
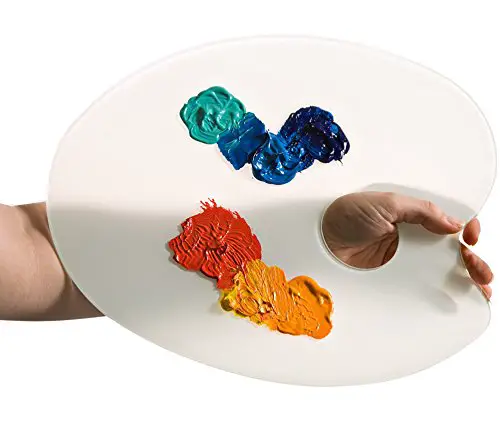
This particular glass palette from Paragona features the classic palette shape with a large working surface (11″x14″) and finger holes for easy holding.
The one disadvantage that has been reported is the weight. If you happen to struggle with upper body strength, it can be a bit of a challenge to hold for long periods of time (unless of course you are looking for a good workout!).

>>>> Want to make your own? Check out my DIY glass palette tutorial here!
- Advantages: Durable, relatively easy clean up, no color absorption, good color-mixing surface, reusable
- Disadvantages: involves some clean up, may be a bit heavy for some, greater price
4. Ceramic/Porcelain Palette
In the same way as glass palettes, ceramic palettes are great for color mixing, great at preventing color absorption, good for relatively easy cleanup, but can be a more heavy, expensive option.
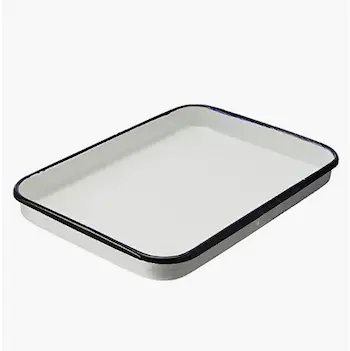
This particular ceramic palette from ProArt is more like a tray, featuring different sizes ranging from 7.5″x11″ to 13″x17″, which can hold a decent amount of paint pigments. Plus, it can be used for other mediums like watercolor paints.
- Advantages: Durable, relatively easy clean up, no color absorption, good color-mixing surface, reusable
- Disadvantages: involves some clean up, may be a bit heavy for some, greater price
5. Plastic/Foam Plate
When I first started painting, I began with plastic plates, which is a great in the world of disposable palettes. These were easy to find around the house and relatively cheap since they come in large packs.
It is important to stick with disposable plates that are either plastic or foam since both these materials are sturdy enough to withstand brush friction, won’t allow for colors to absorb through, and prevents pilling (as opposed to paper plates which are not good options!).

You will however be constrained in terms of space, depending on the size plate you get (I always recommend bigger, oval plates if you can find them!).
Plus, when you are done with your painting, you can simply throw the plate away!
- Advantages: Durable, very easy clean up
- Disadvantages: non-reusable, smaller working space
6. The Stay-Wet Palette: Tray Palettes with Tracing/Parchment Paper
Palette trays are a popular palette option, mainly due to its nice walled borders. This gives artists the ability to add wet towels topped with parchment or tracing paper to help make your acrylic paint stays wet for a long time.
Add an airtight container, and you can make your paint last you for weeks (and maybe even months!). Honestly, you can’t beat the larger working surface and it’s reliable sturdiness.
There is a special type of tray palette called the stay-wet palette.
The stay-wet palette is exactly what it sounds like….it keeps your palette surface wet while holding and working with your acrylic paint inside of it. No more dry paint ever.
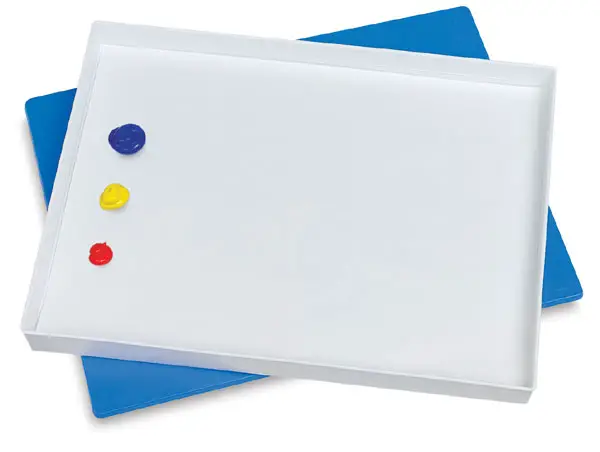
✅ The Masterson Sta-Wet Tray palette is the best option for stay-wet palettes. It has an absorbent sponge cloth you soak with water and place under the working tray to help keep your paints wet for the next day or longer periods of time.
Plus, it comes with an airtight lid for easier transport.
On top of all that, once you are done with your paints, you can simply throw away the tracing or parchment paper and start fresh with a clean set of paper!
- Advantages: Durable, large working surface, ability to keep acrylics wet longer (if desired), partly re-usable, very easy clean up
- Disadvantages: need to replace paper after every use
7. Cellophane Palette

This was a really cool palette idea I found from professional artists, Chuck Black, who uses particle board cut to size and cellophane tightly taped onto its surface with painter’s tape.
The cellophane paper itself is a sturdy option, can withstand the constant brush friction while color mixing, and can be cut to size to suit whatever sturdy surface it will be taped to. Plus, once you are finished with a piece, you can simply remove the cellophane and throw it away!
- Advantages: Durable, large working surface, cheap, partly re-useuable, very easy clean up
- Disadvantages: need to replace cellophane after every use
8. Aluminum Foil
This one is more of a DIY approach to palettes, but one that I sometimes have used in the past.
You simply take aluminum foil and wrap it tightly around a sturdy, wooden surface (you can also tape the edges for added security). Then once you are done, you can remove it and throw it away.
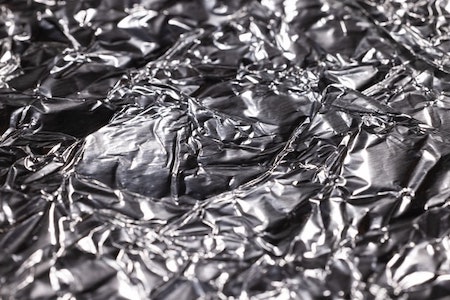
The one thing that can be a pain is the metallic nature of foil. It can throw you slightly off when it comes to creating different color tones, so watch out for that.
- Advantages: cheap, easy clean up
- Disadvantages: more waste, some may not like the metallic shininess
9. Plastic Wrap
In the same vein as aluminum foil, plastic wrap is another way to cover the surface of your paint palette so you can do your thing. Once your painting session is done, simply remove and discard the tin foil into the trash. No clean up required.
10. Wood Palettes
The traditional wooden palette are probably the stereotype everyone goes to about when thinking about palettes, both with acrylic and oil paints.
It truly is a classic used by many famous painters, including the late Bob Ross. And it has remained a good option for many acrylic artists, obviously with a few setbacks. Wooden palettes typically feature the oval shape with a thumb hole for easy, comfortable handling and are great for color mixing.
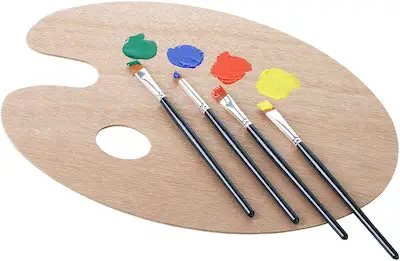
This wood palette from Mr Pen is a definite favorite amongst many artists, with a large 14″x10″ working surface to mix your paint. Plus, it has that classic thumb hole for easy handling.
However, wood palettes can have their challenges, particularly with the wet paint absorbing through the wood (albeit minimal), and the clean-up process being very involved.
You’ll definitely need strong scrubbing, scraping skills to remove paint (this of course is based on what others have said about using wooden palettes with acrylics).
- Advantages: Great for color mixing, more traditional “artist” palette aesthetic
- Disadvantages: paint may have some absorption, involves more clean-up time
11. Paper Plates
This option has been placed last on the list, and here’s why…
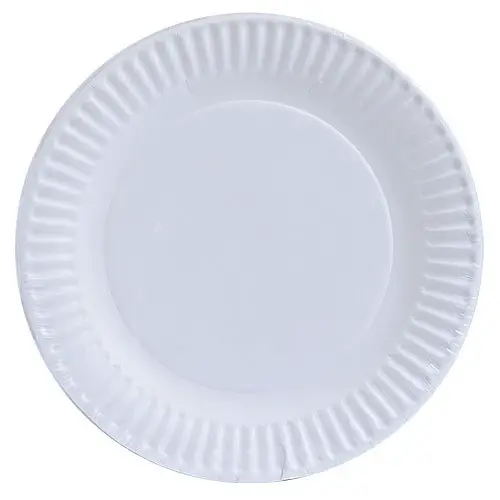
While paper palettes are a great affordable solution to painting, color mixing on them will prove to be a bit difficult.
Since these plates are not properly coated to handle acrylic polymer and the friction of brushes, you will usually find the paper will begin to deteriorate with more use. There may even be pilling inside the paint mixture itself, which can just lead to more complications down the road.
There may even be pilling inside the paint mixture itself, which can just lead to more complications down the road.
So do yourself a favor and make paper plates your last resort if all else fails you. Heck, even using a plastic lid from a yogurt container can handle paint better than paper plates can!
- Advantages: very cheap
- Disadvantages: absorbs paint, causes pilling and residue, non-reusable
These are just a few examples of different types of palettes you can use for your acrylic paintings; choose a palette that will meet both your budget and painting needs, keeping in mind the size, shapes, and make of each of them.
No matter what palette you choose, just remember to choose something that works best for you.
More Paint Palette Posts You Might Like