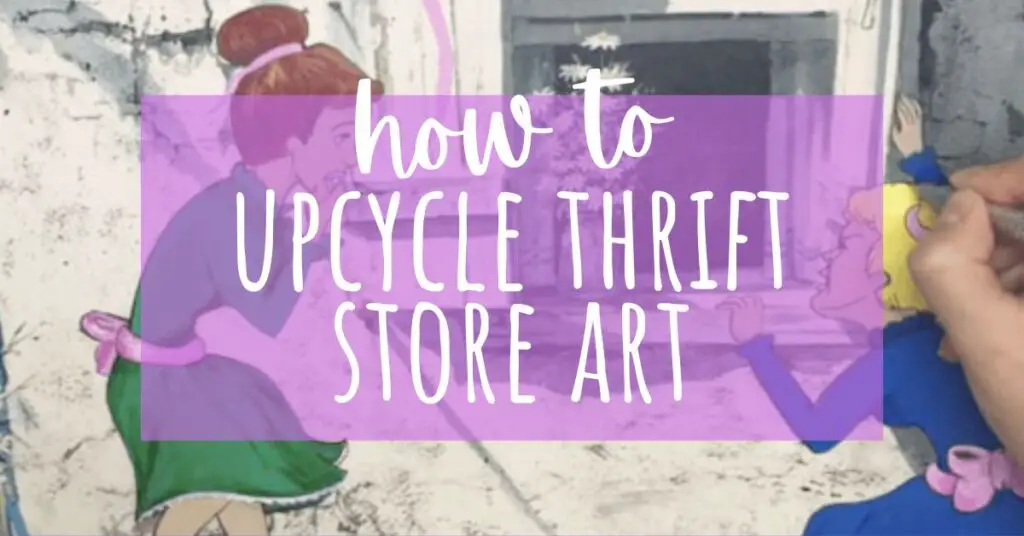
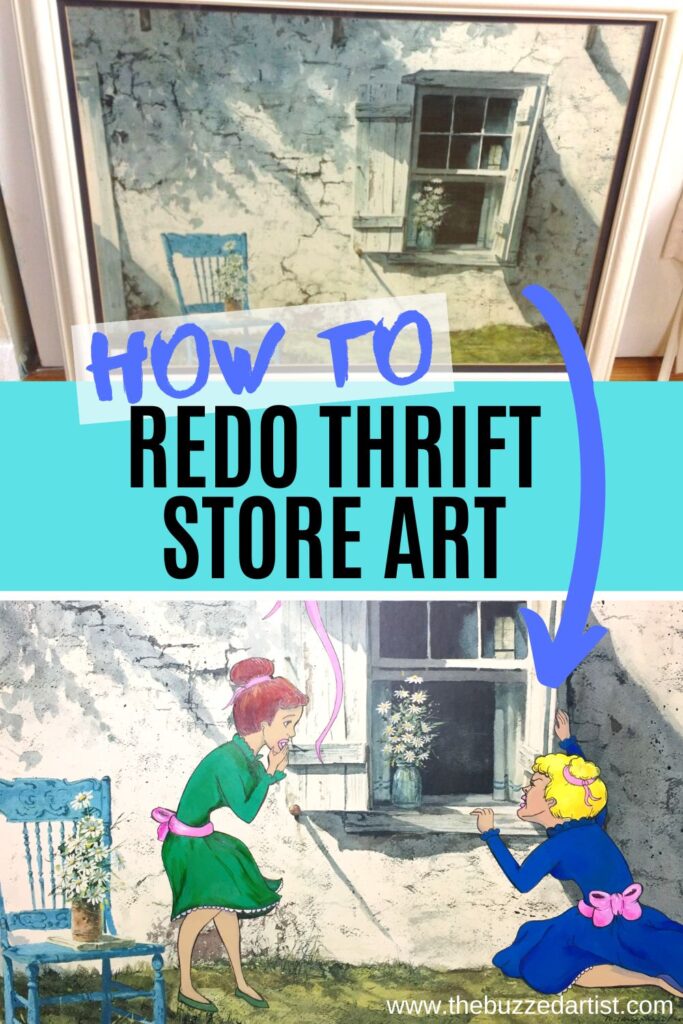
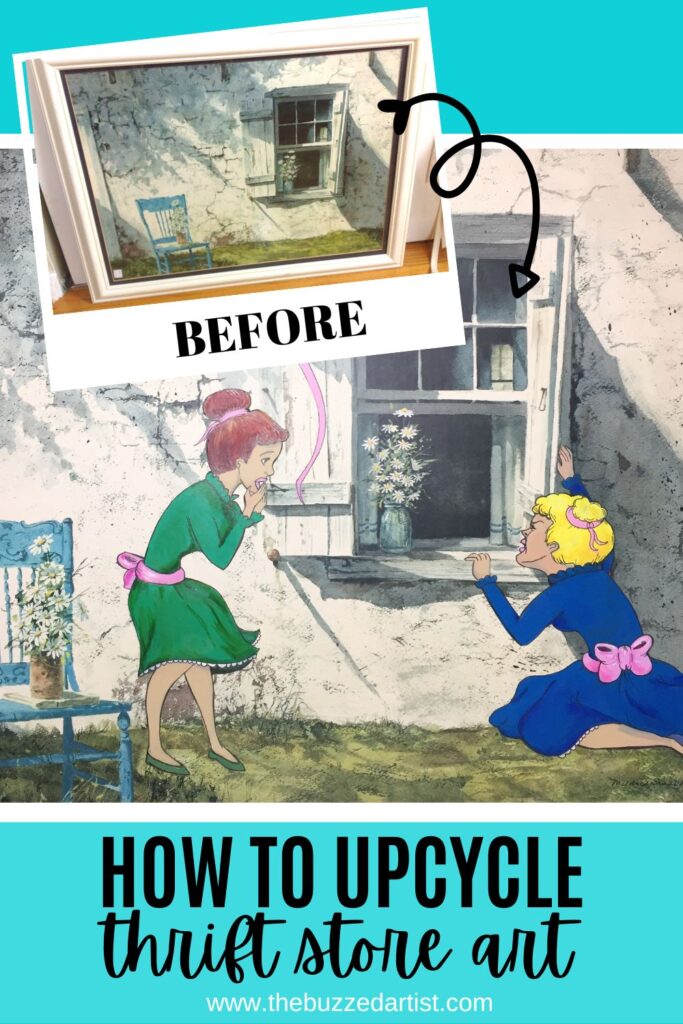
Turn old, tired thrifted art into a fresh work of art in this DIY pop-art inspired upcycle
I don’t know about you, but if there is one thing I love doing, it’s messing around with serious professional artwork and ruining it with my silliness.
And lately, I have come across a certain trend that was sweeping Youtube where artists would buy vintage artwork from thrift stores and then paint over them, aka redo, using their unique artistic style.
Disclaimer: some links used in this post are affiliate links, which means I’ll earn a small commission if you purchase using my links at no extra cost to you. I only recommend products I think will be helpful to you and bring you one step closer to creating beautiful acrylic masterpieces!
Of course, if you are anything like me, the very idea of painting over someone’s possible long-forgotten family heirloom may sound intimidating. But I realized over time, these artist’s intentions are not to slander a painting, but rather to enhance it and have it tell a new story for a newer audience.
It’s rebranding at its finest, and it helped me gather the courage to take a crack at it myself. Watch how I altered an old thrifted painting into a newer, upcycled work of art!

I headed over to my local Goodwill, flew over to the art section, and began the process of finding my future retro masterpiece.


Step 1: Choosing the Painting
The one thing I first considered was what kind of painting I wanted to get. Did I want an abstract? A landscape? A portrait? Kitchy hotel art?
And the way I decided this was first considering my own artistic style.
I know my style veers towards the more cartoony, pop-art style of painting. And the more I thought about it, the more I thought it would be funny to find a painting that was comparatively the opposite of my style – a realism painting.
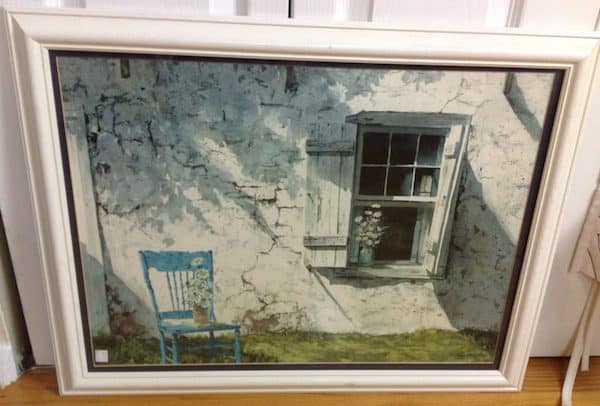
After a few minutes of browsing and deep consideration, I finally found something that would work perfectly. I whisked it away faster than children fighting over Halloween candy and bought it.
Step 2: Idea Generating
Next, it was time to idea generate – aka, what the heck am I going to paint on this thing. And I found myself asking several questions to help me navigate to my answer.
- What popped in my head when I saw the painting?
- What questions did I automatically have about the painting?
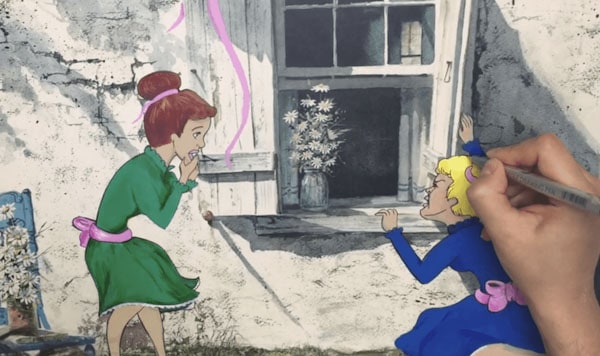
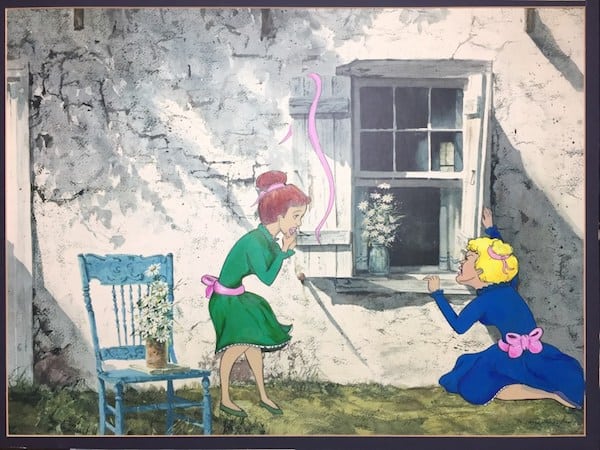
Looking at this painting, the first thing I wanted to know was…
“what the heck is inside that window?”
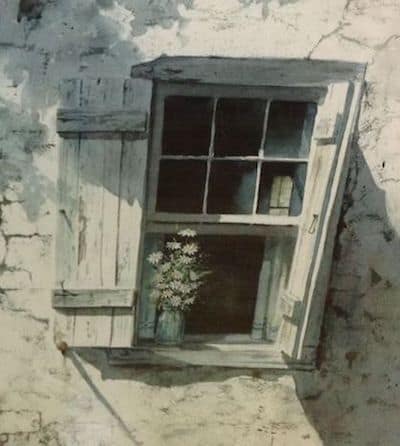
And from there, my mind began to devise a whole scenario of possibilities for this scene – very much unfolding forth from me like an overdramatic soap opera on crack.
After a few moments, I came to the conclusion that I wanted to have two women peeking inside the window straining to take a look at what the heck is going on inside.
Boom. We have conceived an idea!
Supplies
Before I go on, I wanted to share some of the supplies I ended up using for this project. Feel free to use some, all, or modify this list to suit your needs.
- Carbon Pencil
- 2H Pencil
- Tracing Paper
- Arteza acrylic paint set
- #10 Shader Brush
- #0 Flat Brush
- #0/4 Detail Round brush
Step 3: Drawing the Prototype
It was now time to test out my idea, but I didn’t quite want dive into painting immediately. I needed a plan on where I would place my characters, what their movements would look like, and best of all, what their expressions would be like.
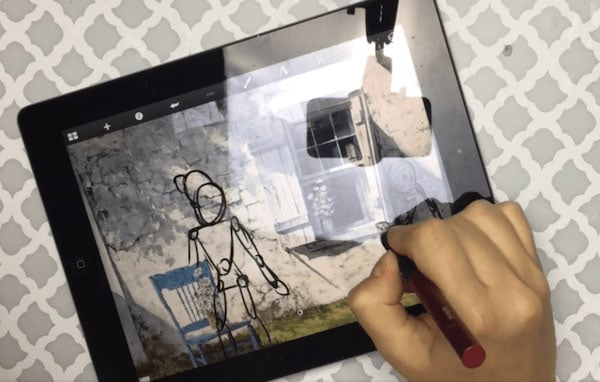
To do this, I snapped a picture of the painting onto my iPad and uploaded it to my sketchpad editor. You can also do this using Photoshop, GIMP, or MS paint on your computer, if you choose to do it digitally. Otherwise, you can go old-school and just sketch your prototype onto a sketchbook.
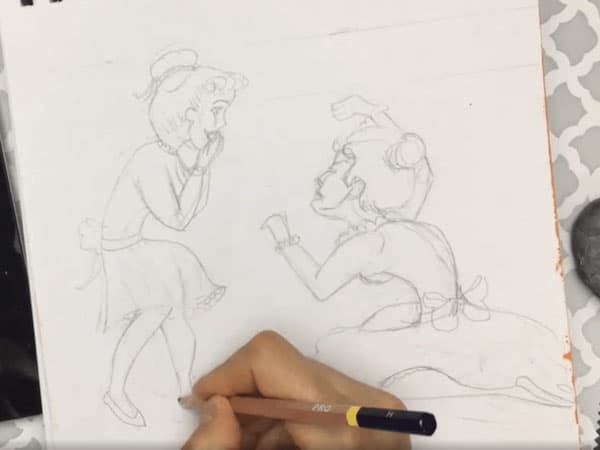

Once you have a good idea of where and how your characters will be, you can proceed to do your final sketches onto your sketchbook. Here is where I was able to flesh out the details of my character’s expressions, clothing, and movements.
Note: Ensure that your drawing is to scale to the painting itself. You can do this by either measuring the painting itself and adapting your drawing to suit or you can simply scan your image into your computer and reprint it to a larger or smaller scale. I had to do this myself, and it proved to be much simpler than it seemed!
Step 4: Sketch in your idea onto the actual painting
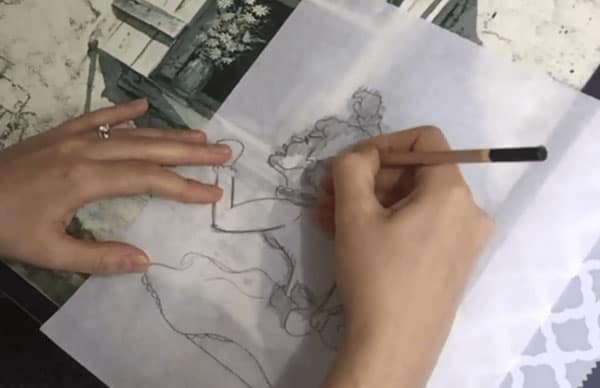
After I completed my prototype, it was now time to do some damage to the actual painting (lol). This proved to be a bit nerve-racking at first, but despite my jitters, I knew I needed to press onwards.
Using a carbon pencil and tracing paper, I transferred my drawing onto the painting itself, thereby saving me more time by not having to redraw the whole damn thing again.
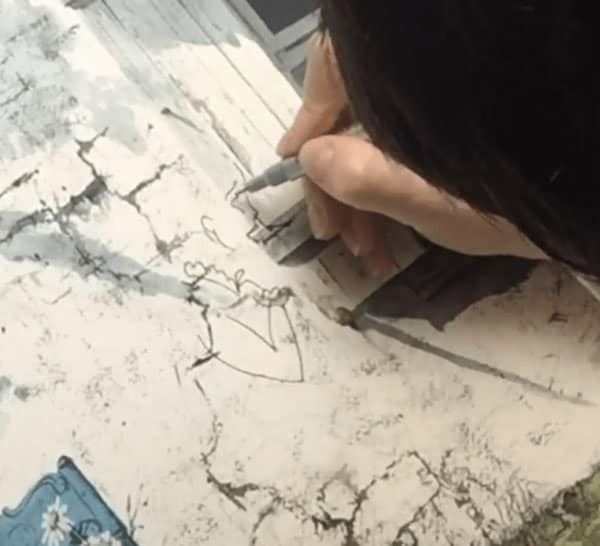
Once my prototypes were transferred, I proceeded to ink my characters, firstly to help me better see where they actually were on the painting (the transfer carbon lines were very faint) and secondly, would make my painting experience much easier.
Related Upcycle Project Posts:
- Thrifting Dollar Tree Artwork
- Easy Upcycled Art Projects You Have to Try
- Upcycling $10 ugly art into a pop art creation
Step 5: Apply paint where you see fit
This is the most fun part! Painting!
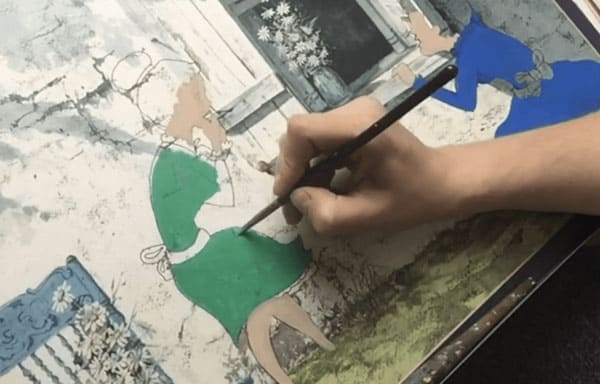
I grabbed my Arteza acrylic paints, grabbed my brushes and palette paper, and immediately went to town on this painting. Considering that this “painting” was actually a print, the surface was extremely smooth to paint on.
If however you are dealing with a painting with actual texture/brush strokes, you will want to make sure there is no dust on the painting surface, and you can remove them simply by carefully wiping with a damp cloth. If you are looking for a super smooth surface, some light sanding on the areas where you want to paint will do just nicely. Just remember to remove any excess dust afterwards.
After parts of my paint dried, I would continue to go over with my ink to ensure my lines were crisp, even, and neat. This is, after all, my cartoony style!
Step 6: Varnish and Admire you Handiwork
Before I knew it, I was done. After a quick varnish, I framed my painting and hung it up right above my office desk. This painting truly came alive, and the scene itself simply put a huge smile on my face.
This experience truly was unique and something I would absolutely do again. It woke up the small kid in me again, allowing me to have some good old immature fun on an old, tired, painting that was ready to die.
So the next time you stumble on some old artwork, consider giving it new life with a fresh coat of paint and a little imagination.
What do you think about redoing thrifted art? Have you done it before?
More Fun Upcycling Projects to Try