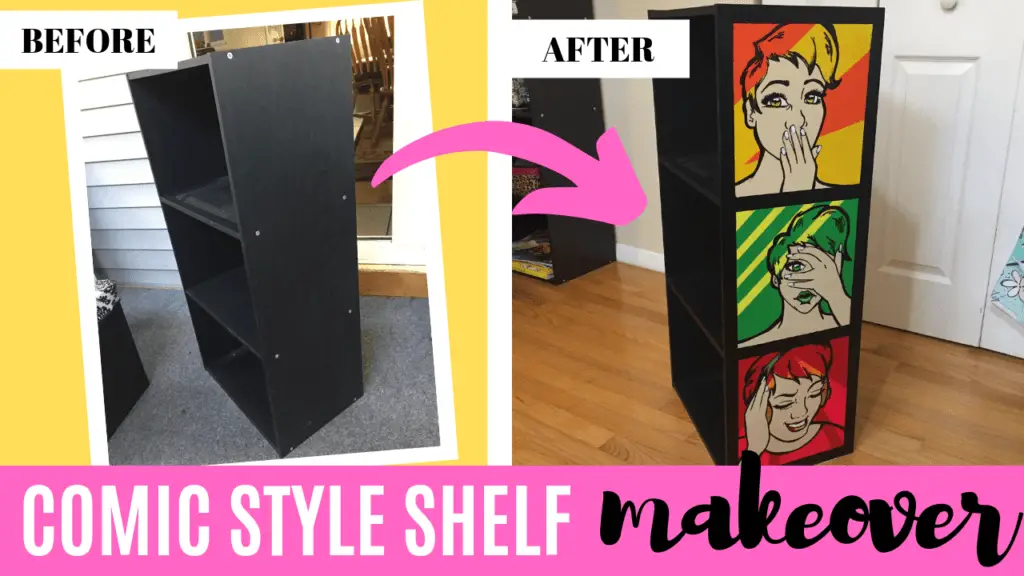
Upcycling a tired bookshelf into a colorful work of pop art
[cp_modal id=”cp_id_9a74a”] [/cp_modal]
The other day, I was staring intently at an old black shelf I had in my at home office/art studio.
It just stood there, a big lump of boring, and despite my best efforts to spice the bookshelf with cute trinkets, it just loomed in total uninspired “bleh-ness”.

Ok, sure perhaps I have been spending waaaaay too much time staring at inanimate furniture, but nevertheless, I knew it was time to do another up-cycle makeover – and this time, I was going to DIY this boring, tired bookshelf into an inspirational work of pop art.
Watch my entire DIY process unfold in the video below!
I was certainly ready for the challenge, so I swiftly emptied the shelf of its contents and hauled it’s bland carcass down the stairs and onto my porch so I could get better ventilation for the painting apocalypse I was going to rain down upon this poor plain shelf.
Prepping The BookShelf for the Makeover
Getting the bookshelf prepped and ready for paint is certainly an important step in the process, and one I was not likely to skip – mainly because I know a poorly prepped ANYTHING leads to lots of do-overs and constant bouts of swearing at furniture items. So I wanted to do it right.
First order of business was the bookshelves’ visible screws.
The caps were lost to time, exposing the shiny screw heads with all their uneven glory.
So, I first grabbed a screwdriver to make sure all the screws were just a tad below the surface of the shelf. Then using some spackling paste and a putty knife, I applied a generous layer to the screw holes and sealed them up. This is to ensure I get a smooth working surface to paint on without bumps.

After some light sanding and quick wipe-down, I was now ready to paint….with primer that is.

Bleh, I know I know. Primer is boring as hell, but it’s so necessary, especially if you want to conserve and get more use from your more expensive, high pigment paints. It must be done, Queen Bee. It must be done.
So I grabbed Rust-oleum white ultra matte Chalked paint, which, rumor has it, is awesome for painting on furniture as a base coat since it creates a lovely even surface for your final paint color to stick to easily. Plus, it prevents unnecessary peeling and other no-gooderies that can happen with poor paint application. With a rolling brush, I painted the left side of the shelf, which is usually the exposed section that I usually stare at in my office.

Creating and Painting Panels
Since I want a comic book style pop art inspired aesthetic, I decided to create 3 panels as the borders for the future “scenes” I was going to paint later. Using painter’s tape and measuring tape, I measured out 3 equally-spaced panels and marked the spots with tape. Then, using Arteza’s Mars Black outdoor acrylic paint and a 3/4″ Flat wash brush, I applied an even layer of black to the desired areas.


Add Background Colors Within Each Panel
Once my panels dried, I laid down painter’s tape on top of the new panels to create a border to freely paint the background colors inside each panel.

NOTE: I ran into an issue with this approach, since removing said tape took OFF some of the black panel paint I laid previously. One way to combat this is to first take the tape and stick it to your shirt or thigh a few times to remove the harmful adhesive and then, lay it down on a painted surface. This significantly cuts down on accidental paint removal and hair-pulling anxiety.
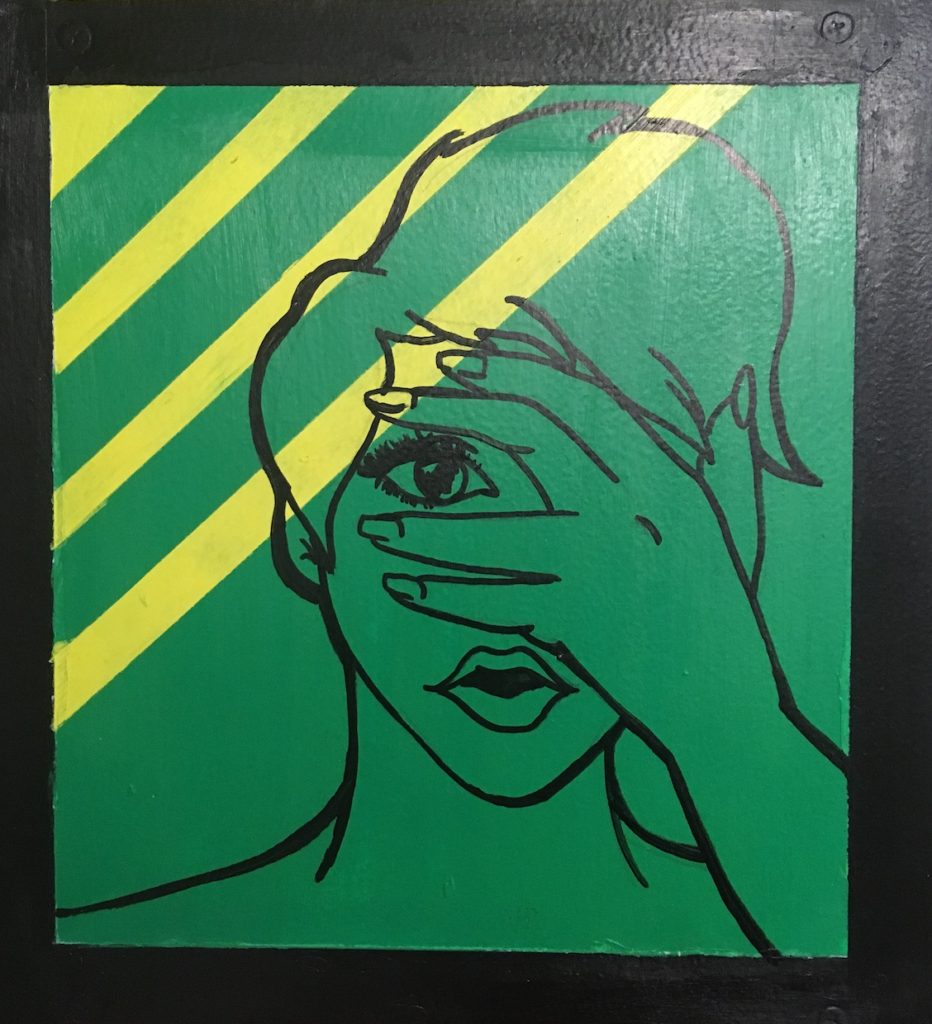
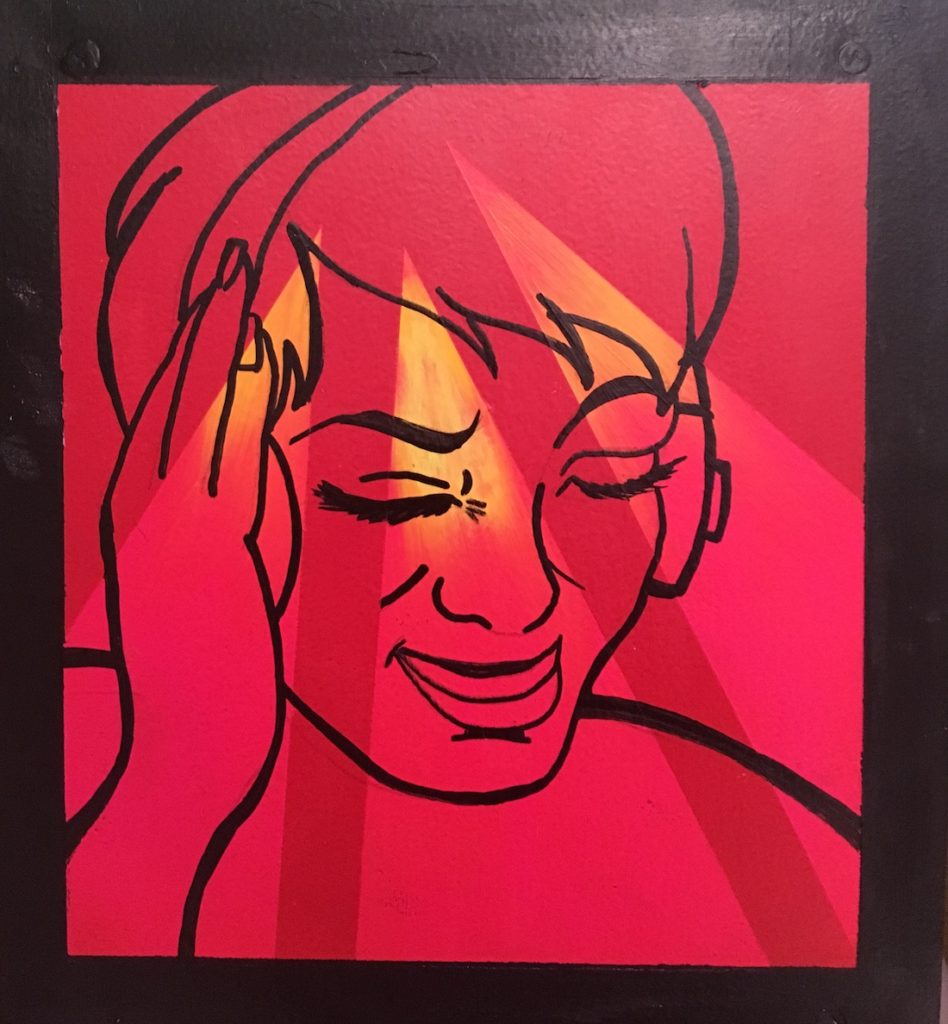
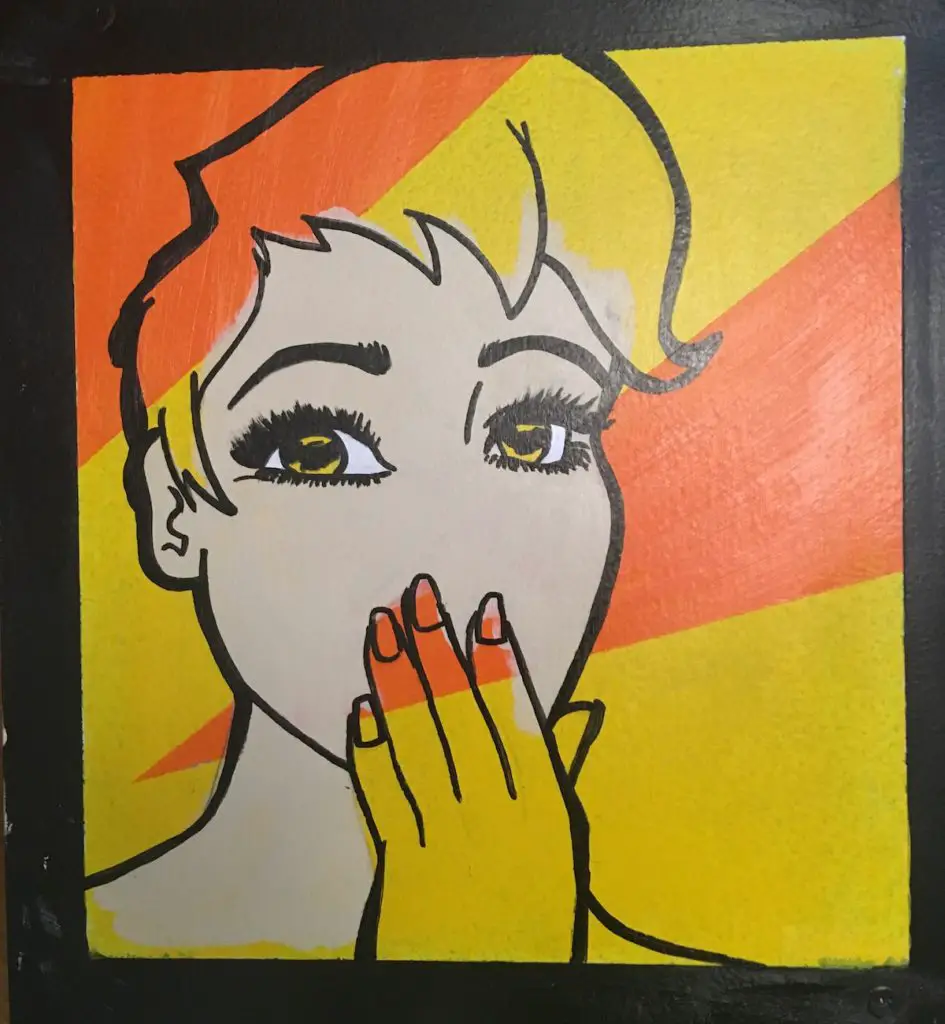
I love the colors I chose for each of these background colors – I limited myself to just the more harmonious colors of the color wheel, which created a more simple, yet effective look. I decided to go one step further and make stripes and cool triangles within the panels with the help of painter’s tape – it totally paid off with little extra work!


Add Stylized Pop Art Within Each Panel
Next came the creative juices, adding the stylized pop art to each panel.
After roughly creating 3 sketches, (I decided to go with a clever rendition of the 3 Wise Monkeys “Speak No Evil, See No Evil, Hear No Evil” thanks to the suggestions of my awesome subscribers), I transferred them to each of the panels and proceeded to first do my line-work to cement down the shapes using Arteza’s Mars Black Paint Markers.


Let me just say using a paint marker instead of a liner brush and acrylic paint saved me loads of time and my lines came out much crisper and cleaner! Woot!

[cp_modal id=”cp_id_9a74a”][/cp_modal]
Once my line work was established, it was time to paint and in this respect, I had but one philosophy – add only one color and let the background colors do the rest. And wow, it was a bit of a risk for me, but a worth-while one!
After some thought, I decided to just add a few layers of skin-tone color to the models within the panels, and just let the rest of the background speak for itself. In the spirit of illustration and pop art, this was a stellar choice!

Then, came the task of cleaning up the lines and adding the final details to each of the panels – which was primarily done with my black paint marker, and few careful strokes of acrylic paint with extremely small flat brushes. It was an understatement to say that my hand hurt like a mofo after this.
Then after all was said and done, I added a protective layer of spray varnish to seal everything in.
The Final Completed BookShelf Makeover!!!!


I then hauled the shelf to its proud journey back to my art studio – and with much anticipation and excitement, I placed the shelf back to its original spot. I stepped back and heard myself saying “wow”.


I mean, sure I have been painting and making art for a while, but that feeling of wonder and pride after completing a tough piece will never EVER go away, and I relish it!
My old tired bookshelf that loomed like an uninspired lump in my peripheral now stands out as it’s own work of functional art- holding my books AND inspiring me with its bright colors and fun cheeky aesthetic. I am in LOVE!
What did you think of my upcycled bookshelf makeover? Have you redone furniture before? Would you do it again? Comment below and let me know!