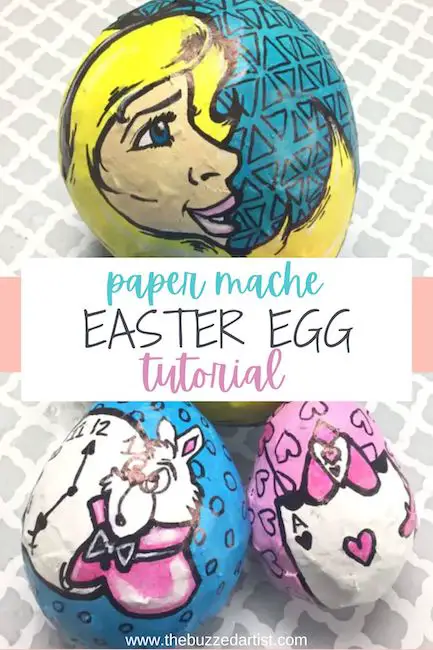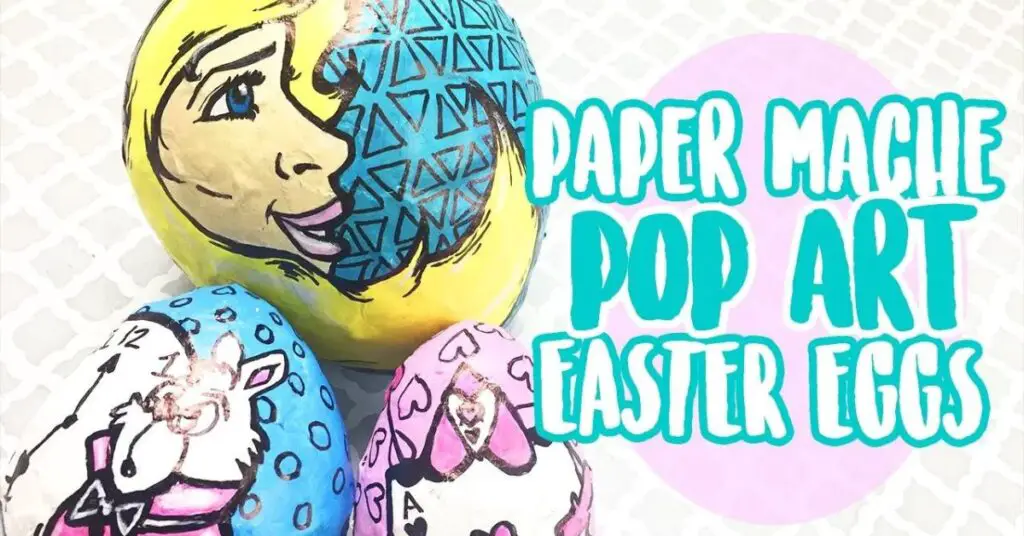
Create these adorable paper-mache Easter eggs (with a little inspiration from Alice in Wonderland)
It’s DIY Easter time! And in this post, you’ll learn how to create colorful paper mache easter eggs and decorate them with awesome pop art designs – inspired by Alice in Wonderland!
Yup, yup, Alice in Wonderland has been on my brain a lot lately, and I thought this tutorial would be a fun way to pay homage to this great classic.
Disclaimer: some links used in this post are affiliate links, which means I’ll earn a small commission if you purchase using my links at no extra cost to you. I only recommend products I think will be helpful to you and bring you one step closer to creating beautiful acrylic masterpieces!
Paper Mache Egg Supplies
- Newspaper
- 1 TBS of tacky glue mixed with 1 TBS of water
- 3 balloons
- Sharpie Marker
- Palette Paper
BRUSHES
PAINT
- Unbleached Titanium White
- Titanium White Acrylic Paint
- Cerulean Blue Acrylic Paint
- Crimson Red Acrylic Paint
- Lemon Yellow Acrylic Paint
- Pale Green Acrylic Paint
Read More: The Honest Truth about Arteza Acrylic Paint | Review
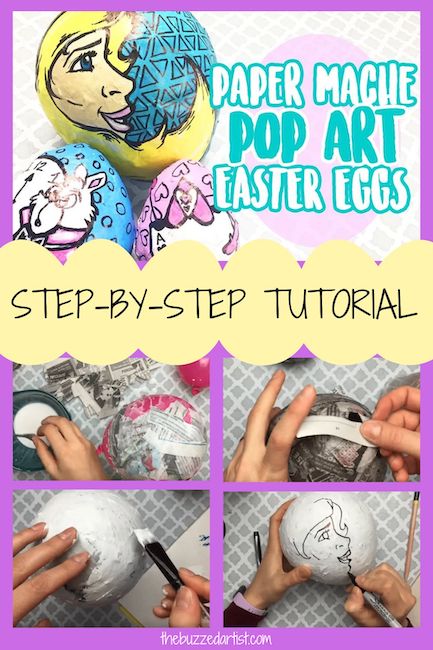
DIY Paper Mache Egg Instructions
Follow along with this video or keep reading to create your own homemade colorful Easter eggs from paper mache.
Step 1: Set Up Your Balloons
Begin by blowing up your balloons to your size preference. I didn’t blow them up too big because I wanted eggs that were on the smaller side, but you can decide to go as big as you like. Tie up with balloon.
Step 2: Create Newspaper Strips
Then tear newspapers up into strips. The smaller, thinner the strips, the better! The thing with spherical shapes is that they are a CHALLENGE when applying rectangular strips to them!
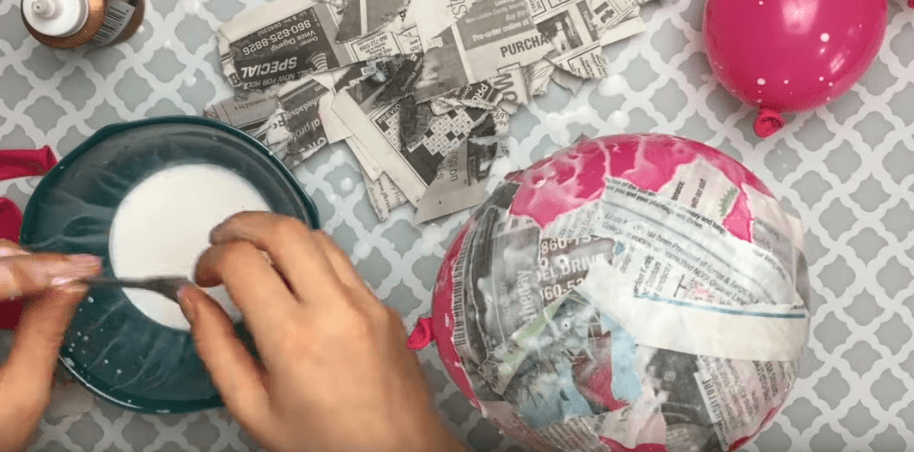
So, making the pieces 1″ thick and short helped create a smoother surface and stuck to the balloons quite nicely.
Step 3: Paper Mache Those Strips
Dip your strips into a 1:1 glue mixture (1 part elmer’s glue: 1 part water), wipe off the excess, and add them to your balloon.
I propped my balloon on top of a glass jar, so I didn’t have to hold it while handling the strips (which was a GOD SEND lemme tell you!).

I added the strips in a criss-cross pattern, so as to avoid holes and create strong, durable layers. I also left a small patch untouched at the balloon knot side to handle later.
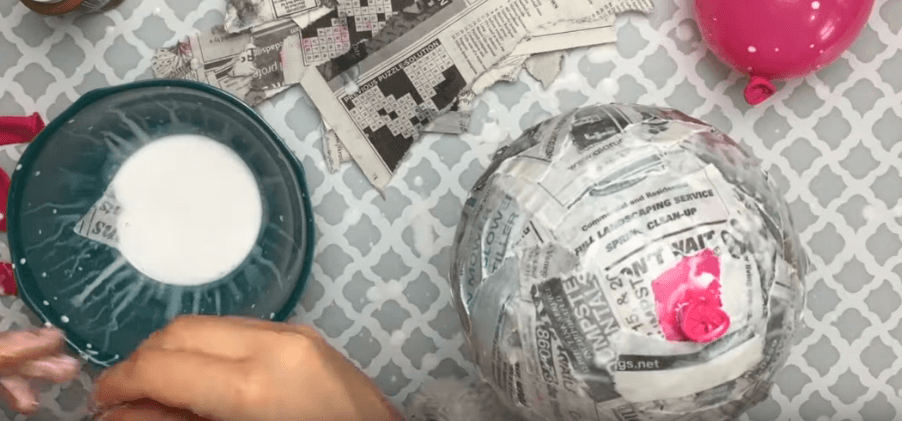
Once you have layered your balloon (recommended is about 2-3 layers), leave to dry for 3-4 hours.
Step 4: Pop and Take the Balloon Out
Once dry, proceed to pop the balloon at the knot side (which should still be a bit exposed). Then, proceed to take the balloon out of the egg.
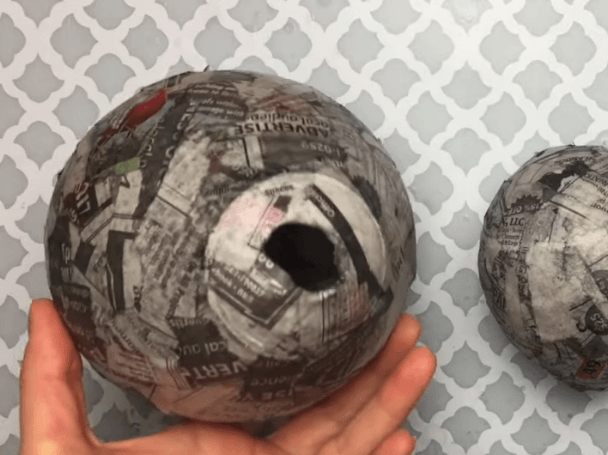
Take your time with this, and use your finger or pencil to gently pull the balloon from the inside walls of the egg and out the opening.
Step 5: Add More Strips
Then proceed to cover the egg hole with more newspaper strips. Follow the same procedure with applying newspaper strips – aka, criss-cross pattern!
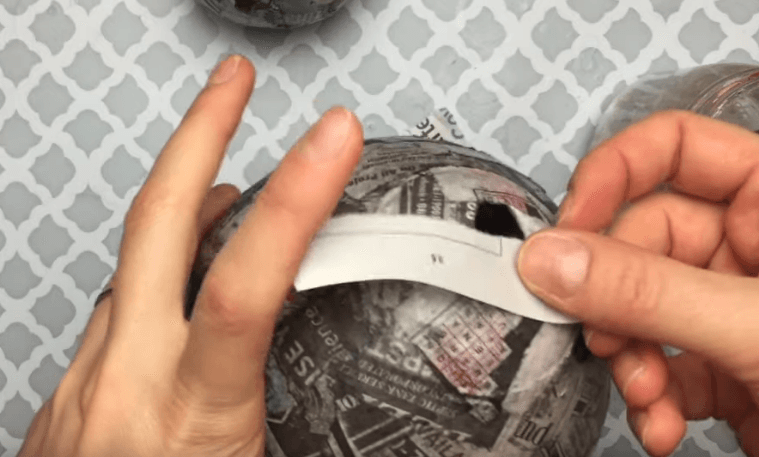
Leave to dry for 3 hours.
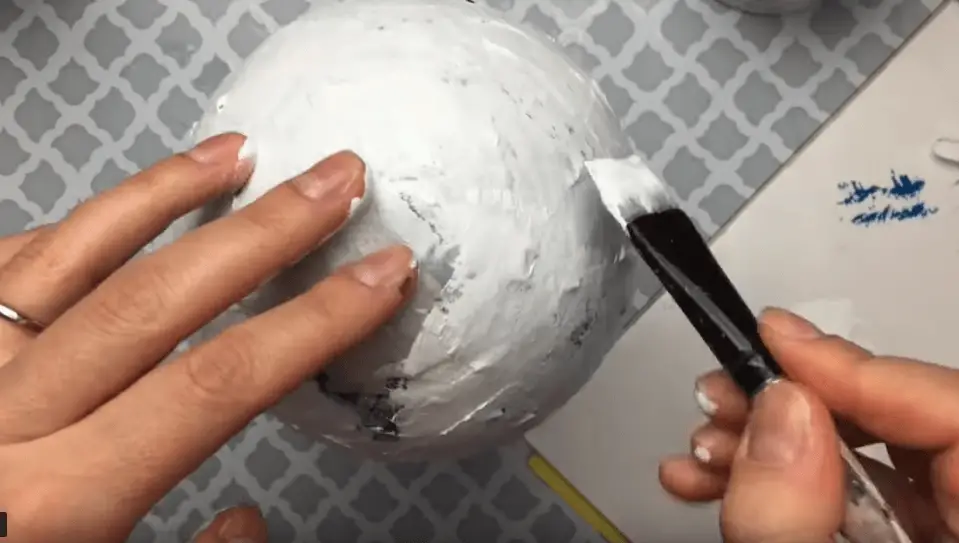
Step 6: Egg Priming Time
Once your newspaper layers are dry, it is now time to prime your eggs! I use titanium white acrylic paint, but you can choose to use gesso or if you want to keep the newspaper background, pure modge-podge will do just fine!
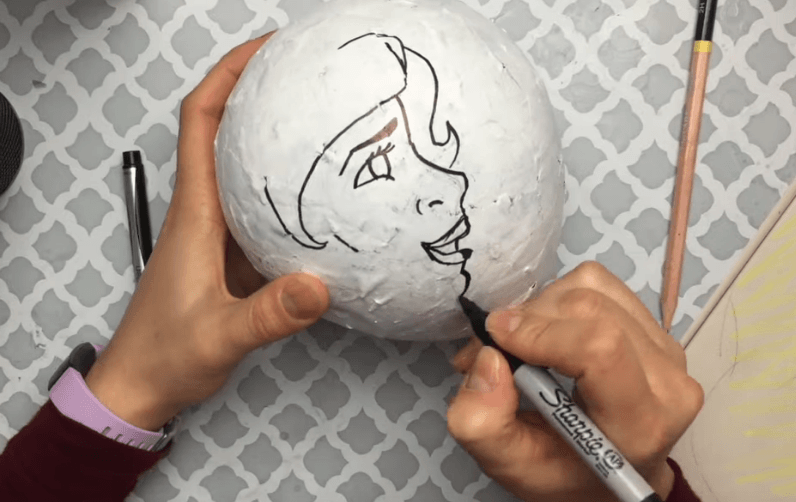
Step 7: Paint Your Egg
Once primed and dried, you can now paint your egg any style you like! Add bright acrylic colors for added pop effect and cool fun characters!

Paper Mache Easter Egg Concluding Thoughts
In conclusion, creating DIY paper mache eggs with a pop art twist is a fun, immersive craft project. The creative possibilities are endless with this craft, allowing individuals to experiment with various colors, patterns, and designs to create their own personalized Easter eggs.
DIY paper mache eggs offer a fun and engaging activity for kids and adults alike, and the final result is a unique and eye-catching decoration that can be proudly displayed during the Easter holiday season. Get ready to unleash your artistic flair and create your own stunning paper mache eggs to add a touch of creativity to your Easter celebrations.
More Paper-Mache Art Projects
DIY Paper Mache Pop Art Easter Eggs