Quick tips to easily transfer any image or drawing onto canvas using just tracing paper
Tracing paper is one of the best hidden secrets lots of artists use to quickly transfer images and drawings – and no, it’s not cheating. Tracing paper will save you lots of time and heart-aches, so you can quickly get to painting without redoing an old drawing all over again.
Pin it for later! ⤵

Disclaimer: some links used in this post are affiliate links, which means I’ll earn a small commission if you purchase using my links at no extra cost to you. I only recommend products I think will be helpful to you and bring you one step closer to creating beautiful acrylic masterpieces!
how to use tracing paper
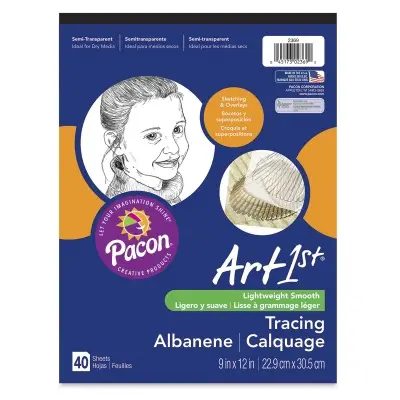
For good tracing, you’ll want tracing paper that is very transparent so you can easily see the lines of your drawing or image. Plain and simple.
✅ This tracing paper from Bachmore is great for transferring sketches and can support multi-media like markers and pens. Plus, it’s a big crowd pleaser amongst artists.
When buying tracing paper, I always like to get a tracing pad with lots of paper inside so I can do lots of art projects without dashing to the store every two days. Plus, I always look for paper that can easily be removed from the pad without needing extra tools like scissors. #aintgottimeforthat
Other Tracing Paper You Might Like


What tools can you use for a successful image transfer?
Besides using good tracing paper, you’ll want to make sure you have a good transfer tool that leaves a residue behind when applied. This applies to items like the following:
- Charcoal pencil (aka carbon pencil)
- Graphite pencil (preferably a HB 2 or soft lead pencil is best)
- Chalk and/or chalk pastels
- Colored Pencil
Looking to scale and transfer your sketch onto any surface?
Steps to transfer an image easily using just tracing paper
Tracing paper is such a versatile medium to use for tracing images and there are two great techniques that can be used to get great looking transfers: the traditional technique and the DIY transfer paper technique.
You can watch this video or continue reading to see each method in practice.
Tracing Paper Traditional Technique
Step 1: Set up
Take your desired image or sketch you wish to transfer and tape it down to your working surface. Then, tape your tracing paper directly on top. Make sure you tape down at least 2-3 edges to avoid accidental shifting during the tracing process.
Step 2: Trace it Out
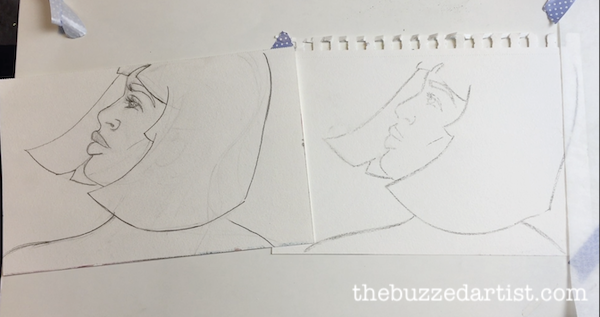
With a pencil or marker, trace out the lines you wish to have transferred onto the tracing paper side. I usually prefer to use pencil during this step mainly so I can figure out what lines I ultimately want transferred.
Step 3: Reverse and Set The Lines
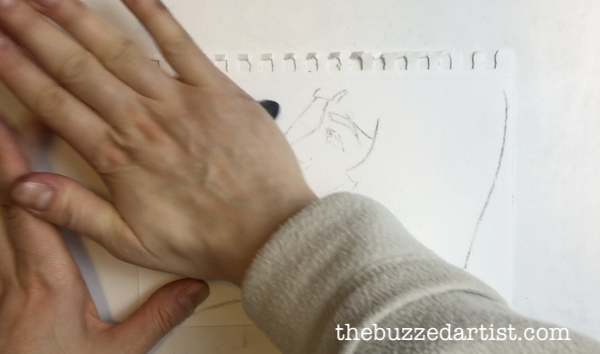
Now that you’ve done one side of the tracing paper with lines, you’ll want to turn over the tracing paper to set the final lines that will eventually be transferred. The reason is to make sure your image is transferred in the original orientation and not mirrored. Using your desired pencil or pastel of choice, retrace the lines you see from the other side of the tracing paper. And you won’t need to tape anything down while doing this.
Step 4: Transfer the Lines
Now you’re ready to transfer your tracing paper lines onto your final support. Begin by setting down and securing the support so it won’t shift during the transfer. Then, add the tracing paper (pencil side down) on top of the surface and place it where you ultimately want the lines to go. Once you’ve set it, tape down all sides of your tracing paper.
Grab your pencil (or whatever tool that you can apply small, medium pressure) and go over the lines on the tracing paper. Be sure to keep a medium pressure point on your tool as you go about doing this.
And if you want to make sure the transfer is going well, carefully lift one side of the tracing paper and take a peek underneath to see the lines. And yes, you will be brimming with excitement.
Step 5: Remove the tracing paper and admire those lines
Once you’ve gone over all the lines on the tracing paper, remove the paper to reveal the transferred lines on your final surface.
DIY Transfer Paper Technique (aka how to use tracing paper without flipping)
This method is a do-it-yourself technique that imitates the effects of traditional transfer paper but on a budget…plus, you won’t have to flip your drawing or tracing paper to get the correct orientation.
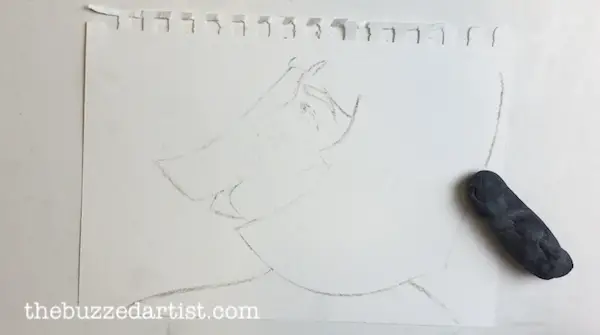
Step 1: Scribble Time
On one side of your tracing paper, take a transfer pencil of your choosing (I usually recommend charcoal pencil most for this) and fill in the entire area. To help reduce unnecessary smudging, take a crumbled kleenex and wipe the paper until you get a smoother, fully covered side.
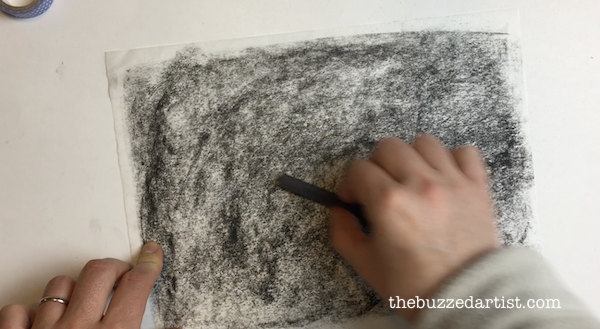
Boom. You just created DIY transfer paper.
Step 2: Place and Transfer Away
Now, you’re ready for transferring.
Begin by setting down and securing the support so it won’t shift during the transfer. Then, add the tracing paper (scribbled side down) on top of the surface. Once you’ve set it, tape down all sides of your tracing paper. Next, grab your image or drawing you want transferred and place it on top of your tracing paper (image side up) and tape down.
Take a transfer tool like a pencil (or any other tool of your choice) and carefully apply medium pressure on the areas of the image you want transferred. Be very careful to apply pressure only on the areas you want transferred, so watch where you place your hands or arms or anything that can cause unintended pressure.
And if you want to make sure the transfer is going well, carefully lift one side of the tracing paper and image and take a peek underneath to see the lines. Cue the excitement butterflies.
Step 3: Remove the tracing paper and image and admire those lines
Once you’ve gone over all the lines on the image, remove both the image and tracing paper to reveal the transferred lines on your final surface.
What can you transfer onto?
Transferring an image with tracing paper opens up tons of possibilities and saves a butt load of time. And you can use this method on a variety of different final support surfaces like the following:
- Canvas
- Cloth
- Paper (multimedia, watercolor, canvas paper)
- Wood
- Top of already painted acrylic surface
Can I use parchment paper instead of tracing paper?
If you’re in a pinch and need something other than tracing paper to create an image transfer, then yes, parchment paper can actually do the trick.
I even tested it out to see if it works.
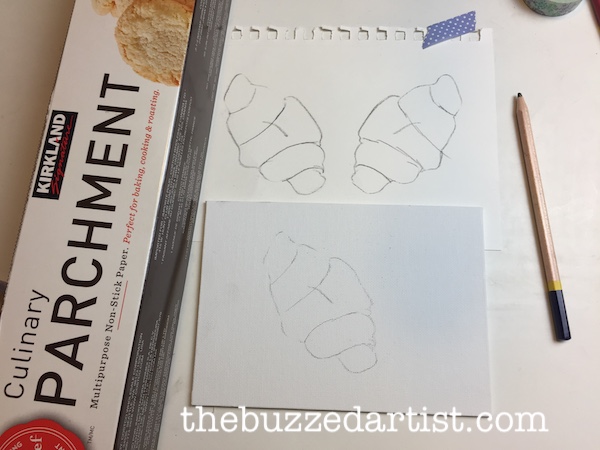
so, how can you trace with baking paper?
Basically, the same way you would with tracing paper.
Although it’s not my favorite thing to use, mainly because the paper isn’t the most transparent and the surface slickness isn’t so conducive to transferring.
Short term solution? Yes.
Use it for all your painting needs? Not so much.
Can you use the same tracing paper on multiple canvas?
As long as you are gentle with the transferring process AND are using the same sketch, you can totally reuse that same tracing paper multiple times for multiple transfers.
Which side of the tracing paper do I use?
The really awesome thing about tracing paper is that you can use both sides of the paper effectively. One side is not different than the other.
How to use tracing paper on watercolor paper?
You’ll basically want to follow either of the two techniques outlined above, with heavy emphasis on using light to medium pressure when transferring the lines onto your watercolor paper. You’ll also want to use a dotting tool with a rounded tip or a pen cap to help transfer the lines.
Once you have everything transferred and wish to make the lines lighter, simply take a kneaded eraser, roll it out into a log, and gently roll the eraser log onto the top of your transferred image.
This will help slowly and gradually lift the lead off the paper until it’s come to a point you’re satisfied with.
How to trace without tracing paper?
If you want to transfer your image but don’t have tracing paper, there is actually ANOTHER way to do this effectively. You can check out my detailed methodology for transferring images to canvas or paper here.
Now, if you’re looking to both transfer and scale your sketch/drawing to fit any size canvas, my Scale & Transfer Your Sketch to Any Surface class walks you through the entire process step-by-step. And you can try it free for 1 month when you sign up.
👉 Try My Scale & Transfer Class FREE for 1 Month