4 dead simple ways to easily transfer and scale a drawing onto any canvas size
You are sitting at your desk, sketch pencil in hand, drawing what could be one of the greatest masterpieces of your life. As you set your pencil down, you suddenly realize you need to transfer your perfect drawing onto your canvas.
“I just spent an hour on this sketch. I can’t do this all over again! Whatever shall I do?!”
Breathe easy, my creative friend.
The answer is really quite simple. You can use transfer techniques to easily move your drawing to your canvas without using a huge chunk of your time or effort, including:
And in this post, I will dive into all these transfer methods that lots of artists love to use in greater detail so you can decide which is the best option for your artwork.
Disclaimer: Some links used below are affiliate links, which means I will earn a small commission if you purchase using one my links at no extra cost to you!
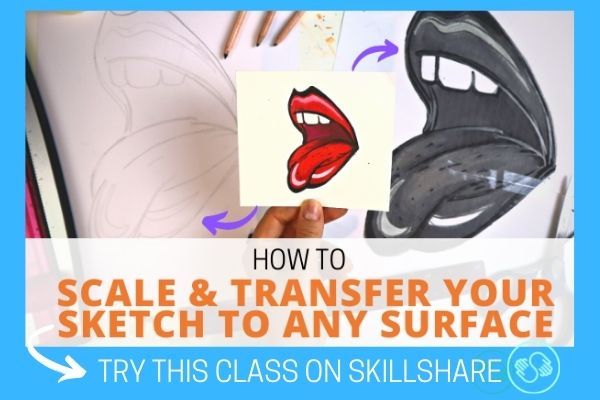
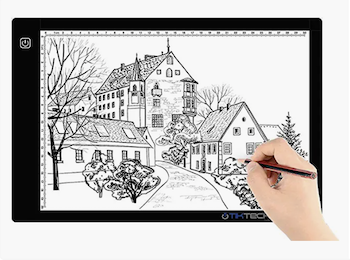
Looking to scale and transfer your sketch onto any surface?
The Charcoal Transfer Method
When it comes to transferring a drawing, the charcoal method is by far my most favorite way for transferring any drawing, photo, or lettering to another work surface – using charcoal pencils!
Charcoal is a great, inexpensive medium to work with and can easily create marks on a surface when pressure is applied to it in specific areas. This makes it ideal for copying lines.
When it comes to charcoal transfer, there are three specific techniques you can use, which we will dive into right now.
Technique 1: Carbon Pencil + Tracing Paper
This transfer technique involves tracing paper, a sketch pencil, and carbon pencil.

If you are looking to transfer your drawing in the same orientation, simply place your tracing paper on top of your drawing, and first using your pencil, trace out the major lines you would like to see transferred.

Once you have completed your lines, turn your tracing paper over to the other side, and with a carbon pencil, repeat the same steps.
When you have completed this step, you now have a transfer-ready drawing!

Choose your final canvas or support, place your tracing paper – carbon side down – onto the canvas, and using a pencil, sketch over the carbon lines to ensure optimal transfer.

Once you have all your lines covered and relish in your final reveal (honestly, this is always the best part!), you have successfully transferred your drawing! Yay!
READ MORE: How to Transfer Any Image Using Just Tracing Paper
Technique 2: Full Graphite On Separate Paper (DIY Transfer Paper)
Now this particular drawing transfer technique can be tackled in two ways: one with commercially bought carbon transfer paper or two, with a DIY alternative.
Many artists tend to buy carbon transfer paper for their transferring needs, and these typically comes in packs so you can use them for future projects as well.
But, here at casa el Buzzed Artist, I like to DIY any supplies I can so I don’t have to buy more stuff I don’t always use!
Technique #2 is an embodiment of this concept.
With this technique, you need the following:
- one piece of tracing paper
- graphite or carbon pencil/stick (this one is my personal favorite)
- a sketch pencil
- tissue paper
Note: you can always go to the store and buy graphite transfer paper (in fact this is the most typical tool most artists have), but in my studio, I prefer a more DIY approach that uses the resources I have on hand. If you want to just skip these techniques and just buy transfer paper, that is cool too. Just follow the same steps!
(also FYI, I love using carbon sticks because I can cover more surface area in less time. Just the resourceful lazy artist in me, y’all!)

With your tracing paper and carbon stick, add a nice layer of carbon onto the paper, doing your best to cover as much of the surface as you can.

Next, take some tissue or toilet paper, and rub the surface of the carbon, creating a sleek, smoother surface. This will help create a smoother, easier transfer!

Upon completion, take your new DIY transfer paper, turn it carbon side down and place onto your canvas.

With that being said, place your drawing right on top of the transfer paper, and using a pencil, begin to sketch out the major lines you would like to see transferred.
Note: be careful on placing unintended pressure from your fingers onto your drawing – because it will transfer onto your canvas. Be sure to tape down your drawing or use an artist’s pall to help keep you hand pressure steady.

Once you are satisfied, set aside your drawing and unravel your transfer paper to see the final transfer on your canvas! Tada! You have successfully transferred your drawing using technique #2.
Technique 3: Full Graphite On Back of Sketch Paper
Technique #3 involves the least amount of material and combines the transfer paper with the actual paper your drawing is on.
All you need is a carbon pencil/stick or graphite pencil, sketch pencil, and tissue paper.

Take your drawing, turn it over to the other side, and with your carbon stick, add a nice full layer of carbon to the back.

Next, take some tissue or toilet paper, and rub the surface of the carbon, creating a sleek, smoother surface. This will help create a smoother, easier transfer!

Take your drawing and carbon side down, place it on top of your canvas, and using a pencil, trace out the major lines you want transferred.
Note: Just like with technique #2, be careful on placing unintended pressure from your fingers onto your drawing – because it will transfer onto your canvas. Be sure to tape down your drawing or use an artist’s mahl stick to help keep you hand pressure steady.

Once you are satisfied with tracing, set aside your drawing to see the final transfer on your canvas! Tada! You have successfully transferred your drawing using technique #3.
Transferring using the Grid System
While some artists like charcoal, quite a few love using the grid system to properly transfer their drawings onto other surfaces, a large reason being the capability to scale their drawings to different size canvas or supports. This is a big advantage and one you might want to consider.
The grid system works by first drawing a grid of 1″x1″ boxes onto the original sketch or drawing in need of transfer. Once complete, a new grid is then drawn on the desired final surface, either using the same 1″x1″ box grid or a scaled box dimension to accommodate the canvas size. It’s important to know that you should always have the same number of boxes for both grids and that both grids are oriented and placed the same way. Once drawn, simply draw in the lines you see in the drawing version’s box onto the final canvas’ respective box.

Let’s do a quick example to further illustrate this concept.
Imagine you created a drawing on a 8″x12″ paper and want to transfer it to a 16″x 24″ canvas.
First, you will want to draw a grid of 1″x1″ boxes onto your original drawing. Once you have done this, label each of the grid boxes, using numbers for rows and letters for columns (or whatever labeling system works best for you). This will help you keep track of what boxes you are focusing on in the later steps.
Next, consider your scale ratio.
Your drawing is 8″x12″ (length x width) and your final support canvas is 16″x 24″ (length x width). This means that 16″/8″=2 (length) and 24″/12″=2 (width). The scale ratio for both length and width is 2. This will be the scale multiplier you apply to your 1″x1″ grid box.
- 1″ drawing box length x 2(scale)= 2″ new box length
- 1″ drawing box width x 2(scale)=2″ new box width
Therefore, the new scaled box grid for the final canvas will each be 2″x2″.
On your final support/canvas, draw in the 2″x2″ grid, being mindful to create the boxes in the same consistent manner that you did with the original drawing grid.
Once drawn, label each of the grid boxes (in the exact same way you labeled the drawing grid boxes). Then, you are ready to do your transfer.
Refer to box A1 on your original drawing, see what lines appear and copy those exactly onto your box A1 of your canvas. Repeat this step for all the boxes in the grid until you have sufficiently transferred your drawing to your canvas.
Then you are done with your transfer.
Now, while I do like using this method for some of my projects, I am not the greatest fan of it – mainly because it requires a heap of extra steps like making a grid on my original drawing and essentially redoing my entire drawing by drawing in each line into the boxes. But, lots of artists swear by this method, especially with the scaling capabilities.
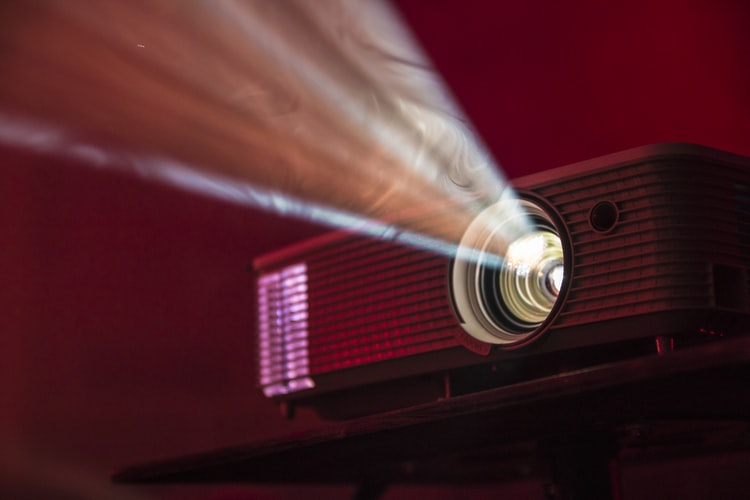
Transferring using a projector
Projectors are another great option for transferring drawing and sketches onto a surface, and unlike the grid system, doesn’t require drawing grids or doing math to scale a drawing.
The general idea would be to take your sketch and project it straight onto your desired canvas or surface and move the projector itself back and forth to adjust the size that appears on the canvas.
Once you’ve properly adjusted the focus lens, grab pencil or charcoal and trace the projected lines of your image straight onto the canvas itself.
There are two main types of projectors to look out for: LED (digital) projectors and Opaque projectors. Each of these come with their own advantages and disadvantages, which we will dive into next.
LED projectors
When it comes to projectors, lots of artists hail the use of LED projectors, and for lots of good reasons.
LED projectors work digitally, meaning you can project photos and digital copies of your drawings from any digital source like computers, digital cameras, smartphones, and thumb-drives.
I like this option A LOT because you can preserve your original drawing and work with a digital copy. Plus, LED bulbs are known to last a lot longer than regular projector bulbs, are energy efficient, require less maintenance AND provide amazing brightness – the cheaper models exceeding 2000 lumens!
Best Digital Projector For Under $100
✅ This LED mini projector makes it easier to transfer your drawing to any surface of your choice AND is compatible with smartphones and USB, which means less wires to trip over. PLUS, it’s an Amazon Best Seller, which means LOTS of other people like it too.
This means you won’t need to have a super dark room to get a clear projection, and you can get bigger projections, which is great for painting on large-scale canvases or murals. Plus, you can take your LED projector anywhere with you, due to its portability and lightness in weight.
And the picture clarity…WOW!
Compared to opaque projectors, LED projectors give you crisp, pure, detailed projections that would make your arm hair tingle. Seriously, if you really want to capture all the details of your drawing and not fight with fuzzy lines all day, you’ll be in for a treat.
Other Digital Projectors You Might Like
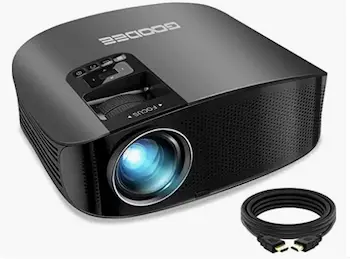
The one downside to LED projectors is the cost.
Yup, these projectors do run a bit on the high side of price ($70-$200), but if you know you’ll be using projectors for multiple projects, I would seriously consider investing in one (hell, if you have an art business, claim it as a business expense!).
Opaque projectors
Opaque projectors work by shining a bright light onto your sketch/drawing and then creates an enlarged reflection onto your desired surface using mirrors, prisms and a lens.
Depending on the opening size of your projector, you’ll typically need to use a small version of your drawing, between 5 sq. inches and 7 sq. inches. If you have access to a scanner, you can easily scan your sketch, reduce the size to fit the projector and print it out for use.
✅ This EZtracer opaque projector from Artograph is a popular go-to for artists to transfer their drawings onto different surfaces. And it’s praised for it’s simplicity (all you need is a bright bulb and a drawing ready for transferring).
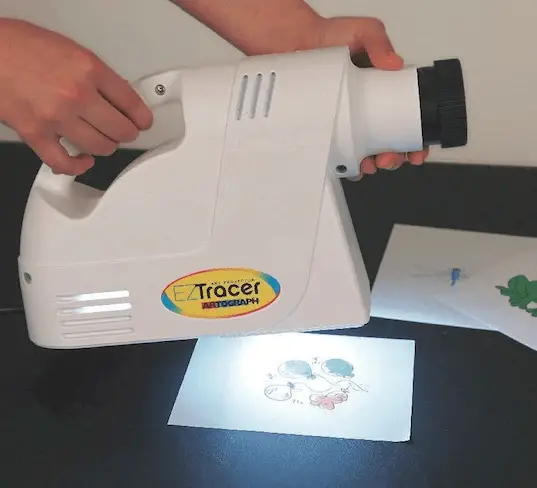
Because you are projecting from a physical image, you need to make sure the image and projector itself are fairly stable and won’t be moved around since this can knock the projector out of alignment, making it damn near impossible to readjust back to the original position.
For that reason, it’s usually best to do the tracing in one sitting! Less room for errors.
One of the more renowned opaque projects is the EZtracer from Artograph. These types of projectors are less expensive than their LED counterparts, but the picture quality will appear much more fuzzy and dimly lit, making it a bit more challenging to trace.
Overhead projectors
Remember those overhead projectors from high school?
Well, overhead projectors are yet another option you can use to transfer an image or drawing onto a canvas.
Overhead projectors require your sketch to be transparent and uses a series of mirrors and and light to project a clear, crisp image onto the desired surface. And if you’re wondering how in the hell you’re going to make a transparent version of your drawing, you can simply buy printable transparency film, print your drawing onto it, and use it on your projector.
Although overhead projects worked in high school chemistry class, they are probably my least favorite option, only because it requires you to use extra materials with extra steps. Plus, they are pretty expensive ($250+).
Transferring using a Lightbox or Window
Ok, this method doesn’t quite translate well with a canvas or non-transparent surface, but if you are looking to copy a paper sketch onto another piece of paper, using a light box would be a great option.
Basically light boxes are a flat box with a side of translucent glass or plastic that contains a light source that can provide an evenly lit flat surface.
You can place your sketch and your desired final paper on top and the lines of your drawing will appear visible on the final paper, allowing you to easily trace with a pencil or pen.
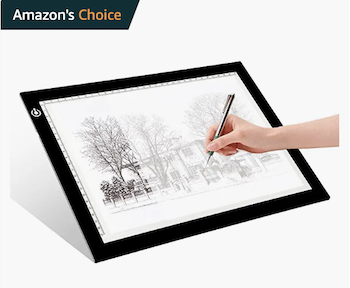
With the advent of technology, light boxes have evolved from large, boxy installations into smaller, thinner portable shapes that can simply be powered via USB.
If you don’t own a light box, you can also do this trick with a window, preferably in the daytime when the light is shining through from behind. Simply place your drawing behind your final paper surface, place both against the window glass, and trace the lines.
Now, if you’re looking to both transfer and scale your sketch/drawing to fit any size canvas, my Scale & Transfer Your Sketch to Any Surface class walks you through the entire process step-by-step. And you can try it free for 1 month when you sign up.
👉 TRY MY SCALE & TRANSFER CLASS FREE FOR 1 MONTH
Which transfer method is your favorite?

In conclusion, those are several methods for transferring any sketch or drawing onto a canvas or any final support surface you wish to work on.
And really, the most important part to remember from of all this is to simply trust the process and relax.
Art is not just a destination. It’s a journey towards self-discovery and appreciation. These techniques serve to help ease you through the creation process and to keep on learning. So keep calm and love yourself; it’ll all be OK in the end.
What did you think of these techniques? Have you used a similar approach to transfer your sketches? Comment below and share your thoughts.