Easy methods to take dry acrylic paint off your brushes and get them back to fighting shape
As you sit down for your next big painting project, you notice some of your brushes are looking beat-up and worse for the wear; some bristles are frayed; others have lost their shape completely, while others are literally caked with dried acrylic paint from a past project. #oops
But, there is good news. Instead of throwing all your brushes out in a fit of madness, there are several methods for reviving your damaged brushes and restoring them back to good condition, without using harsh chemicals.
In a rush?
✅ This is the best way to clean dried acrylic paint off your brushes and get them looking sexy again.
So, take a deep breath. It’s gonna be ok.
The best ways to repair and maintain your acrylic paint brushes include the following:
- Clean and restore your brush with a brush cleaning solution
- Clean off the dried paint with acetone (aka nail polish remover), isopropyl alcohol, or hand sanitizer
- Reshape the brush with the help of boiling water
- Prevent future damage by following proper brush cleaning techniques like washing with dish soap and water during and post painting sessions
- Condition your brushes with oil or preserver to maintain it’s shape over time
After reading this post, you’ll have several tactics for removing dried paint and restoring your brushes back to fighting shape. And best of all, how to get your brushes to last you a very long time.
Before we do that, let’s talk about the main causes of brush damage and how you can avoid them in the future.
Pin it for later! ⤵
What exactly causes brush damage?
There are lots of ways that your paint brush can get damaged, including negligence or simply not quite understanding how to treat a brush. Now, before you beat yourself up for being a bad brush parent, I want you to know it’s totally ok to mess this up.
A big reason why most brushes get damaged and lose functionality has to do with dried paint getting into the ferrule, aka the metallic area that fastens all your bristles together.
When this happens, your brushes become extremely difficult to manage and use, the ferrule itself may rust, or the brush handle will warp, often resulting in your brush’s inevitable demise into the trash can.
Other forms of brush damage include poor brush handling (like leaving your brushes bristle tip down in your water cup for extended periods of time) or just not cleaning your brushes after finishing a painting session.

So as we dive into the best way to repair your dried brush (for both synthetic and natural brushes), I want you to know that these are last-stitch efforts to recover your brushes, and there really isn’t a guarantee that you’ll be able to save your synthetic brushes.
Look at this as a cautionary tale of why it’s SO important to take care of your brushes in the first place.
Disclaimer: some links I include below are affiliate links, meaning I will earn a small commission if you choose to purchase using these links at no extra cost to you!
How to clean dried paint off brush bristles
I’m sure you know exactly how it happened.
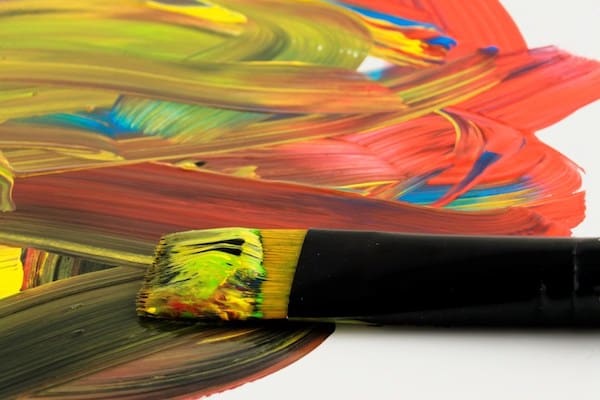
You were in the middle of a painting project, you put down your paint-soaked brush to tend to another pressing matter and 3 hours later, you find yourself with a stiff, cake-y brush that is now rendered unusable.
It sucks and looks really really bad. But, fortunately for us, there are ways to clean off dried paint of those natural or synthetic bristles and get your brushes back to fighting shape.
First of all, don’t ever do that again.
Always always always clean your brushes with water while you are working with them, just so you can avoid catastrophes like this. Make it a priority so you can avoid having to do all the recon later.
Ok, now that that is covered….
You can effectively remove dried acrylic paint from your brushes by one of several methods:
Acrylic Brush Cleaner
One of the best “go-to” options for cleaning dried paint off a brush is to use an acrylic brush cleaning solution. These are tested to clean both synthetic and natural hair brushes, are non-toxic, and emit very little fumes. It’s great for saving your brush bristles, removing dried acrylic paint, and reshaping your brushes.
Just be sure to keep the painted handles of your brushes out of the solvent and avoid a gooey mess of trouble.
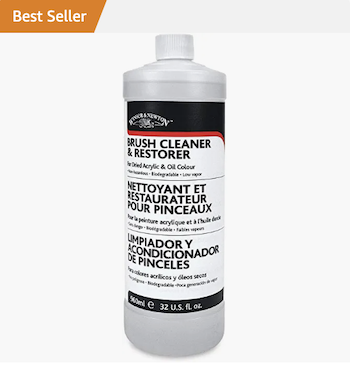
One of the best cleaners is the Winsor & Newton brush cleaner and restorer. This solvent is great for both oil and acrylic brushes, leaves no oily residue and is non-toxic. Plus, it’s a favorite brush cleaner amongst lots of artists.
Acetone
Surprisingly, acetone (aka nail polish remover) is an effective acrylic brush cleaner. In a well-ventilated room, dip your brush bristles into a glass jar filled with acetone solution up to the ferrule, letting the acetone penetrate the bristles and release the dried acrylic paint buildup. Let sit for a few minutes.
I would suggest using a cloth to help wipe off the bristles post-dipping to aid in the paint removal or use a steel-wire brush (brushing away from the ferrule) and finish off by rinsing the bristles in clean water to remove any excess acetone. Depending on how much paint you have, you may need to repeat this process several times until all your acrylic paint is removed.
Isopropyl Alcohol
Less pungent than acetone, isopropyl alcohol (aka rubbing alcohol) is another great cleaning solution to taking out dried paint from bristles.
Simply dip your affected bristles into a solution of rubbing alcohol up to the ferrule level, letting it penetrate the bristles and release the acrylic paint buildup. Let sit for a few minutes. Use a cloth to help wipe off the bristles after each dip to aid in the paint removal process or use a steel-wire brush (brushing away from the ferrule) to remove excess paint and then rinse with water to remove any remaining alcohol. Repeat as necessary until all the paint has been removed.
Hand Sanitizer
Who knew hand sanitizer would be an effective way for getting dried acrylics off of brushes? Thanks to the ethyl alcohol content, hand sanitizer can penetrate the bristles and release paint buildup, in very much the same way as acetone and rubbing alcohol.
To use, you can simply squeeze a small amount onto your bristles and using the palm of your hand or a plate, simply swish your brush in a round-motion until the paint is removed. If the paint is refusing the budge, consider using a steel-wire brush and brush away from the ferrule to get the paint off. You may want to repeat this process several times until all your paint is removed for best results. Then give your brush a final rinse with water.
How to remove dried paint from the ferrule
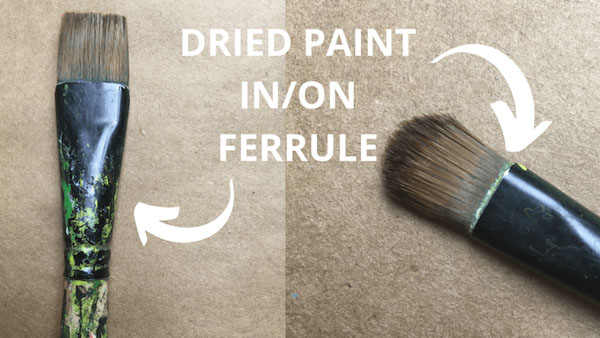
Now, what if you happen to have dried paint nestled deep inside your brush ferrule. How can you remove it? Pretty much the same way as we mentioned before, with either acetone or rubbing alcohol.
In a container that can fit your entire brush on its side, add your acetone or rubbing alcohol solution and add your brush, completely submerging it in the liquid. Let sit for a few minutes and using a cloth and a swirling motion with your brush, get as much of the dried paint off as possible. Then rinse with water and repeat if more paint needs to be removed.
ONE MAJOR CAVEAT: as tempting as it may seem, do not leave your brush or bristles in acetone for long periods of time. This can severely damage your brushes and make them damn near unusable. If you want to give your brush a fighting chance of returning to its former glory, do not soak them in caustic solutions. They will hate you forever.
How to reshape frayed paint brush bristles
Sometimes our brushes really take a good ol’ beating from one too many paintings, leaving the bristles looking frayed and shaggier than 80’s hair. When this happens, your brushes become very difficult to handle and create unintended paint strokes – especially if you’re dealing with a frayed detail round brushes that simply refuse to give you sleek, crisp lines.

To repair your brush shape, ensure that there is no dried acrylic stuck to the bristles. If this is the case, follow the above steps for removing dried paint off the brush itself. Once cleaned, follow the steps below to return your brush back to its original form.
- Step 1: Boil a pot of water
- Step 2: Place your brush inside the boiling hot water, tip-side down, and rotate the brush for 5 minutes. As you’re doing this, you’ll start to notice the bristles coming back together, thanks to the heat of the water.
- Step 3: Remove your brush and dry it using a cloth or dry paper towel, making sure to carefully wipe away from the ferrule, not toward (this will cause the bristles to get caught and warped, so be mindful of the direction you’re wiping).
- Step 4: Add a plastic guard or wrap your brush tip in aluminum foil to preserve the shape and set aside. Within a window of 3 hours, your brush shape should be back to normal.
Proper Brush Care Techniques Every Artist Needs to Know
Ok, so you’ve repaired your brushes and dodged the bullet of repurchasing new brushes. Now, let’s keep it that way. In order to help your brushes stay in the best condition possible, you will need to put in a tiny bit of effort – especially while the paint on the brush is still wet and workable, so I’ve outlined two major steps you will need to follow for the best clean brushes.
Wash your brush while paint is still wet
I cannot recommend this method enough! The best sure-fire way to keep them in good fighting shape is to clean it with water – both during and after your painting session. When washing wet paint off your brushes, there are two types of techniques I like to follow.
Technique #1: Wipe and Dip
The wipe and dip technique is the first thing I personally like to use during my painting sessions – mainly because it’s a quick and easy way to clean my brushes. Simply wipe any acrylic buildup off your brush using a cloth or spare piece of paper, dip the brush into your jar of water and stir the bristles around the bottom to push any paint off the brush body. Then, repeat this process with wiping and dipping until all your paint has been removed. Once your brush is cleaned, set it down on your working station.
As an added tip, I have heard some artists like to add marbles or rocks to the bottom of their water cups so that their brush has a multi-textured surface to squeeze out paint while dipped. This is a great hack to try so I figured I would mention it!
Technique #2: Cleaning with Soap and Water
This is the easiest way to clean my brushes because it gets the entire brush body, and I use this technique once I am done with my painting session. To clean your acrylic paint brush, you simply mix your brush bristles in equal parts liquid soap and oil. I love using olive oil for this step since this will keep your paint brush bristles slick and ready for its next adventure.
Then, I simply rinse the paintbrush bristles with warm soapy water. I use the palm of my hand or a hard surface like my paint palette to push the acrylic off my brush. I know my paintbrush is clean when there are no paint streaks left while brushing.
As a bonus, I included a video below demonstrating the steps I just outlined:
Dry your brushes in the proper orientation
Once your brush has been sufficiently cleaned, it is time to dry them. I have seen lots of beginner artists throw their cleaned brushes into a cup with the bristles pointed down.
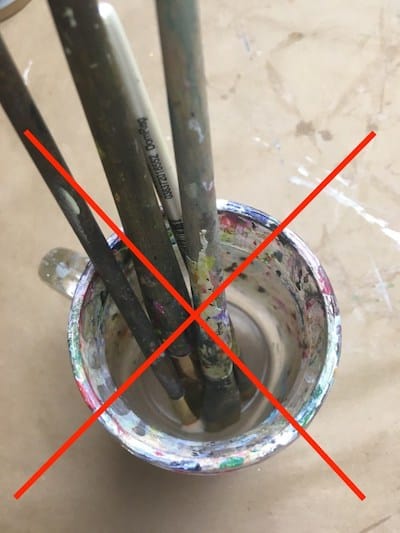
DO NOT DO THAT. This will mess with your brush bristles and the overall brush shape!
Instead, orient your brush so that the bristle tips are pointing/slanting down so that gravity can work it’s magic and get the water to properly drain from the ferrule and bristles.
Get a Decent Brush Holder
You can get really creative with how you decide to orient your brushes, but here are just a few methods I have tried or other artists like to use to dry their brushes properly. Whatever method you decide to use, be sure nothing is touching the bristles!
Method 1: Make Your Own Brush Holder (for those artsy DIYers)
You can always go down the DIY route and make your own brush holders. In fact, Pinterest and google have some really great ideas, but one particular design caught my attention – and all you need is a pool noodle.
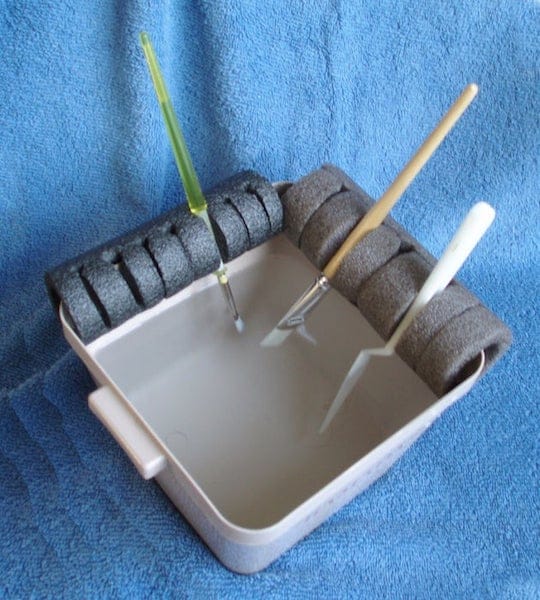
Cut several small slits into a pool noodle and a major slit on the backside of the noodle. The major slit can be used to secure the entire noodle on an edge, like a box or container.
Place your brush handle into the tinier slits, pointing the brush tip at a downward angle.
To get more details on how to make this, here is the step-by-step DIY brush care holder tutorial from instructables.com.
Method 2: Purchase a Brush Holder
When searching for manufactured brush holders, I did not find a lot that oriented the brushes in the correct direction. However, I did find these two brush holders which can hold wet brushes in the correct position; these can be used both during your painting session and after washing your brushes.

This brush cleaner and holder set from MyLifeUnit is a top choice for during and after a painting session since it has a mixing station, a paint holder, brush cleaning basins and holes to store your brushes. Plus, it’s super portable.

The paint puck is a simple yet effective way to clean your brushes during your painting session and hold your brushes in the correct orientation with the help of the little “pincers” around the rim. A great choice for artists on the go or at the studio too.
Step 3: Condition those janky brush bristles
One of the final steps to proper brush care is to condition your brush bristles. Now, you won’t have to do this every single time you clean your brushes, but I would recommend doing it once every month or two, depending on how many times you use your brush.
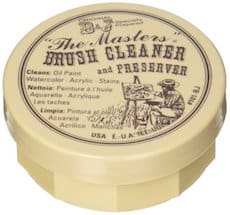
To prep your brush for conditioning, first make sure all excess water is removed from the brush by simply pinching the brush with your fingers; then grab your choice of conditioner like olive oil or a manufactured preserver like The Master’s Brush Cleaner and Preserver (lots of artists love using this!), lightly stir your brush into the conditioner (make sure your bristles don’t bend all the way back), squeeze off any excess with your fingers, and then use your finger tips to shape the brush.
Once finished, simply slip on a plastic guard or wrap your brush in aluminum foil to help keep its shape. To help better see this concept in action, I included a quick little tutorial showing you how to use The Master’s Brush Cleaner and Preserver in more detail.
More Frequently Asked Questions About Removing Dry Paint from Brushes
Can I use mineral spirits to remove acrylic paint off brushes?
While mineral spirits is great for removing oil paint from brushes, it’s not the best option for acrylic paint brushes.
Can I apply these same techniques for oil paint brushes?
A lot of these techniques use water-based solvents, which is best for acrylic paint’s composition. Since oil paint is oil-based, it would require different cleaning agents like mineral spirits.
In conclusion, just take care of your brushes
My number one rule for dealing with paint brushes is to take care of them right the first time.
A good well-cared for brush will last for years, as long as you follow the preventative cleaning steps after every painting session. If your brushes get messed up (which can happen), see these repair tips as your last resort to restore them back to working condition.
Make brush care a priority and a habit, and you will save yourself time and headaches in the long run.
What did you think of my tips for repairing damaged acrylic paint brushes? What methods have you tried before? Comment below and let me know!
Related Acrylic Care Tips
How to Restore Damaged Acrylic Paint Brushes and Keep Them Looking Good
Pin it for later! ⤵