

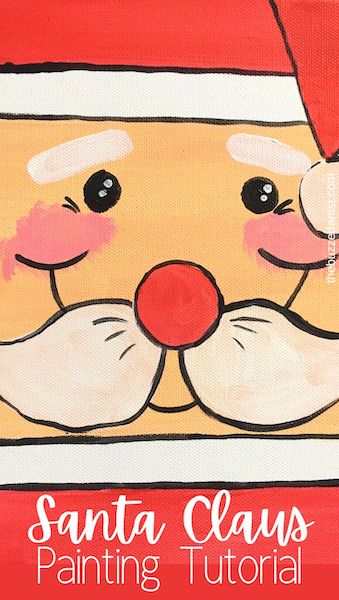
In this post, you’ll learn how to paint a cute Santa Claus in this easy step-by-step acrylic painting tutorial for beginners. Santa Claus is coming to town!
Disclaimer: some links used in this post are affiliate links, which means I’ll earn a small commission if you purchase using my links at no extra cost to you. I only recommend products I think will be helpful to you and bring you one step closer to creating beautiful acrylic masterpieces!
👉 Want to host a paint party with this tutorial? Here is exactly how you can set up a fun DIY paint party at home.
Santa Claus Acrylic Painting Supplies
Paints
Brushes
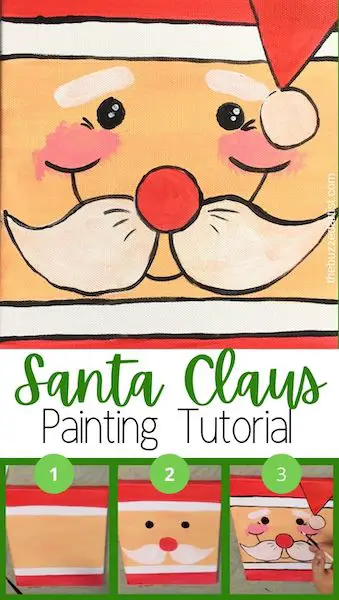
Santa Claus Acrylic Painting Steps
Follow these step-by-step instructions on how to paint your very own cute Santa Claus face.
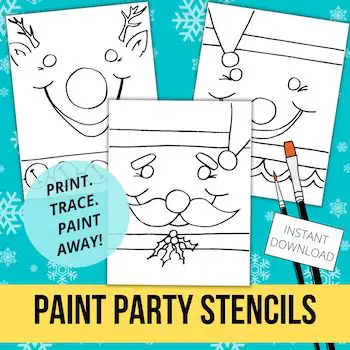
Want the Traceable Stencil?
If you want to get the full stencil for this painting, get the printable stencil here.
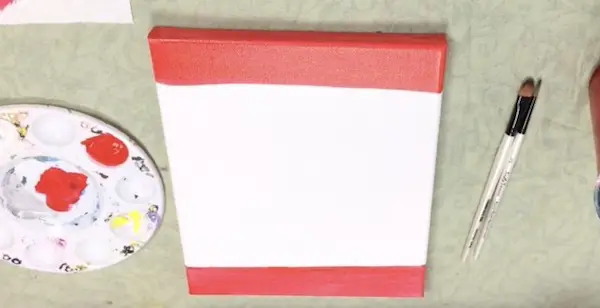
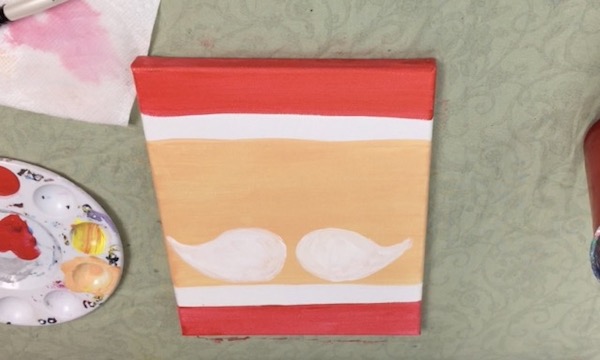
Step 1: Paint in the Coat and Hat Stripes
With your flat wash brush, paint two 2″ red stripes on the top and bottom edges of the canvas. This will be the coat and top of the hat.
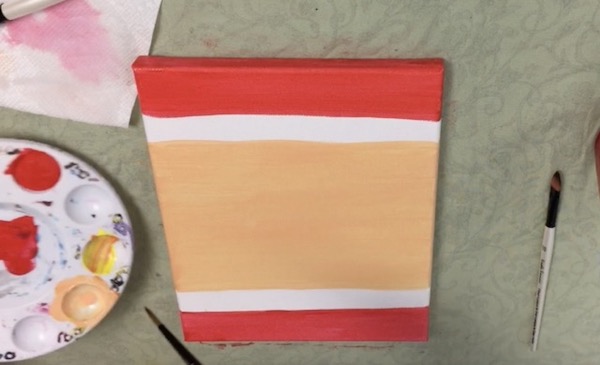
Step 2: Paint in the Skin Tone
Mix together yellow and red with white. This will create a lighter skin tone for our santa. With your flat wash brush, paint a large centered block about 6-8″ wide, making sure to leave 1″ space between the red and skin tone blocks.
Step 3: Paint in the Beard Whiskers
With your filbert brush loaded with titanium white, paint two beard whiskers towards the bottom of the canvas just above the white space.
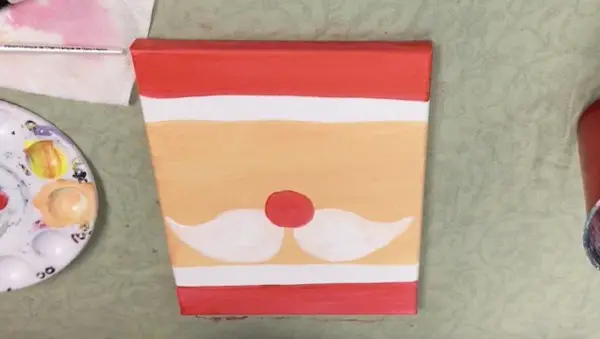
Step 4: Paint in the Nose
With your filbert brush loaded with red, paint a 2-3″ circle between the beard whiskers.
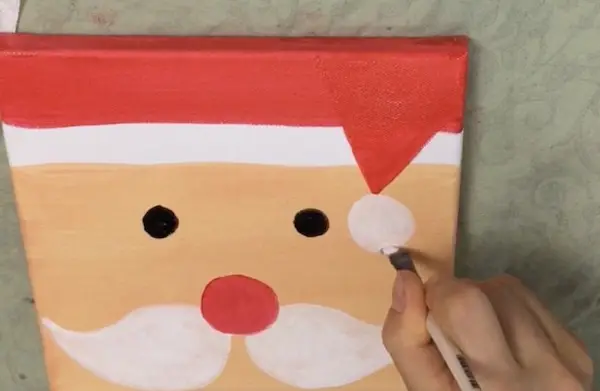
Step 5: Paint in the Eyes
With a detail brush dipped in black, add two circles for Santa’s eyes.

Step 6: Paint in the Hat Tip
With your filbert brush, paint an upside down triangle on the top right portion of the canvas to represent the tip of the hat. Then, with a rinsed filbert brush dipped in white, paint a circle at the tip of the triangle to represent the hat trim tip.
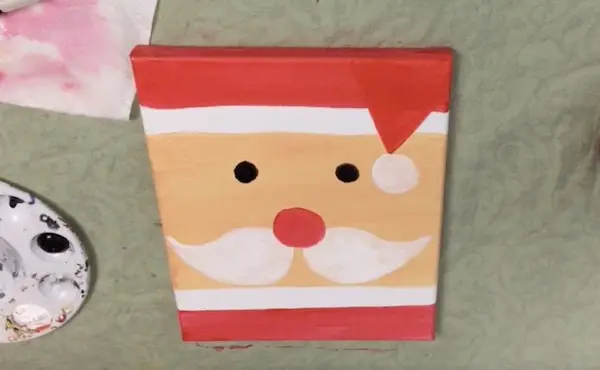
Step 7: Paint in the Hat Tip
With your detail brush loaded with black paint, outline the entire Santa face, hat, trim, and whiskers. I even added laugh lines around his eyes as well as a wide smile spanning across his face. To add blush to Santa’s cheek, mix together white and red to make pink. Then, lightly brush on the blush under the eyes.
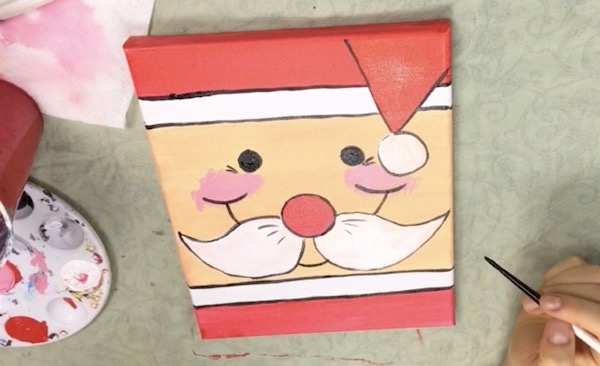
Step 8: Paint in the Eyebrows
With your filbert brush dipped in white, paint two eyebrows above the eyes. I slanted my eyebrows upwards to create a jolly expression.
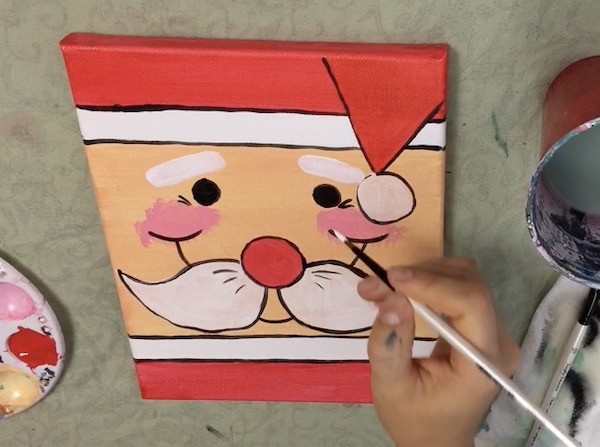
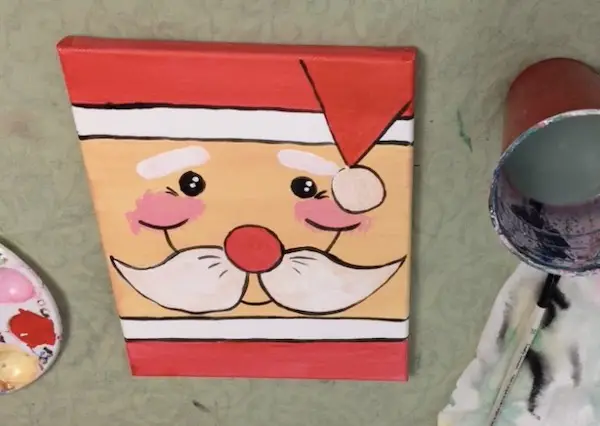
Step 9: Add Final Details
With your detail brush, add a few final details like the eye highlights, to create an extra jolly hint.
Want the Traceable Stencil?
If you want to get the full stencil for this painting, get the printable stencil here.
Santa Claus Painting Tutorial | Step-by-Step Acrylic Tutorial for Beginners
More Posts You'll Like
 Rudolph the Red Nosed Reindeer Tutorial | Step-by-Step Acrylic Painting for Beginners
 Christmas Elf Painting Tutorial | Step-by-Step Acrylic Tutorial for Beginners
 Mr. Grinch | Step by Step Christmas Painting Tutorial For Beginners
 Reindeer Painting Tutorial on Canvas | Step-by-Step Acrylic Tutorial for…