
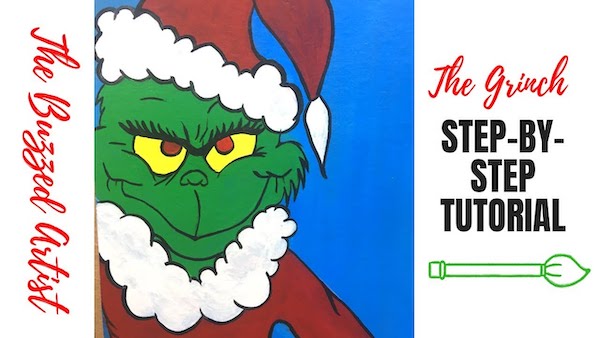
In this post, you’ll learn to paint the infamous Grinch from Dr. Seuss’ book and 1966 movie classic How the Grinch Stole Christmas in this easy step-by-step acrylic painting tutorial.
Disclaimer: some links used in this post are affiliate links, which means I’ll earn a small commission if you purchase using my links at no extra cost to you. I only recommend products I think will be helpful to you and bring you one step closer to creating beautiful acrylic masterpieces!
👉 Want to host a paint party with this tutorial? Here is exactly how you can set up a fun DIY paint party at home.
The Grinch Acrylic Painting Supplies
PAINTS
- Mars Black Acrylic Paint
- Primary Red Acrylic Paint
- Primary Yellow Acrylic Paint
- Primary Blue Acrylic Paint
- Titanium White Acrylic Paint
BRUSHES

The Grinch Acrylic Painting Steps
Follow these step-by-step instructions on how to paint your very own grouchy Grinch.
Want this Grinch Stencil?
If you want the stencil that goes along with this tutorial, just click here to get it.
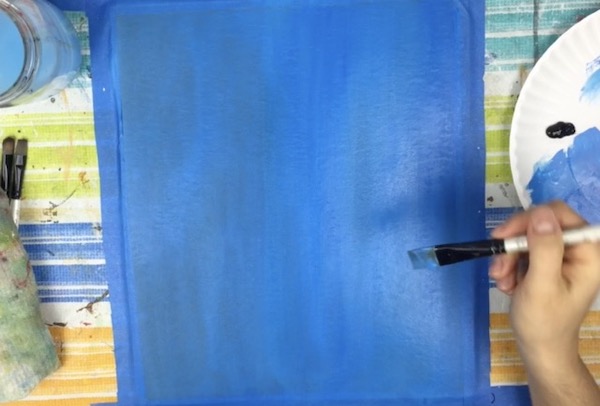
Step 1: Paint in the Background
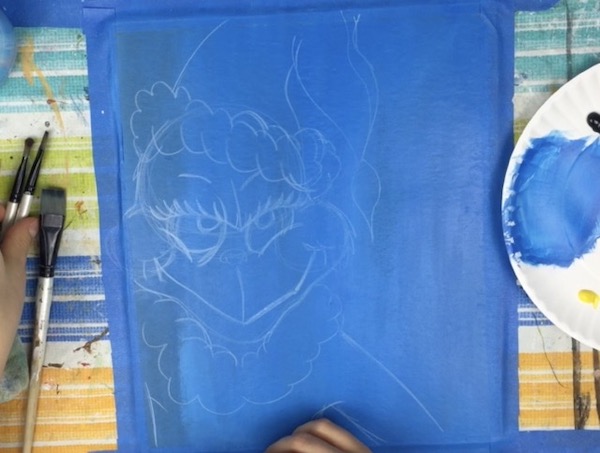
Step 2: Trace in Your Grinch
Using your grinch stencil, place and trace onto your canvas paper. If you need directions on how to do this, read this helpful post on transferring stencils to paper.
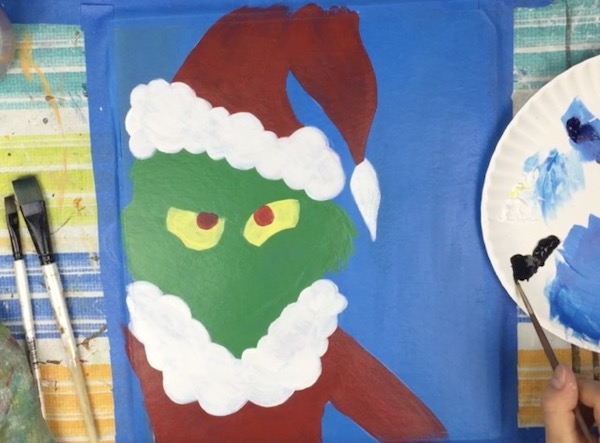
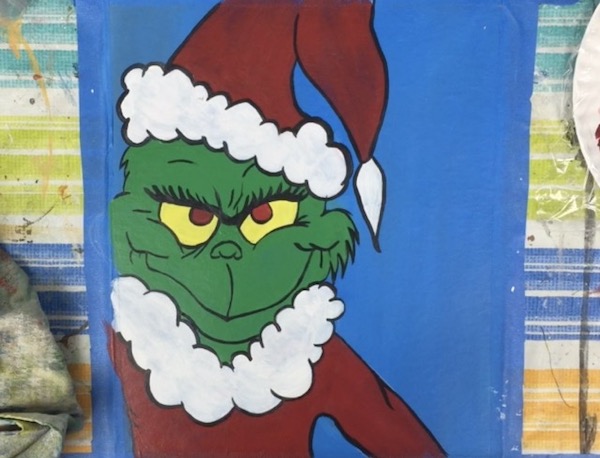
Step 3: Color Block in the Grinch
With a combination of your flat wash, flat and filbert brush, color block in the different features of the grinch – I went with green for his face, yellow for his eyes, red for his pupils, red for his hat and snow suit, and white for the hat and coat trim. To make the color green, simply mix equal parts blue and yellow.
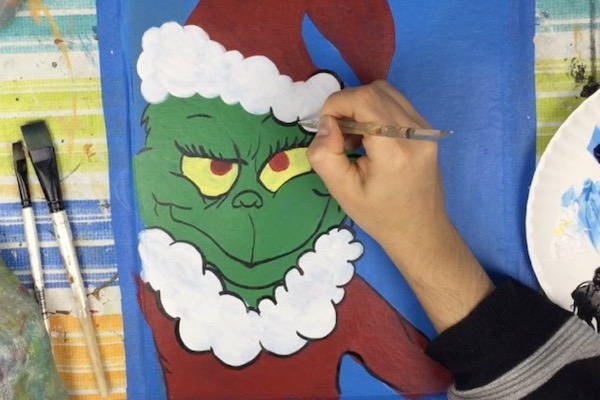
Step 4: Add in Detail Lines and Outline
With a detail round brush, load black paint onto your brush and outline the Grinch and his outfit. If you’re not comfortable using a brush, you can always use a sharpie or black marker. I went ahead and outlined the hat, trim, coat, and his face.
For his face, I added his wide smile, nose, and eyelashes from his eyes – among a few extra little details. I made sure to keep a reference picture of the Grinch nearby to make sure I was capturing all the facial details I wanted.
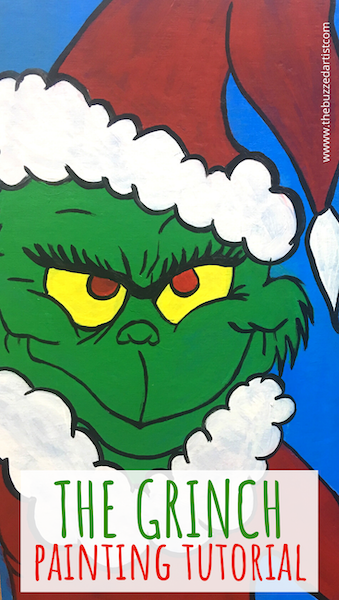
Step 5: Step back and Admire your Work
Want this Grinch Stencil?
If you want the stencil that goes along with this tutorial, just click here to get it.
Mr. Grinch | Step by Step Christmas Painting Tutorial For Beginners
More Posts You'll Like
 Christmas Elf Painting Tutorial | Step-by-Step Acrylic Tutorial for Beginners
 Rudolph the Red Nosed Reindeer Tutorial | Step-by-Step Acrylic Painting for Beginners
 Santa Claus Painting Tutorial | Step-by-Step Acrylic Tutorial for Beginners
 Reindeer Painting Tutorial on Canvas | Step-by-Step Acrylic Tutorial for…