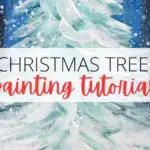
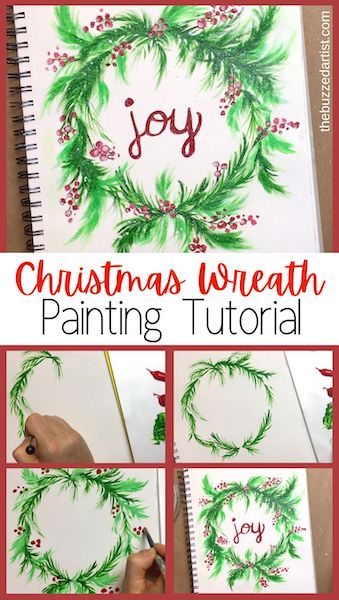
Create your own whimsical, Christmas wreath in this easy step-by-step acrylic painting tutorial for beginners
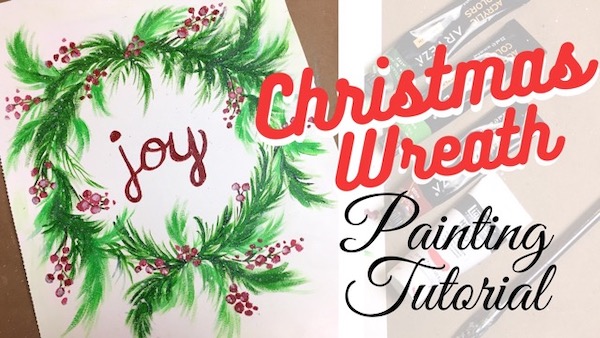
In this post (and video lesson), we are painting this cute and easy Christmas wreath that you can adapt to cards, canvas, or any other decor in your home for the holiday. All you’ll need is acrylic paints, canvas paper, and a few brushes.
Some items mentioned below are affiliate links which come at NO extra cost to you, my darling Queen Bees! If you wish to support this channel and send me an extra thank you, be sure to use the links above! I hope you love these products as much as I do!
👉 Want to host a paint party with this tutorial? Here is exactly how you can set up a fun DIY paint party at home.
Easy Christmas Wreath Painting Supplies
As always, if you wish to use different brushes or supplies, you are totally welcome to do so. I always welcome your freedom of choice in creativity.
Christmas Wreath Step By Step Tutorial for Beginners
Follow these step-by-step process (and video tutorial) on how to paint your very own magical-looking Christmas wreath.
But first… A basic walkthrough on painting pine branches
When it comes to painting a pine branch, think of two basic shapes:
A long line at the center of the branch for the stem and curved/diagonal lines coming out from both sides of the long line to represent the pine needles. It’s important to remember whatever direction you intend for the pine branch to sit, the pine needles will also fall in that direction.
For example, in this painting below, I intended for the pine branch to hang down, and so I made sure to make all the pine needles curve downward as well.
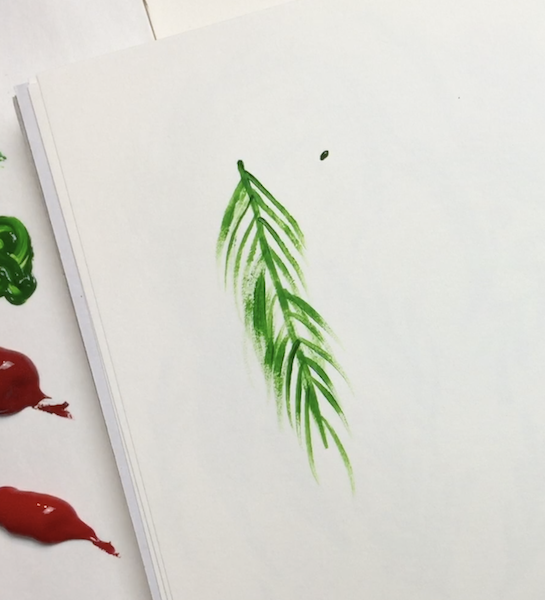
For this wreath, we’ll be doing a combination of different branch orientations, straight and curved. To make a curved pine branch, simply make the stem by painting a long line into a curve in whatever direction you wish.
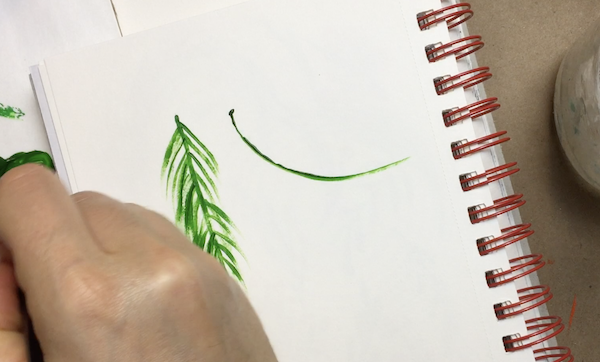
Then, when making the pine needles, make sure to curve your brush strokes in the same direction as the center line.

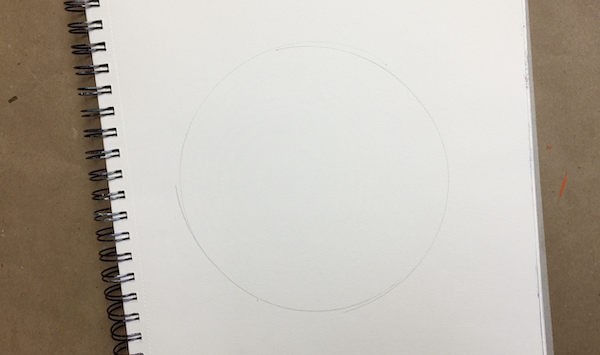
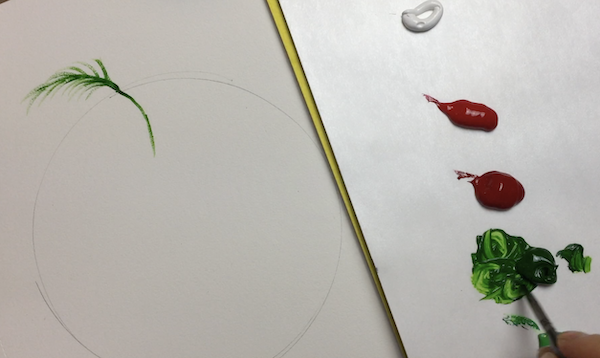
Step 1: Draw a circle for the Wreath
With your paper ready for painting, make a circle in whatever diameter you like. For this, I made a circle that was about 7-8″ in diameter. You can make this even easier if you have a circular item in your house you can trace to make the perfect shape.
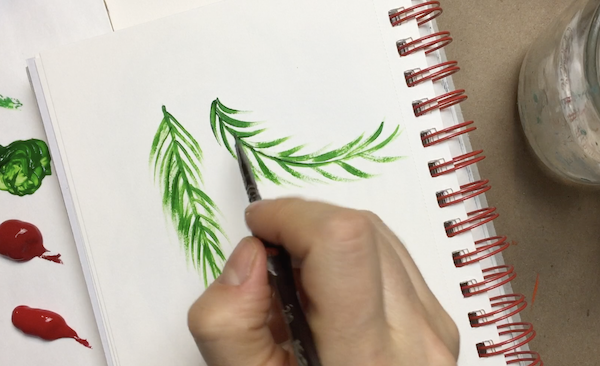
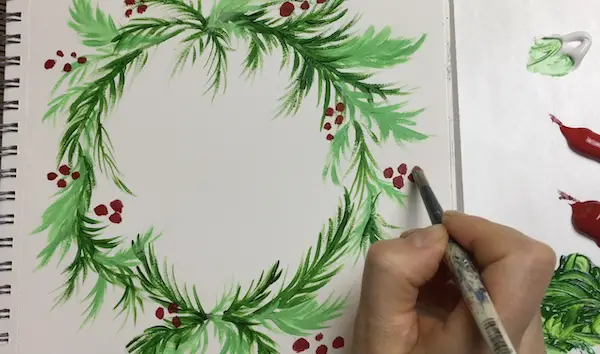
Step 2: Paint in the Branches Around the Circle
With your detail brush, load it with Prussian green and begin to paint branches around the wreath. I started by making the base of the branch stem start at one point on the circle and curve off to one side. Then, I painted pine needles following the stem direction.
From there, I kept repeating this, filling in the circle with pine branches in varying orientations.
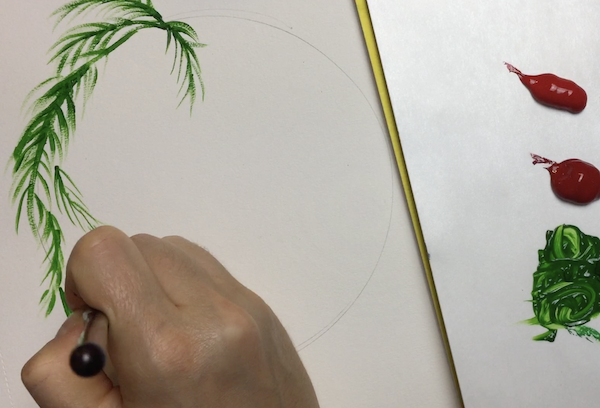
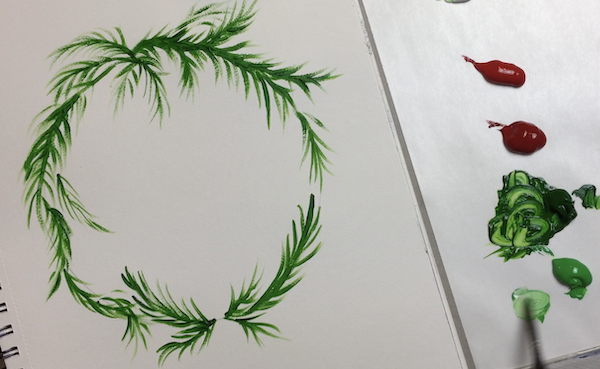
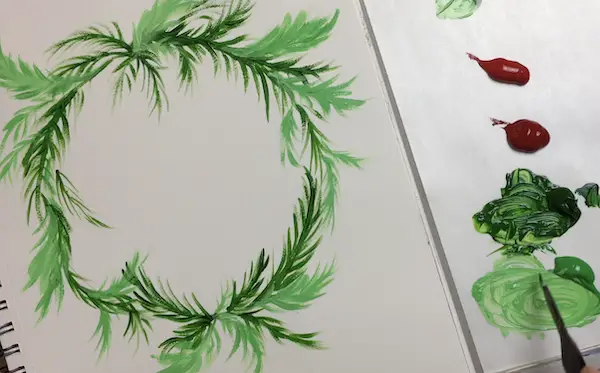
Step 3: Paint in the lighter branches
Once you got the first layer of pine branches, load your detail brush with pale green and make a few more pine branches around the wreath, following the same painting techniques as the previous step.
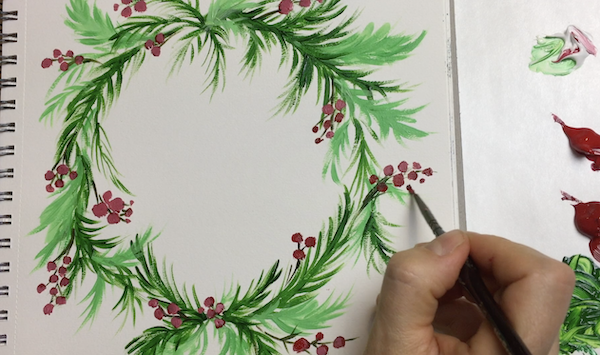
Step 4: Paint in the Berries
Using your detail round or larger round brush, load your brush with crimson and add in berries at various points on the wreath. I did various clusters of berries – each with 3-5 berries to help make it feel abundant.
Step 5: Add little berry branches & details
To make tiny branches for the berries, load your detail brush with a mix of prussian green and crimson red (making a brown color). Then, add a few light brush strokes connecting the berries to a point on the wreath.
In addition, I added a few details to the berries by loading my detail brush with napthol crimson and painting a small stroke on each of the berries to make a lighter tone.
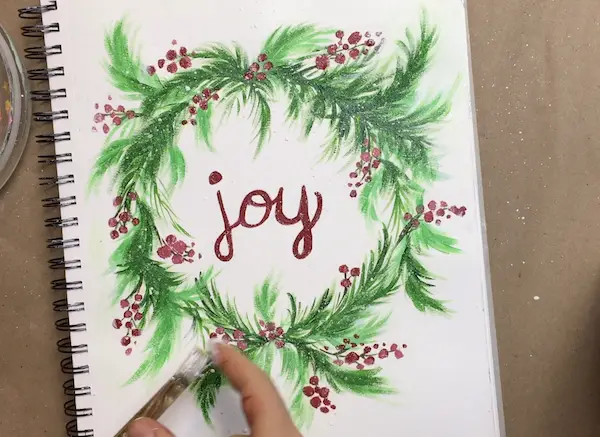
At this point, you can use your detail brush with your choice of color, to paint in a saying or word that reflects your cheery holiday spirit. For this, I painted in the word “joy”. If you’re not comfortable using a brush, you can always use markers to write in the words.
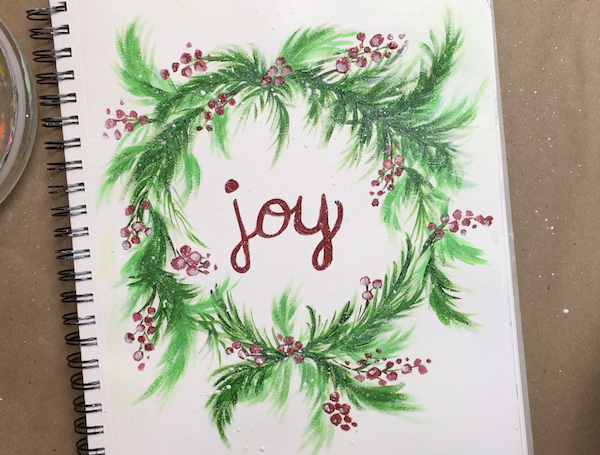
Step 6: Add Snowflakes
With a larger flat brush or toothbrush, load it with white and a lot of water. Then, hover over the painting, pull the bristles back and let go to make a series of paint splatters that resemble snowflakes. You can do as much or as little as you want.
Step 7: Ogle and Admire Your Work
Once you have your snowflakes in, you can add a few extra highlights on the berries using a little white and your detail round brush. Once you’re done, your christmas wreath is finally complete.
Easy Christmas Wreath Acrylic Painting Tutorial