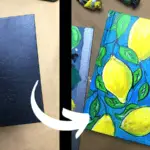
Transform Old Curtains into Eye-Catching Art in this DIY Tutorial
Buying wall art can get pretty expensive – so what better way to decorate your home than by upcycling old items destined for the trash into cool, fresh AF works of art.
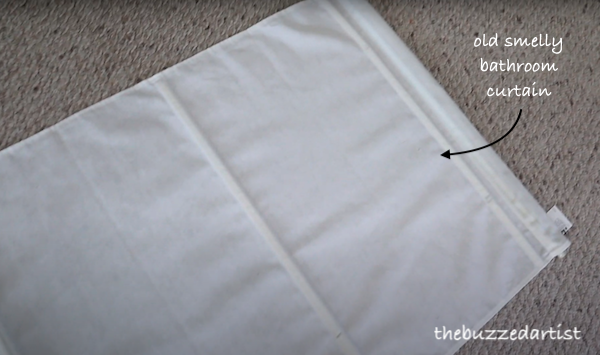
This time, I have an old smelly bathroom curtain that was begging for a makeover…and my creative bones were quaking to revamp this tired fabric into something I would admire for many years to come.
So watch my entire process in this video below or keep reading to see how you can give any old curtain in your home a brand new lease on life, in the form of fun, colorful artwork.
Step 1: Clean the Fabric
As you can guess, this curtain is old as hell, and since it’s been chilling in a bathroom for god knows how long, I needed to clean and sanitize the heck out of it.
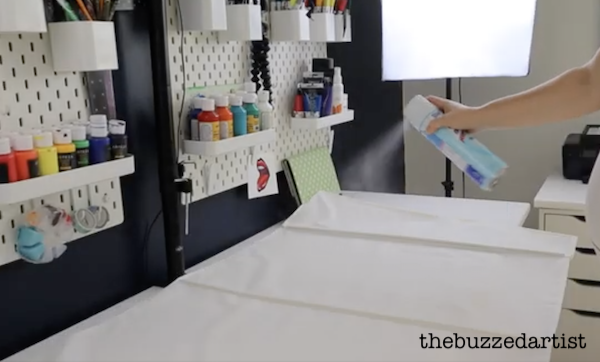
You can either throw the fabric in the washer or spray with distilled vinegar and baking soda and then hang or wave it around frantically like a pyschotic ribbon twirler to dry.
I also found a ton of hair in the fabric, so some handy sticky rollers will do just the trick to grab all that butt hair out of the fibers. Very handy and quick hack way to get all the fuzzies out.
Disclaimer: some links used in this post are affiliate links, which means I’ll earn a small commission if you purchase using my links at no extra cost to you. I only recommend products I think will be helpful to you and bring you one step closer to creating beautiful acrylic masterpieces!
Step 2: Compose/Plan out Your Art
Now you’re ready to sketch and compose my art piece on this freshly cleaned surface.
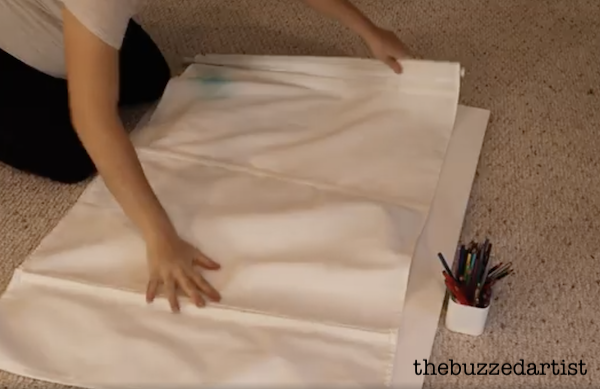
Because this is loose fabric, I used a large canvas I had in storage and laid the curtain on top of it, to act as a hard surface to draw onto.
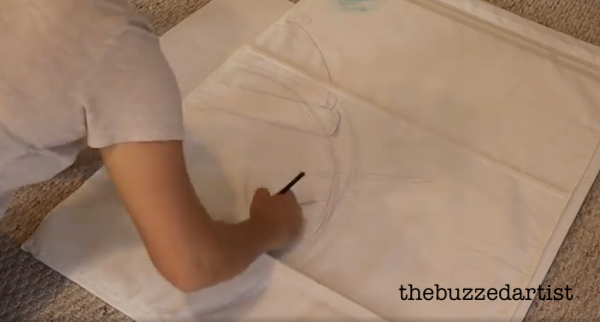
Using colored pencils that match your intended art colors, sketch out the general composition of your scene, taking time to feel out the lines and make a few adjustments.
Why colored pencils? It’s a super easy way to compose your art and get it close/similar to the intended colors you plan to use for painting. This will result in line art that will virtually disappear when you add paint later. No need for erasing (if done well).
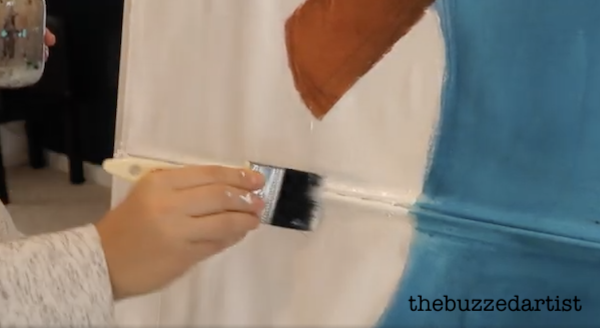
Step 3: Prime the Fabric
Now it’s time to prep the curtain for painting – at first, I wanted to skip this part, but my inner Picasso kept saying “Gesso that shit and you won’t have a bad time” and when Picasso talks, Amanda obeys without question.

I ended up using a mix of two dollar store white and blue acrylic paint to prime my curtain but in retrospect, gesso would have been a bit easier to use and manage – but both accomplish the same thing – prepping your curtain fabric so it won’t slurp up all your good paint when it comes time to actually paint.
Related: Is Gesso Really Necessary for Your Acrylic Paintings?
So, I primed the entire fabric area with the help of a 2” nylon flat brush, making sure to keep the curtain tight and wrinkle-free.
Oh and warning, primer will seep out onto the other side of the fabric, so you’re gonna want to use a drop cloth or in my case, portions of my back canvas and poster board. It worked great with just a few blue streaks as carpet souvenirs. Nailed it.
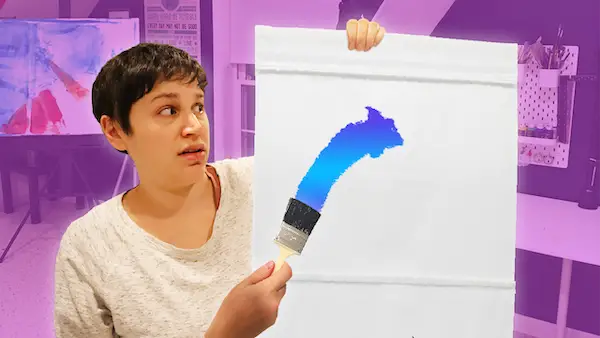
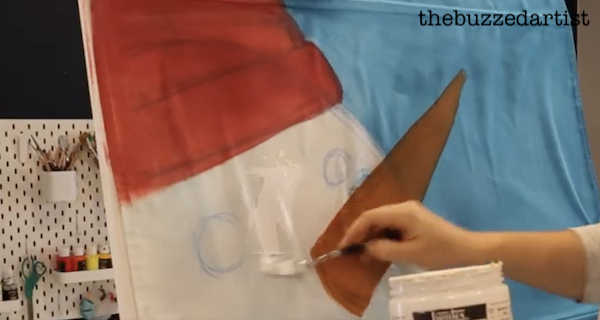
Step 4: Add Paint Color to the Curtains
Now comes the really fun part…adding color with your acrylic paint colors of choice.
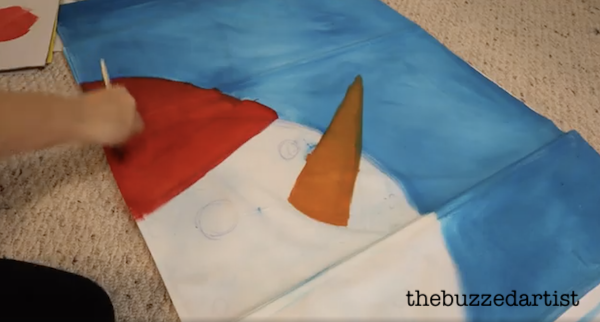
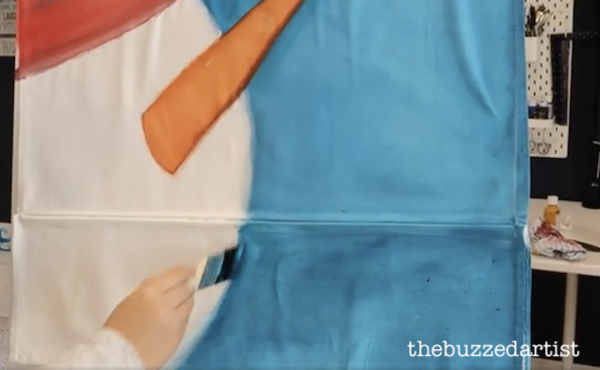
This is where I let loose and added various acrylic paint colors onto my curtain and the application was smooth as silk (thanks to the priming). I used a variety of Arteza and Liquitex acrylics paints to get this done.
In true “Bob Ross” style, I painted the background in criss-cross strokes to give me a blended hunk of a sky that would give all the winter welcomes I was looking to achieve. Then, I color blocked in the nose and hat.
Once I was happy with my first layer, I took a much needed break to let my paint dry.
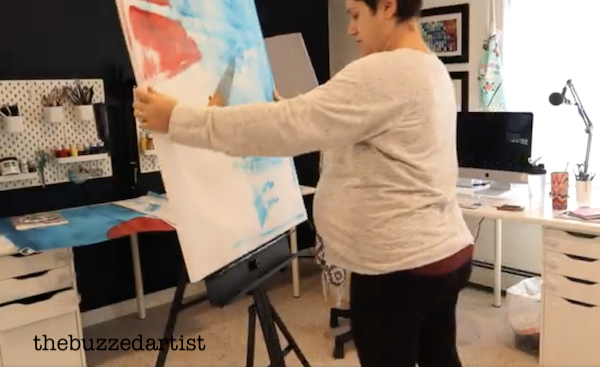
On Day 2, I continued to paint, this time propping both my canvas and curtain onto my A-frame easel so I didn’t have to bend over like a cow to apply my paint color. Sooooo much better on the knees and made for a smoother painting operation.
For the snowman body, I decided to try a slightly different approach with my palette knife and heavy body white acrylic paint, spreading it like butter on toast to give my snowman that extra oomph of clean white I was looking for.
And wouldn’t ya know, it paid off, and with a few smoothing strokes with a wet brush, I got a fine looking, glass-like snowman bod.
Now why 2 days of painting, you ask?
Well, because I am working with acrylics, the more layers you build, the brighter and more saturated the color will become (for the most part). And because I was using A LOT of paint on the first layer, it needed to fully dry before I could paint slap some more layers onto it.

So, with two coats, I was able to really make my colors stand out and slap as many eyeballs as possible. Totally worth it. Plus, I wanted to add some nice highlights and shadows to give my scene more depth and character.
Plus, once my acrylic paint dried, I did a few easy touch-ups to clean up the edges and give everything a cleaner feel.
Step 5: Add The Details
Ah and here come the details – adding the snowflakes and cutesy words.
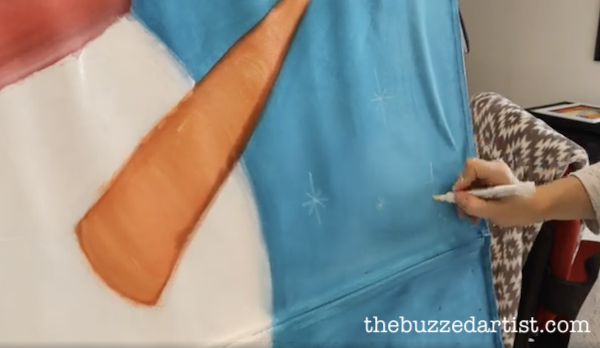
I have a confession to make, I initially tried to use my acrylic pens to draw out the snowflakes and words on the curtain, but there was no juice left in it whatsoever, so I ended up making an outline with the pen and then paint over it with diluted white acrylic paint and a #3/8 angle brush to get the colors to really stand out.
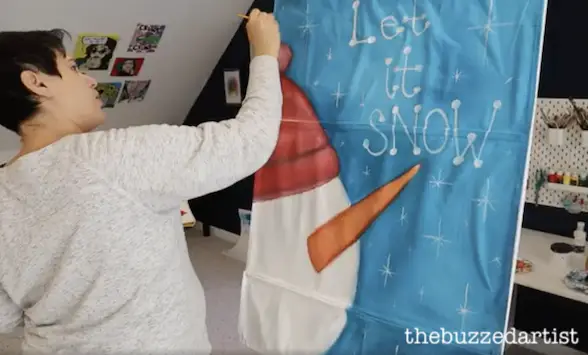
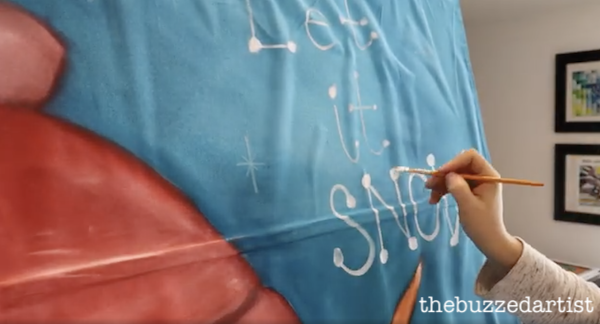
I used this same technique to write out “Let it Snow”, adding a few little embellishments to give it that extra holiday feel.
And because I just can’t help myself, I sprinkled some pretty glitter onto my snowman while the paint was still wet.
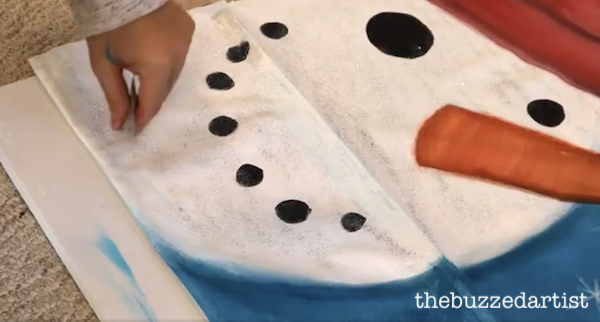
If the paint was already dried, simply adding another layer of white or even modge podge would have done the trick nicely. And I also added a few glitter specks onto the stars as well, because….why not.
Step 6: Prepare to Hang the Curtain
Once the paint has completely dried, I was ready to hang this curtain.
Luckily, the ringblomma curtains have two eye-rings on the top, which was perfect for stringing twine through and making a tight hanging line.
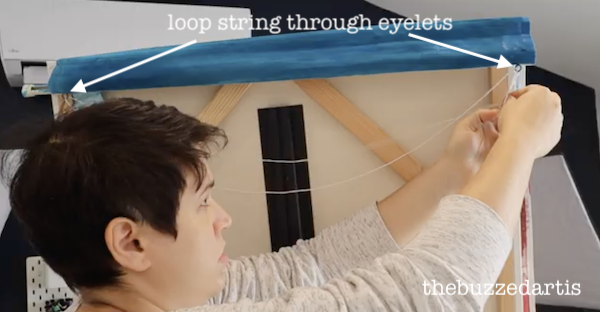
If your curtain is just a flat piece of fabric, you can roll a tiny piece of the fabric at the top so it makes a sleeve, hold it down with hot glue or hem tape, and then run a string or ribbon through the sleeve so you can hang it.
Once your curtain hanging prep is done, go ahead and hang your new piece of wall art to admire for many years to come.


Curtain Wall Art Tranformation Conclusion
Aaaaaaand that is how I turned a crusty smelly bathroom curtain destined for the trash into a fun work of art that I can use and enjoy year after year for all eternity. If you want to decorate your home on a budget, think about upcycling and/or reusing something you already have and breathe new life into it. You’d be very surprised at what you can make on the cheap.
What did you think of this upcycle project? Would you try it? Comment below and let me know, my darling Queen Bee.
Related Posts
- Upcycling Thrifted Art with a Fresh Twist
- Making a Giant Color Wheel using Only Paint Swatches
- How to Upcycle & Reuse Old Canvas