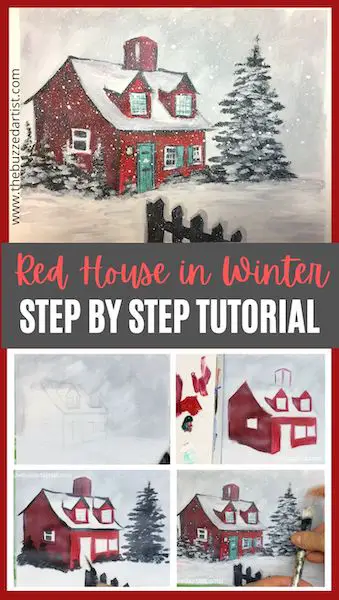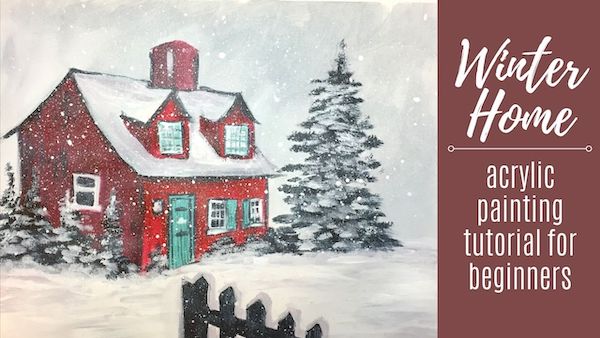
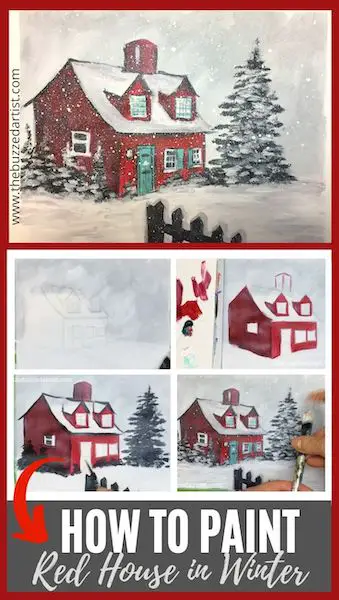
The beginner’s step-by-step guide to painting a winter scene with a red house and fir trees using acrylic paint
If there is one thing I adore about the winter, it’s the coziness of staying inside and admiring the beautiful spectacle that is snow flurrying about it’s merry way. I love the way it coats everything in white, making the world appear a touch more magical (and makes for ah-mazing picture quality – thanks to that all-natural white filter).
With that in mind, this painting tutorial is the perfect little treat for the soul – a lovely New England-style red house complete with rustic features surrounded by fir trees, a fence, and the magical wintery wonderland that is snow.
And don’t be intimidated by the colors or techniques. We are only using 2 colors plus white (wait whaaaaat?!) and just 3 brushes. Plus, i’ll walk you step-by-step through this entire process; all you have to do is bring a winning attitude and some paint.
So grab your paint supplies and let’s dive in.
👉 Want to host a paint party with this tutorial? Here is exactly how you can set up a fun DIY paint party at home.
Disclaimer: some links used in this post are affiliate links, which means I’ll earn a small commission if you purchase using my links at no extra cost to you. I only recommend products I think will be helpful to you and bring you one step closer to creating beautiful acrylic masterpieces!
Red House in Winter Acrylic Painting Supplies
- 9″x12″ canvas paper
- Tracing paper
- Carbon Pencil
- Sketch Pencil
- Cup of water
- Table cloth
- towel
- palette paper
Brushes:
Paints:
Easy Red House in Winter Acrylic Painting Tutorial
Follow these step-by-step instructions on how to paint your very own red house with a pine tree in a beautiful snowy landscape.
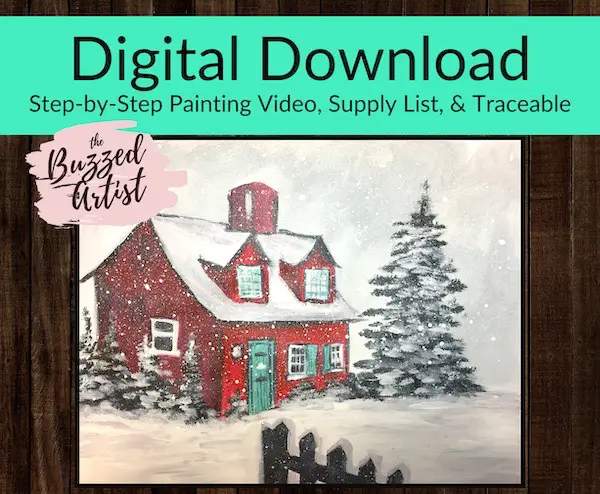
Want the Full Tutorial with No Ads?
Now before getting started, there is no need to have killer drawing skills in order to do this painting. In fact, I already made a stencil of this house that you can use. If you want access to the stencil and step-by-step video tutorial, you can find it on my shop here.
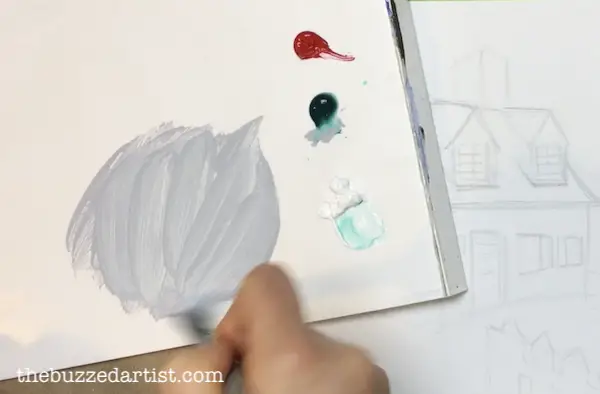
Step 1: Mix the background color
Grab your 3/4″ flat wash and dip in water. Mix green and white with a tiny hints of red until a gray-blue color is achieved.
Paint the color onto your background being sure to surround the house and snow areas of the landscape. Try to paint using a backward “c” shape with your brush as you go.
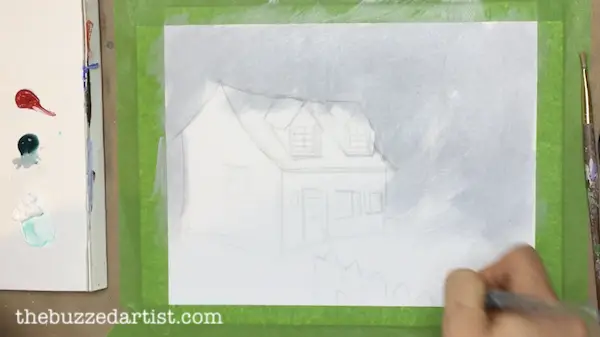
Without rinsing your brush, take more titanium white and paint it onto the lower areas of the sky, particularly where it touches the house and snowy areas of the landscape. Be sure to use the same brush strokes as the previous step.
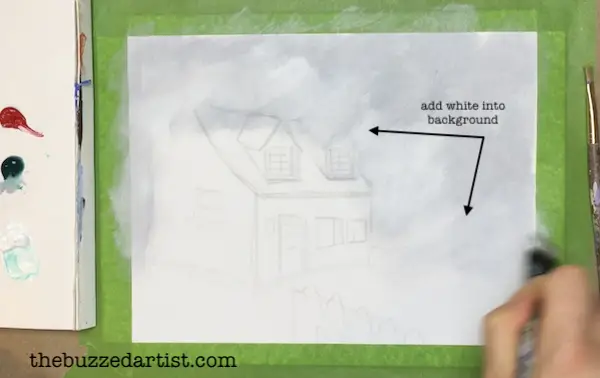
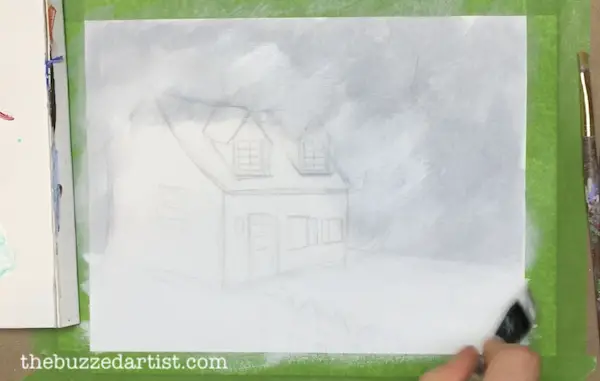
Step 2: Paint the Snowy Areas
Without rinsing your brush, take more titanium white and paint vertical curved strokes onto the snowy parts of the landscape. Doing this will help with future layering and brush strokes.
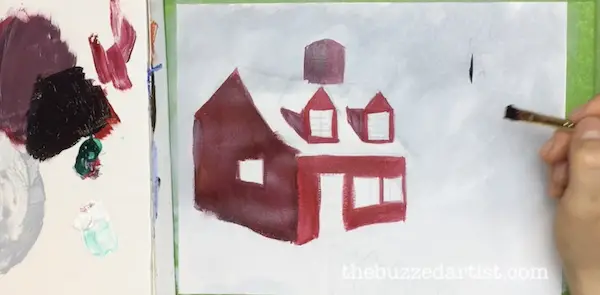
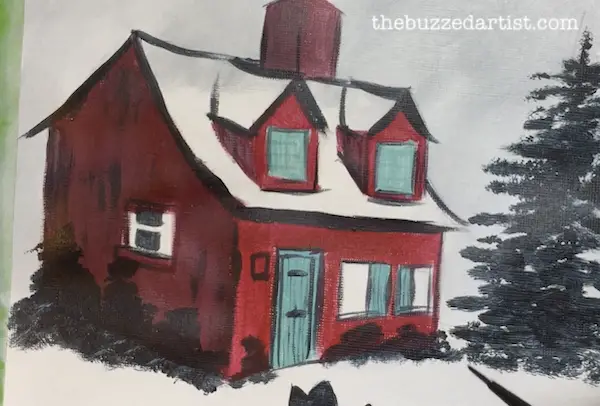
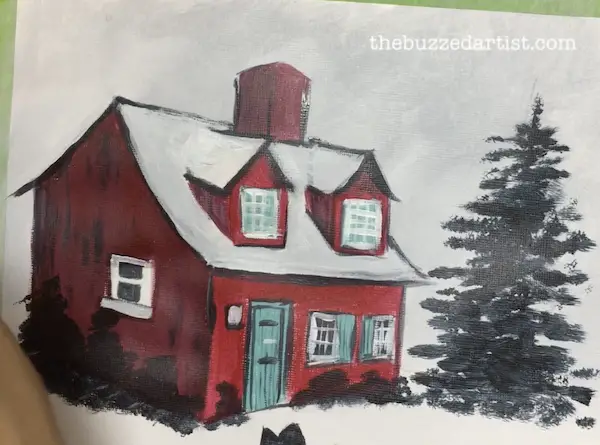
Step 3: Paint the Red House
With your shader brush dipped in water, mix red with a tiny bit of green. This will help make a nice red color for the front-facing area of the house, as well as the forward facing side of the dormers.
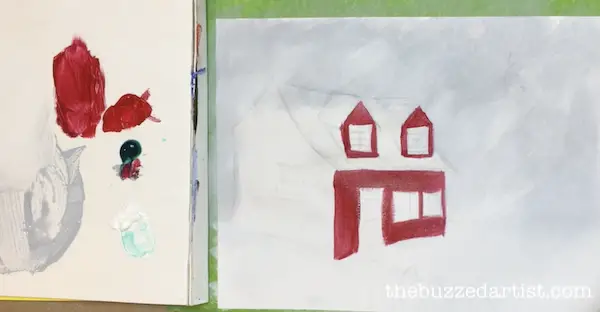
With your brush still un-rinsed, mix more green and white to the red to make a darker shade of red. This will be used for the sides of the house and dormers.
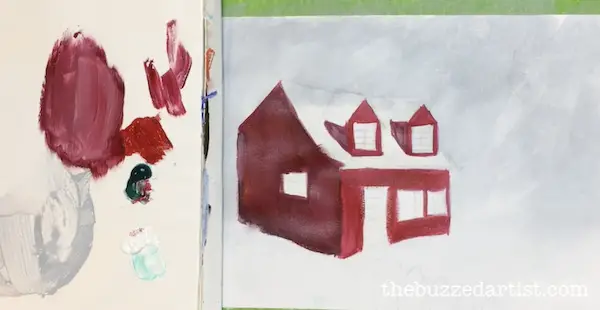

Step 4: Paint in the Chimney
Since painting the background kind of erased the chimney, go back and repaint in the chimney using the same darker red color as the side of the house. Refer back to the stencil if you need some help with the shape.
Following the same colors as the rest of house, add the lighter red to the front-facing areas of the chimney and darker red for the side of the chimney.
Step 5: Paint in the Fir Tree
With your rinsed shader brush, mix together equal parts red and green to create a lovely dark color (almost black, but not really!). Position your brush vertically at the tip, about 3-4 inches to the right of the house, around the same height as the chimney. Create a small vertical line with your brush tip. This will be the tippy-top of the fir tree.
Continue adding more fir layers by turning your brush horizontally and tapping your brush along a line, increasing the length of the line as you proceed to go down the entire tree. You want to end with a tree that is smaller on the top and longer at the base.
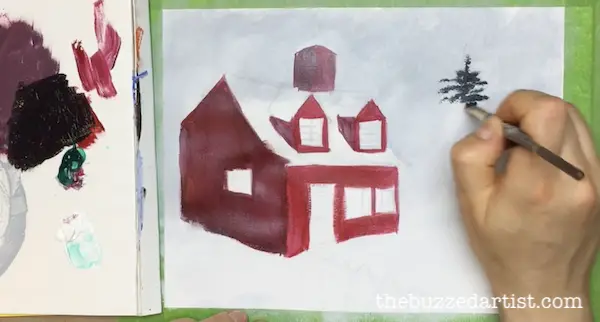
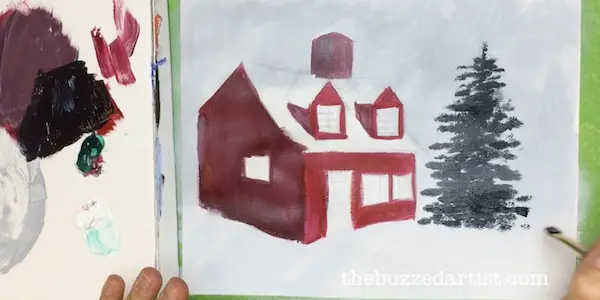
little tip: You’ll know you did it right when your tree looks a bit like a triangle in shape.
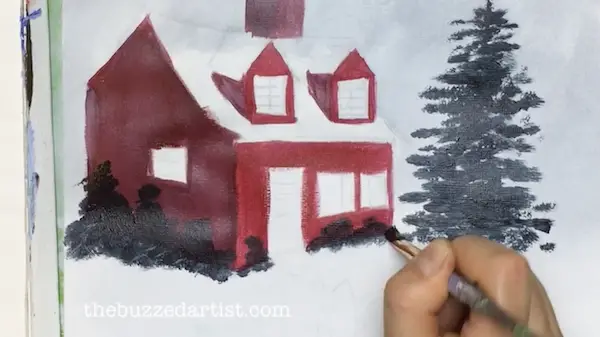
Step 6: Paint in the Side Bushes
Using the same brush and color, tap your brush to the side of the house to create several side bushes. Vary the heights for more organic authenticity.
Continue tapping more bushes to the front facing area of the house.
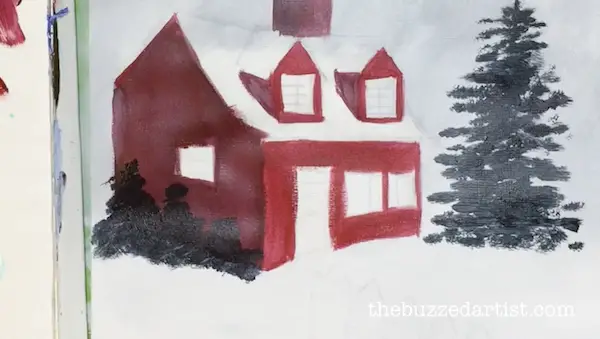
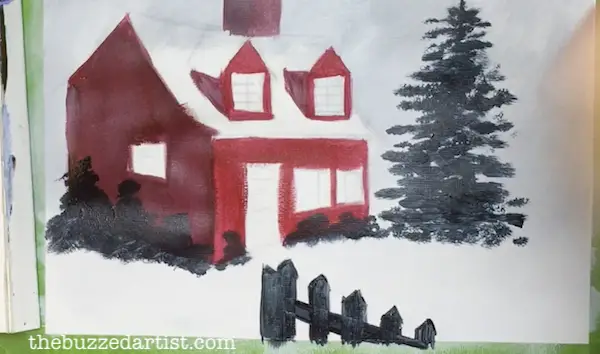
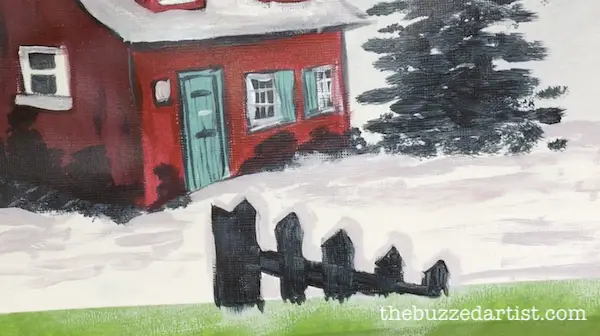
Step 7: Paint in the Fence
Using the same color and brush (or detail round brush dipped in water), paint in the fence.
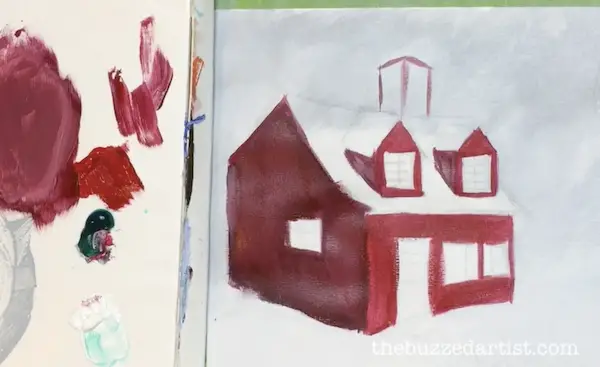
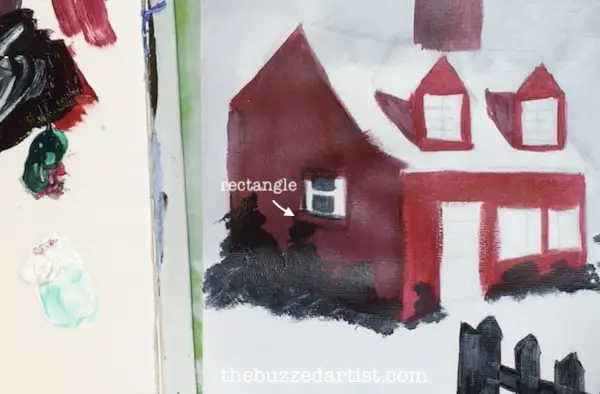
Step 8: Paint in the Side Window
With your detail round brush dipped in water and the same dark color, add in the framing and inside portion of the side window. I made a rectangle at the base of the window as well creating an outline around the window.
Step 9: Paint in the House Shadows
With the same brush and color, add in lines where there would be shadow – particularly at the roof line, under the roof, and around the windows.
Step 10: Paint in the Siding
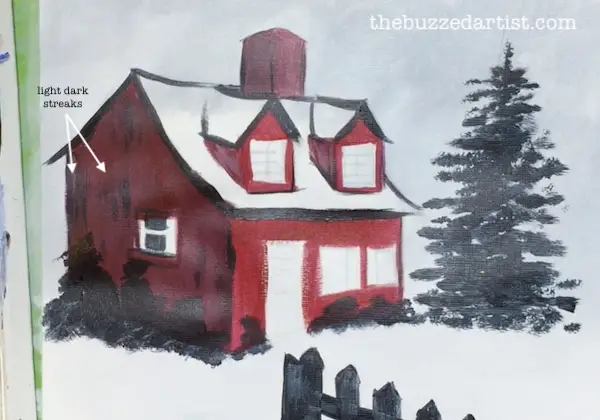
With the same brush and color, load a tiny bit of color to your brush with water and with gentle (and I mean gentle!) pressure, add several vertical lines to the side of the house to resemble rustic siding.
Step 11: Paint in the Door, Windows, and Shutters
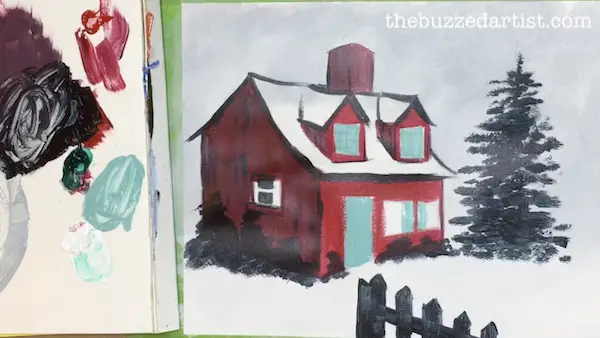
With your rinsed detail round (or rinsed shader), mix together green, white and a tiny bit of red to create a lovely teal color for the door, shutters and dormer windows. Once you got the color, proceed to add it to the house. Note the shutters on the house are next to one another, thus I painted them both that teal color. If you want to vary the shutters, go for it!
Step 12: Paint in the Door, Front Light and Window Framing
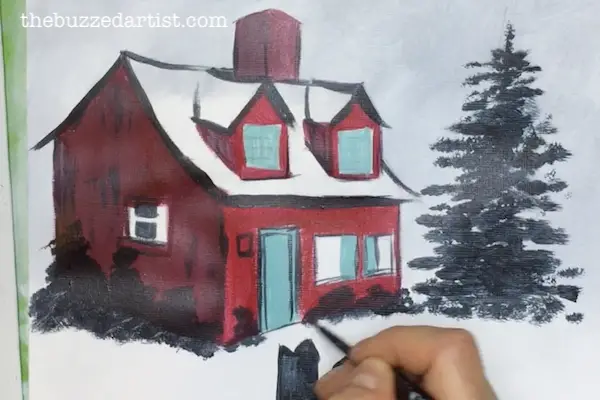
With your rinsed detail brush loaded with the darkest color (red+green), add in the door framing, which is basically rectangular in shape, at both the door outline and within the door itself. For the same level windows, make a rectangular box at the window bases as well as the outlines of the windows and shutters themselves.

Step 13: Paint in the Door Details
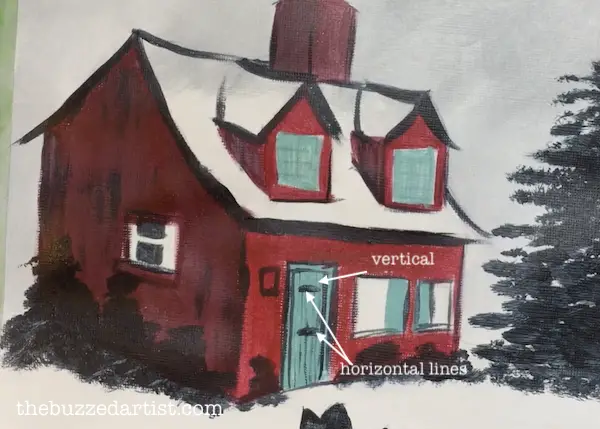
With the same brush and color, add vertical strokes onto the door using very gentle pressure. Once you got that, make the door decor by painting two horizontal lines, one toward the top of the door and one a bit below the middle of the door.
Step 14: Continue Filling Window and Shutter Details
With the same brush and colors, add vertical lines to the window shutters with gentle pressure (broken record much? lol)
Proceed to fill in the windows with the dark color as well.
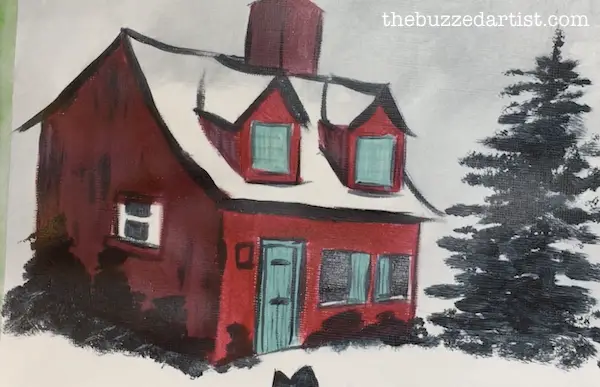
Step 15: Add Window Panes (front)
With your rinsed detail brush dipped in white, paint in the window panes, making sure to add a box around the windows (slightly smaller than the window outline itself). To make the panes, create two horizontal lines and two vertical lines with gentle pressure. If you can’t fit in all the lines, that is totally ok. Repeat painting in the window outline and panes for the dormers, by making 3 horizontal lines and 3 vertical lines.
Step 16: Paint side window framing
With the same brush and color, paint in the side window frame.
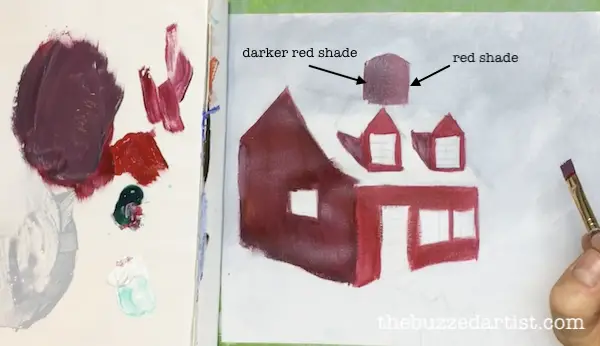
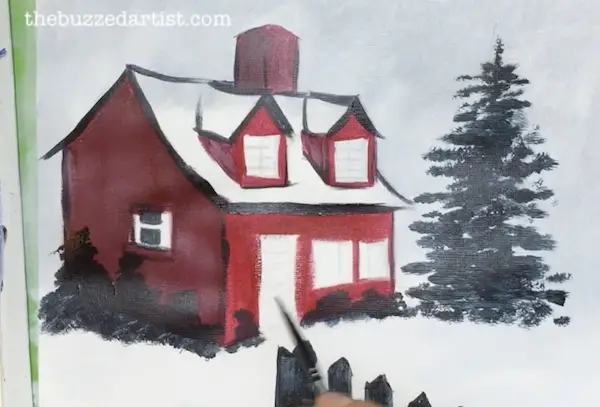
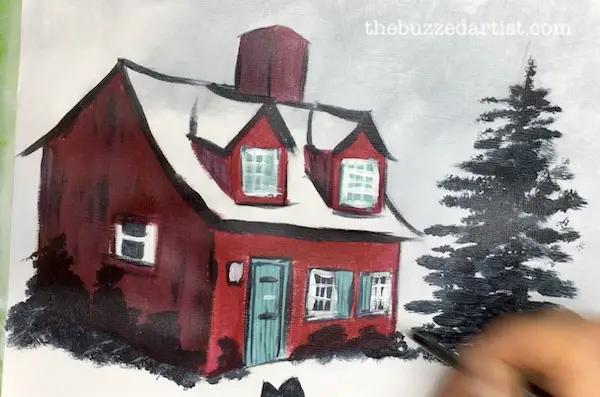
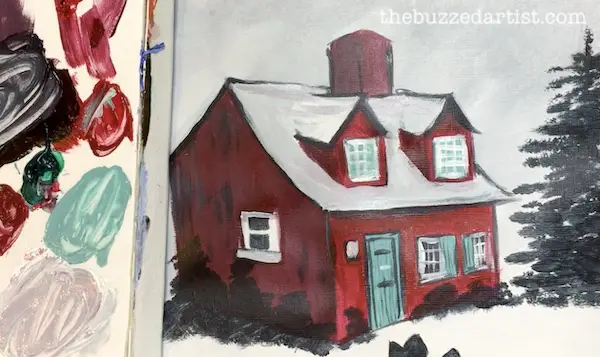
Step 17: Paint the Snow on the Roof
Ok, so you might be looking at your painting right now and thinking it looks too….sharp? This is the step where we dim that down a notch.
Mix white with a tiny combination of red and green to make a slightly darker shade of white. This will be the snow on the roofline. Proceed to paint this color all over the roof, especially going over some of the roof lines and hiding it a little.
Step 18: Paint the Roof Snow Shadows
With your un-rinsed brush, mix in a bit more red and green into the white to create a slightly darker shade of white. This will be the snow shadows for the roof. Proceed to add that color to the areas of the roof like under the dormers, along some of the roof line and dormer roof lines.
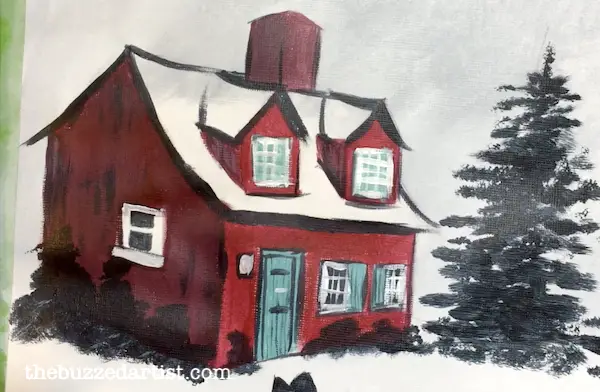
Step 19: Paint the Snow on the Fence
With the same color and brush, proceed to add snow onto the fence, making sure to concentrate the snow piles on the right most portions of the fence.
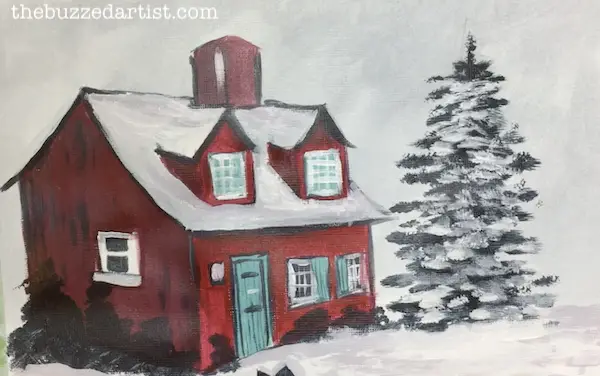
Step 20: Paint the Snow on the Fir Tree
With your rinsed shader brush dipped in white, position your brush tip horizontally at the top portion of the fir tree. Proceed to make a series of tapping motions with your brush working your way down the tree to create the snow that piles up on the boughs.
Step 21: Add Snow Highlights on the Ground
With the same color and brush, add the snow highlights. It’s totally ok to go over some of the snow shadow areas (in fact it’s encouraged!). If you decide you went too far with highlights, simply make the snow shadow color again (white + a bit of red and green) and add it back in.
Step 22: Add Snow to Bushes
With the same brush and color, tap the brush tip onto the side bushes to create the appearance of snow on them. In the event you add too much snow or want to adjust your side bushes (and in my case make them into mini fir trees, #happyaccidents), simply make the dark color again (red + green) and tap the tree color back in. Simple as that.
Step 23: Add Defining Lines to Dormer Window Panes
With the darkest color combo (red+green) and your rinsed detail round brush, paint in the dormer window panes. Up until now, those panes felt ill-defined, so these new lines will help build more contrast and definition.
With your rinsed detail brush with white, go over the same lines of the dormer window panes to help dim down the contrast a bit more. This is all tiny detail efforts to create more subtlety in the painting layering.
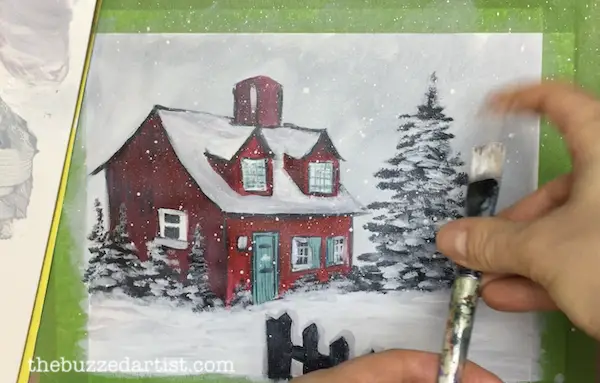
Step 24: Add Snow Flakes
Now, is the best part of this painting -adding the snow flakes! With your 3/4″ flat wash brush (or a toothbrush) dipped in lots of water, load white onto the bristles, go to your painting and flick back the bristles with your fingers to create tiny little paint dots resembling snow flakes. Since this is a snowy scene, add snow flakes all over the entire landscape (and go nuts!). Of course, if you want to go less with the flakes, that’s OK too. It’s your painting, love. Do what YOU want.
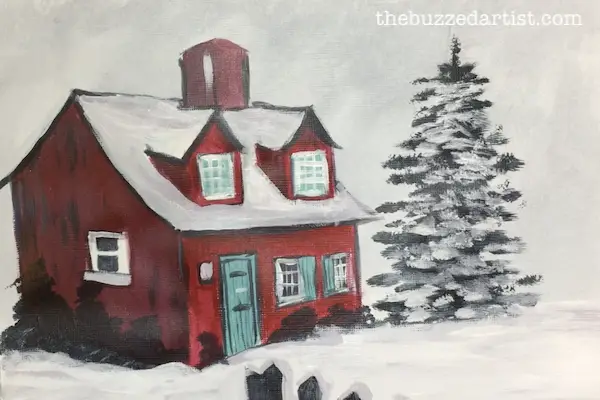
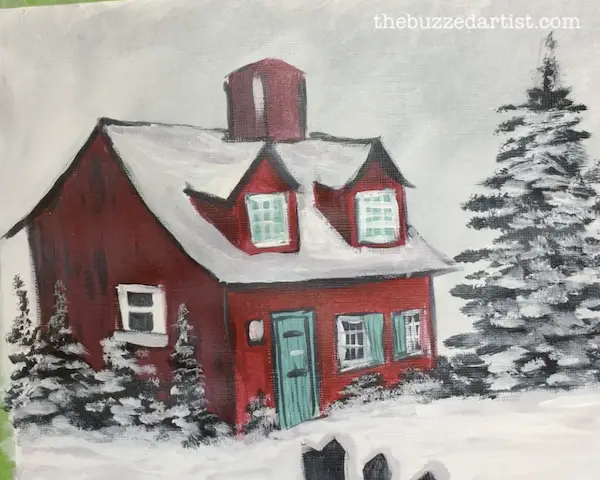
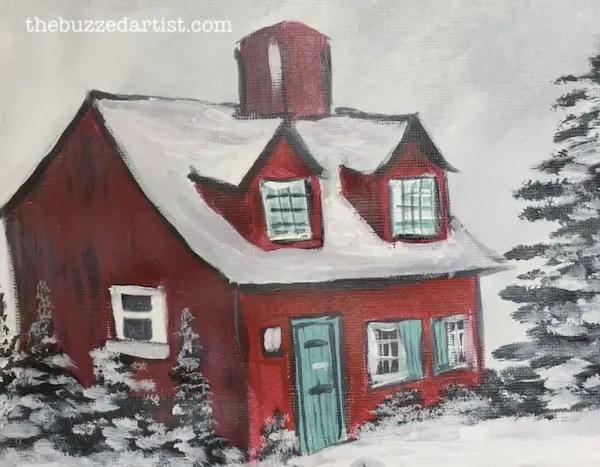
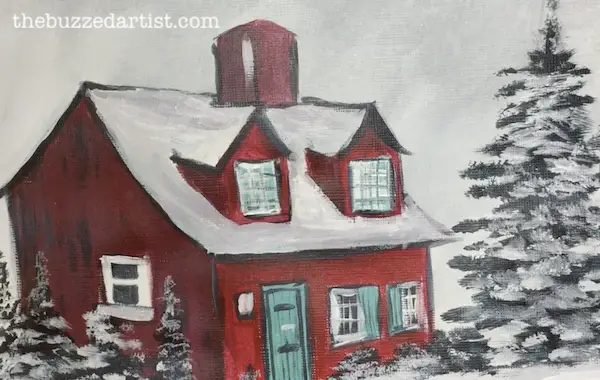
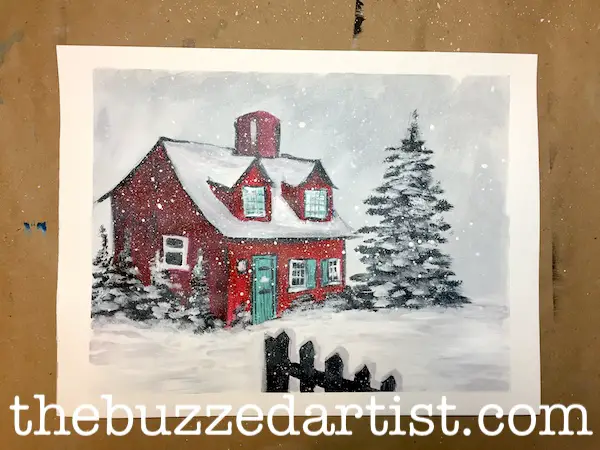
Step 25: Step back and admire your work, Queen!
and there you have it, a gorgeous winter scene that has that cute “New England-y” red house surrounded by white skies, fir trees, and snow flurries. You might even feel super inspired to cozy up by the fire with a hot beverage and some cheesy holiday specials. No judgement here.
Want the Full Tutorial with No Ads?
Now before getting started, there is no need to have killer drawing skills in order to do this painting. In fact, I already made a stencil of this house that you can use. If you want access to the stencil and step-by-step video tutorial, you can find it on my shop here.
Red House in Winter – Acrylic Painting Tutorial