An easy way to turn old crayons into a colorful work of pop art
[cp_modal id=”cp_id_9a74a”] [/cp_modal]
I am willing to bet the last time you even CONSIDERED using crayons was probably a few decades ago when you were a wee kindergartner getting jiggy with your Disney coloring book.
So, I can understand it’s been a hot minute.
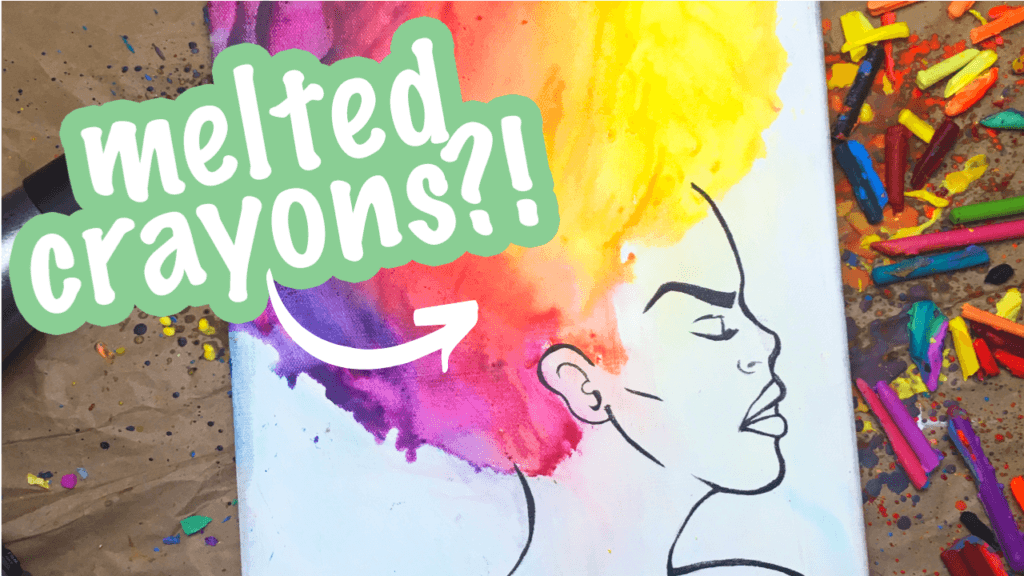
But, in my art reveries, I have recently discovered the fun and reimagined impact crayons can have on a canvas – especially when they are melted!
Ok, here me out.
If you absolutely love making or watching acrylic paint pour (ya know, the literal hypnotic pouring of paint onto a canvas), then you might want to explore the fun world of melted crayons.
Crayons are primarily made of wax with integrated pigments. And when applied to a high heat source, that wax can melt, creating a myriad of fun, colorful possibilities – plus, it’s therapeutic as hell to watch.
In an effort to try new things and push out of my comfort zone, I decided to give melted crayon art a go – and totally fell head over heels into the entire creative process! Watch my full video below on how I use melted crayons to create gorgeous art!
How to Do Melted Crayon Art
Step 1: Prepare your work surface
I cannot stress this enough, Queen Bee. Seriously. When it comes to playing with melted crayons, that sh*t gets EVERYWHERE, at all angles. So be sure to lay down some paper cloths or other protective thingies on your work surface AND another propped vertically behind the canvas when lifted. You’ll thank me later!
Step 2: Paint desired silhouette

It’s time to paint your desired silhouette. I decided to go with a cool Pop art inspired facial side profile. I planned for the hair to actually be the melted crayon portion. This pretty mama is all drama, and ready to get some rainbow locks up in this beyotch!
[cp_modal id=”cp_id_9a74a”][/cp_modal]
Step 3: Pick out your crayon colors

At this point, you’re ready to choose your crayon colors. I decided to go with the majority of the rainbow colors, or ROY G BIV (red, orange, yellow, green, blue, indigo, and violet). The only ones I did not end up using was the green colors.
Arrange your colors in complementary order (aka, in the ROY G BIV order). This ensures all those colors will blend super nicely together.
Step 4: Soak selected crayons in water and soap

Next it’s time to prep your crayons for gluing, which means we need to remove those cute little paper jackets they are wearing. Take your desired crayons and throw them into a cup of warm water with soap. Let them soak for about 30-40 minutes, so the paper gets super saturated and ready to gently fall off those smooth crayon bods.
Step 5: Remove paper jackets from crayons

After their super lovely soak, remove the paper jackets from the crayons. You’ll know it’s ready when the jackets easily peel right off. If there is still a bit of a struggle, put that crayon back in its watery prison for another 5-10 minutes and then try again.
Step 6: Add painter’s tape to select areas of canvas

We are ready to add painter’s tape to our canvas. I did this mainly to guide the unpredictable flow of the melted crayon rivers, but also to prevented any wax from the glue gun to mess with the actual canvas and cause unnecessary bumps and messes.
So basically, place the tape wherever you DON’T want to see wax. Period.
Step 7: Hot glue crayons onto tape in desired pattern

Then it was time to hot glue our crayons to the taped areas on our canvas. I placed the crayons in order of their complementaries (ROY G BIV) and also oriented them such that the pointed tips of the crayon faced the direction of where I wanted the crayon to flow. For example, if I wanted the flow of the crayon to veer right, I pointed the crayon tip to the right.
Step 8: Prop the canvas and use heat source to melt crayons

Grab your heart source (I used a good ol’ hair dryer), and then go to town. Seriously. The more crayons you got, the more hours of immersive creativity you can find!
My tip for you would be to point the hair dryer or heat source in a direction you want the crayon to flow and splatter. Pointing the hair dryer at a 90 degree angle to the canvas will cause it to splatter everywhere, so tilt your heat source so the crayon can better flow in that direction without all the mess.

You can take this opportunity to move and tilt your canvas at any angle to get the right flow going. Be creative here and have some fun becoming one with the canvas and heat source!
Step 9. Remove Painter’s Tape and Clean Up

Once you got a majority of the color onto your canvas, it is time to remove the painter’s tape and do some clean up work.
I found that removing the painter’s tape left me lots of opportunities to go into little areas and add spots of crayon color, and using the heat source to smooth out any remaining crayon lumps and bumps.
What if I miss a spot or two?

[cp_modal id=”cp_id_9a74a”][/cp_modal]
If you are looking to spot fill various areas of your canvas that is devoid of crayons spatters, you can simply grab a crayon stick, hover a heat source over the desired area and crayon, and move the stick around to spread the melting wax.
Note: You may want to use tongs or a special tool to give your hands some distance from the heat source.
What if you get melted crayon in an undesired location?
If you’re a human like me, you probably will be making large, fun messes with your crayon art, cuz I most certainly did. One thing I did notice was the occasional splatter of wax onto certain parts of my canvas that I did not want.
One easy way to remove those unwanted splatters would be hold your heat source over the affected area and once melted, use a cloth or paper towel to wipe off the wax. The wax is still hot enough to wipe clean off, without really leaving a pigment behind!
The creative possibilities are endless, and I most certainly got a boost in my creative spirit!


What do you think of crayon art? Would you ever attempt it? Comment below and let me know!
Related Posts
- How to avoid muddy colors when mixing
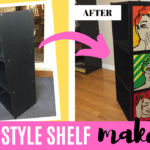
- Upcycling an old bookshelf with a pop art flair
- Upcycling thrift art into pop art