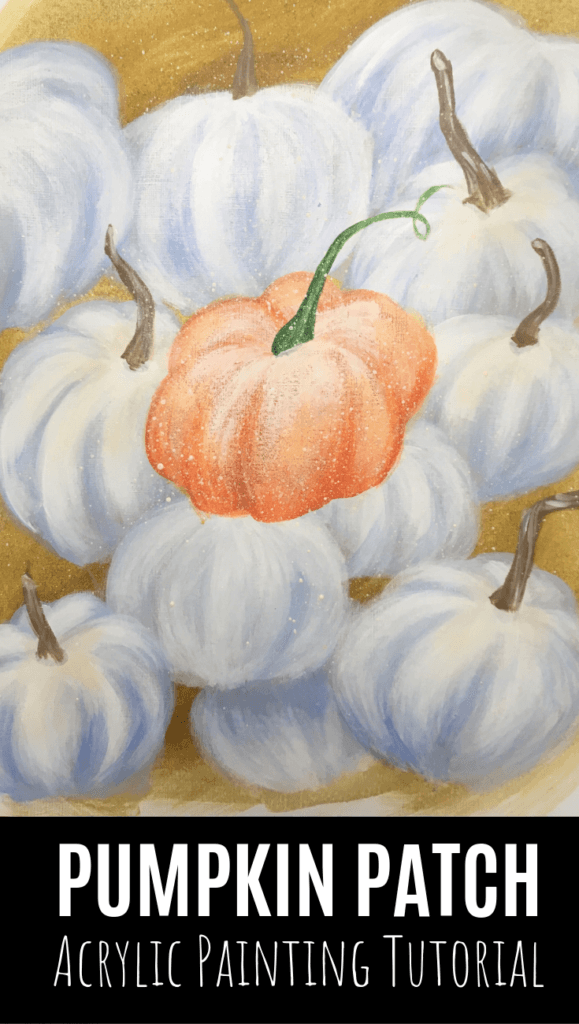
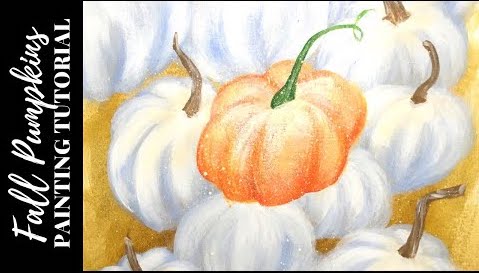
In the fall pumpkins acrylic painting tutorial, you will learn how to get started with composing, creating tonal values and painting an entire Halloween-inspired theme, featuring a white pumpkins and a central orange pumpkin.
Disclaimer: some links used in this post are affiliate links, which means I’ll earn a small commission if you purchase using my links at no extra cost to you. I only recommend products I think will be helpful to you and bring you one step closer to creating beautiful acrylic masterpieces!
👉 Want to host a paint party with this tutorial? Here is exactly how you can set up a fun DIY paint party at home.
Pumpkin Patch Painting Supplies
Brushes Used
- 1/2″ Flat Wash Brush
- #2 Flat Brush
- #2/0 Detail Round Brush
- Toothbrush (optional)
Paints Used
Pumpkin Patch Painting Steps
Follow these step-by-step instructions on how to paint your very own pumpkin patch painting.
Want the Full Tutorial (with no ads)?
If you want to get the entire step-by-step painting tutorial (without ads) & supply list, check out this painting class here.
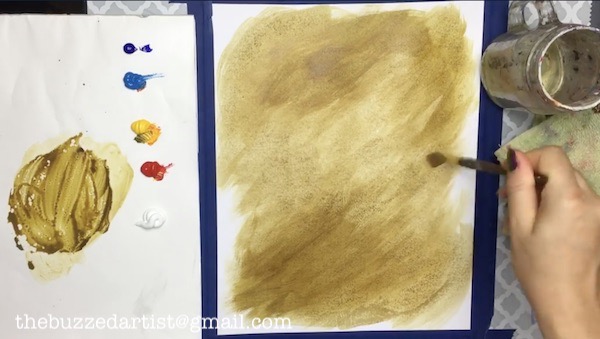
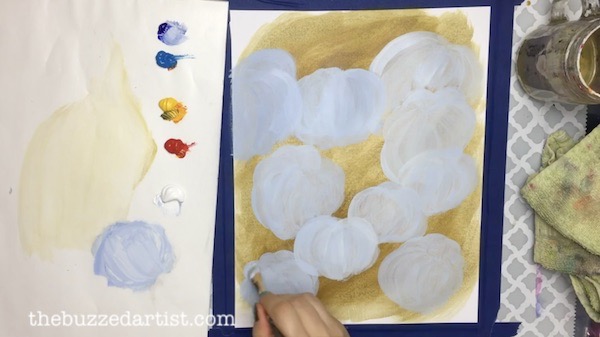
Paint in the Background
With your flat wash brush dipped in water, mix together yellow, a bit of red, and a tiny bit of blue. Then begin to fill in the majority of your background using a variety of side strokes with your brush – this helps create a nice texture and movement in your art. Periodically dip your brush in water to help thin out the paint and create some tones. Once done, let your background dry for 5 minutes.
Paint in the White Pumpkins
First, we will paint in the white pumpkins. With your rinsed flat wash brush, mix together a bit of ultramarine blue and white paint to create a whitish-blue color.
To paint in your pumpkin, think about painting it in with ridges in mind – painting it in sections. Aka, think lots of “C” shapes done over and over until the entire pumpkin body is made.
With your brush at its tip, paint in your first “C” shape (about 3″ long)- this represents the first pumpkin ridge. Then, next to the first ridge, repeat again to make your second “C” shape, making it slightly bigger. Repeat this with one more “C” shape to make 3 ridges representing the left side of the pumpkin. Then to make the other side of the pumpkin, simply make a slightly smaller reverse “C” shape touching the previous ridge. Repeat this 2 more times to create the right side of the pumpkin.
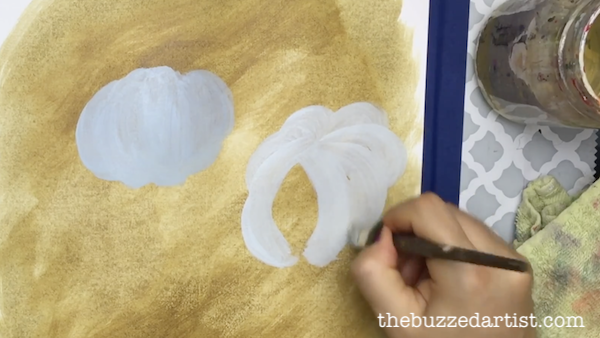
You’ve just made your first little pumpkin! Repeat these steps to create lots of different pumpkins in the scene.
Painting in White Pumpkins at Varying Angles
In addition, I did paint some pumpkins that appear at a different angle, which means some of the back pumpkin ridges are visible. To make this, make the “C” shape for your first pumpkin ridge. Then, create another C shape that starts at the tip of the first ridge and ends at the halfway point of the first ridge. This creates the illusion of a ridge that is towards the back of the pumpkin. To continue this, create another small “C” that starts at the tip of the second ridge and ends about 2/3 of the way of the second ridge.
To make the back-most ridge, create a small curved line (upside down “U” shape) that starts at the point of the first ridge and ends about 1-2″ away to the right.
Then at the same center point of the first ridge, create a backward “C” shape that is slightly bigger than the ridge next to it. Then, create another series of backward C shape ridges, each increasing in size, until the entire pumpkin shape is filled in.
Now that you’ve got the hang of making pumpkins at various angles, experiment and have fun filling your background with lots of little pumpkins like I have.
Painting in the White Pumpkin Highlights
It’s time to add more depth to our pumpkins with highlights.
So with your flat wash brush dipped in a bit of white, we’ll begin at the center of a pumpkin. Very much like the previous step of creating ridges, look at one ridge of the pumpkin and with the brush tip, create a “C” shape, making sure to not go all the way to the bottom of the pumpkin. This will create the lightest portion of the pumpkin ridge. Repeat this step on each of the pumpkin ridges and on all the white pumpkins you currently have in your painting.
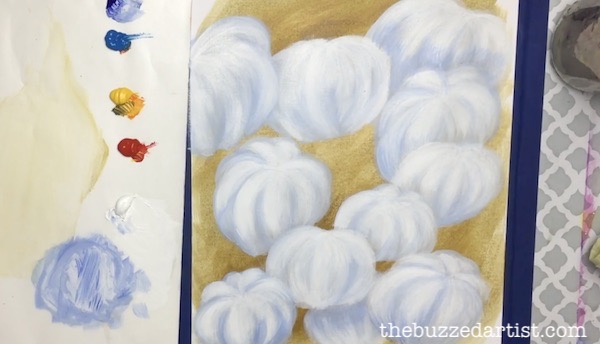
Painting in the White Pumpkin Shadows
With your flat wash brush, mix ultramarine blue with a bit of white to create a light blue- this will be our pumpkin shadow. Then dry brush onto the bottom areas of the pumpkin ridges following the “C” shape as you do so. I chose to add a bit of this blue color in between the ridges to really accentuate the ridge itself. This will help to create a bit more contrast and shadow to your pumpkins.
At this point, feel free to go back and forth adding shadows and highlights using the steps above. Layers are good!
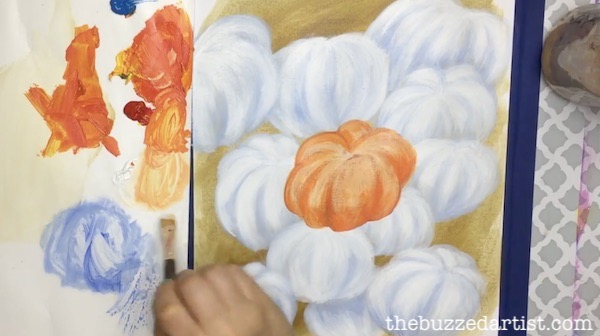
Painting in the Orange Pumpkin
With your flat wash brush, mix together yellow and a bit of red to create an orange color. Then add in a bit of white to slightly lighten it. This will be the color of our one pumpkin in the patch that is standing out from the rest. I decided to place mine in the center of the canvas, but you can choose to place your orange pumpkin anywhere you like.
To begin, we’ll make the first ridge of the pumpkin. Start by painting an oval shape (~3-4″) to represent the pumpkin ridge closest to the viewer. Then, using the “C” and reverse “C” shapes from the previous steps, create your ridges coming off that oval shape, making sure they all share the same starting and end points.
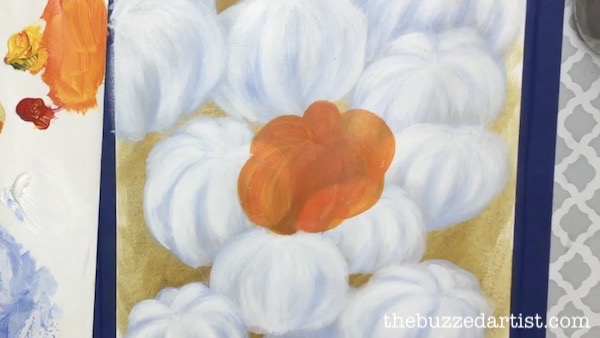
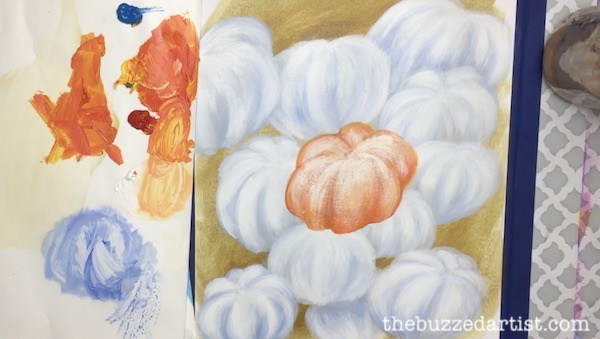
Painting in the Orange pumpkin highlights
With your wash brush, grab white with a little bit of orange to create a light orange color for the lighter areas of the pumpkin ridges. Dry brush the color onto each of the pumpkin ridges.
Going back in, mix a bit more orange into the white to create a slightly darker shade of orange from the highlight. Repeat the previous step to add a layer over the lighter shade of orange.
Note: To help get to the pumpkin edges, you can switch to your flat brush to get those smaller areas of the painting.
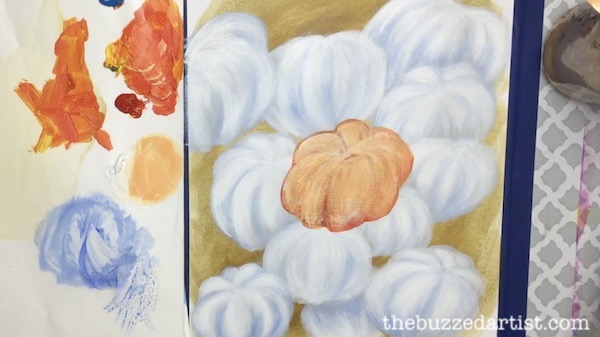
Painting in the Pumpkin Shadow
With your flat brush, mix red and yellow to make an orange color. Paint the bottom areas of the pumpkin ridges to create the shadowy areas of the pumpkin.
I like to go back and forth with my colors to help layer and create even more depth. I even went ahead with my flat wash brush loaded with a bit of white, to dry brush the color onto the top portions of the pumpkin ridges to help create the pumpkin highlight.
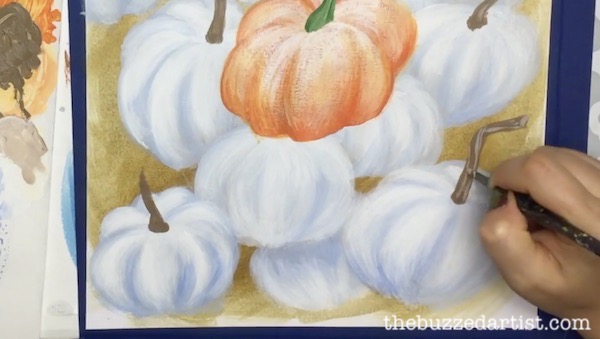
Painting in the Pumpkin Stems
We will begin to add the windy stems of all the pumpkins. First, let’s start with the center orange pumpkin.
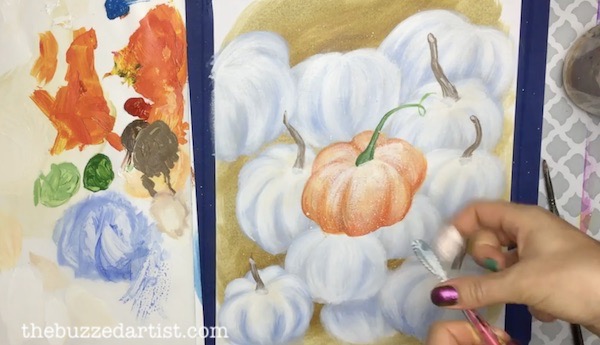
With your flat brush, mix together cerulean blue and yellow to create a green color. Then, go to the center of the orange pumpkin, paint in a thin stem that moves upwards and curves in any direction you like. I even added a curly-Q to the stem tip for a little extra whimsy.
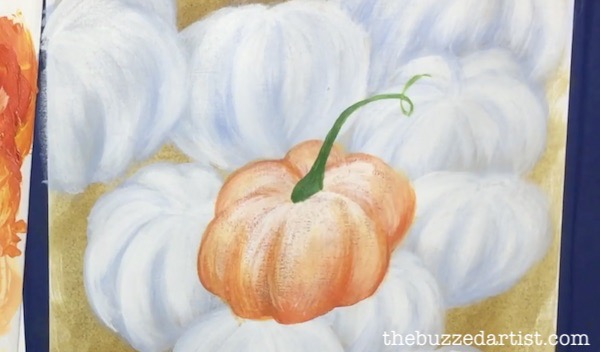
WIth the same brush, take that green mixed with a bit more white to create a ligther shade of green. Paint in a few small highlight stripes in the middle and side of the stem.
Painting in the Rest of the Pumpkin Stems
With your rinsed flat brush, mix together yellow, red, and cerulean blue to create a brown color. Then add a bit of white to lighten the color up. Then, head over to the white pumpkin centers and paint in the stems.
You can be super creative with how windy or bendy each of these stems are.
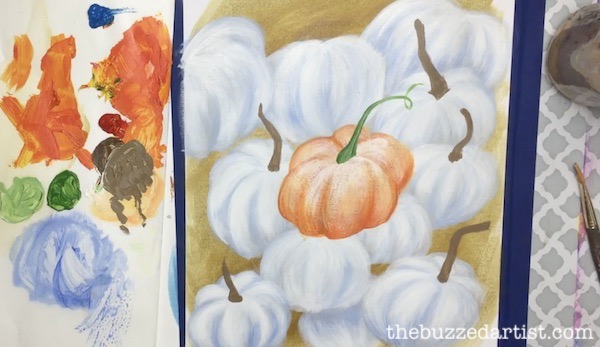
Then, with your flat brush dipped in a bit of white, you can add some stripes on each of the stems, following the stem shape for added dimension and depth.
Painting the Details
With your flat wash brush dipped in a bit of white, you can lightly paint over the area where the stem and pumpkin body meets to help blend the two areas together. Totally optional but I liked how this made everything seem a bit more organic.
Adding a Cool Splatter Effect
Lastly, we’ll add a fun little splatter effect. With either your flat wash brush or a toothbrush, dip your brush into a water mix of white. Then, flick the bristles over the canvas to create a series of tiny dot splatters. Do this as many times as you like until you’re satisfied with the final result.
You now have a beautiful pumpkin patch, rich with depth, color, and whimsy!
Want the Full Tutorial (with no ads)?
If you want to get the entire step-by-step painting tutorial (without ads) & supply list, check out this painting class here.
Enjoyed this? Make more Halloween paintings!