Halloween is probably the most popular season of the year. It’s not only about costumes and candy; it’s also a festive time when we get to celebrate our love for horror movies and ghoulish characters.
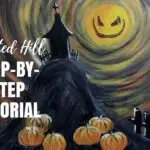
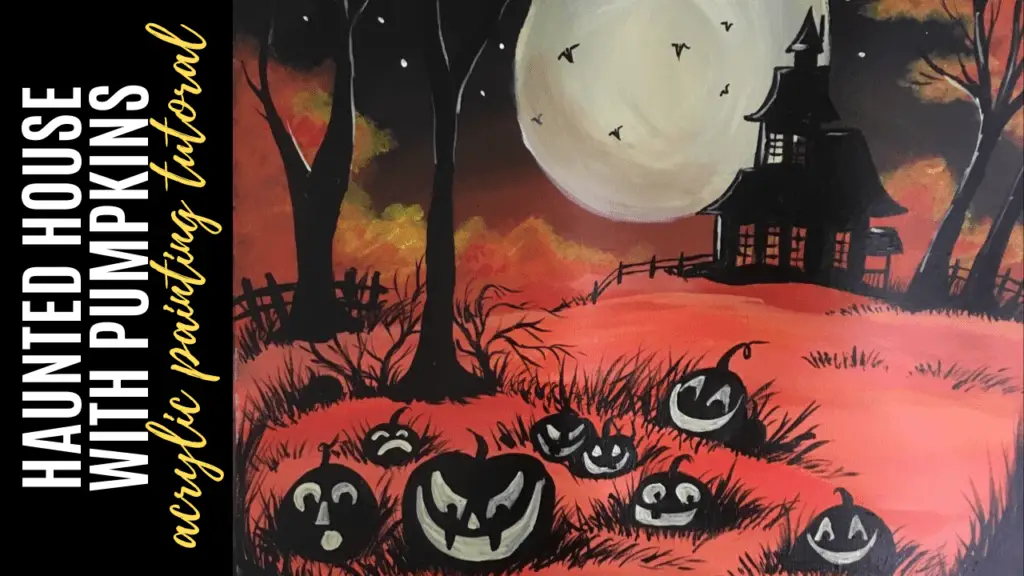
And if you need some artistic inspiration to celebrate this spooky season, you’ve come to the right place. In this blog post we’re painting a spooky haunted house scene with a yard of trees and pumpkin in this step-by-step acrylic painting tutorial made just for beginners.
Disclaimer: some links used in this post are affiliate links, which means I’ll earn a small commission if you purchase using my links at no extra cost to you. I only recommend products I think will be helpful to you and bring you one step closer to creating beautiful acrylic masterpieces!
👉 Want to host a paint party with this tutorial? Here is exactly how you can set up a fun DIY paint party at home.
HAUNTED HOUSE ON PUMPKIN HILL PAINTING SUPPLIES
- 11″x14″ Canvas Paper or pre-gessoed canvas (aligned vertically).
- Tracing paper (for transferring stencil)
- Charcoal pencil (for transferring stencil)
- Palette, palette paper or plate for mixing paint
Brushes
Paints
- Mid-Yellow Acrylic Paint
- Scarlet Red Acrylic Paint
- Mars Black Acrylic Paint
- Titanium White Acrylic Paint
- Acrylic Paint Basics
HAUNTED HOUSE ON PUMPKIN HILL PAINTING STEPS
Follow these step-by-step instructions on how to paint your very own haunted house on pumpkin hill painting.
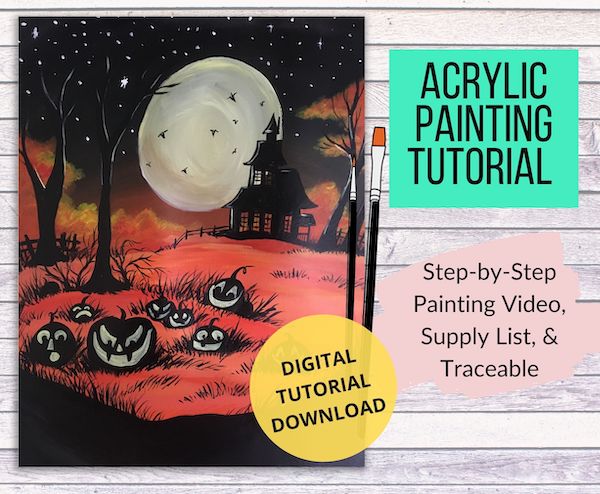
Want the Full Tutorial + Traceable stencil (with no ads)?
If you want to get the entire step-by-step painting tutorial (without ads), printable supply list and stencil, check out this painting printable here in my shop.
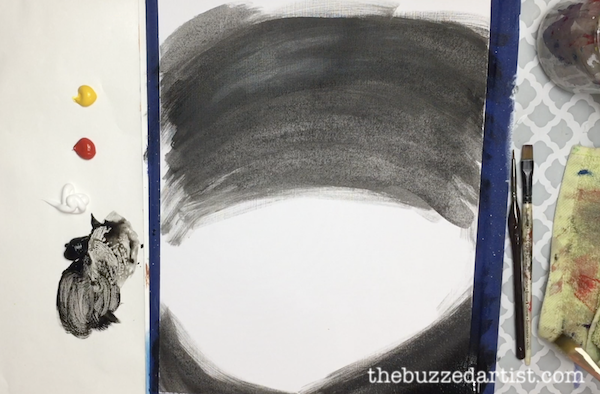
Paint in the background
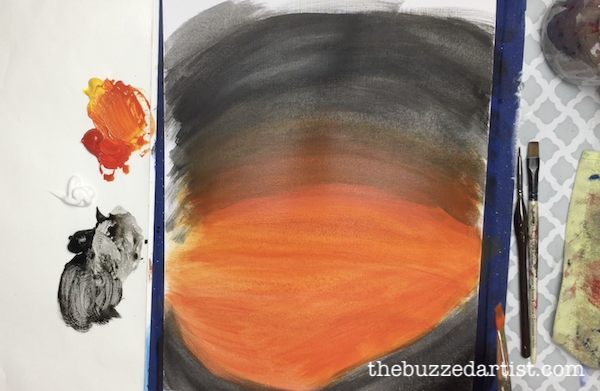
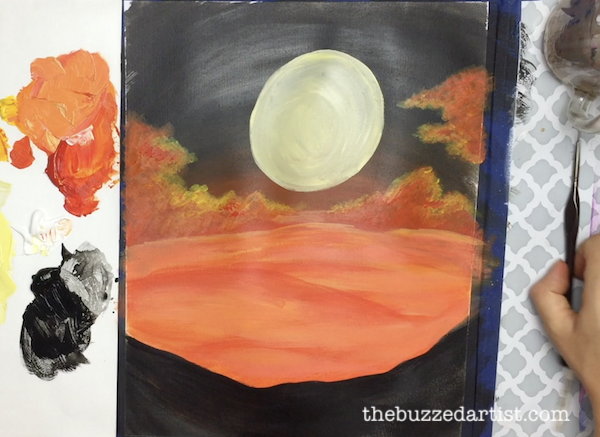
STEP 1: Using your flat wash brush dipped in water, load your brush with black. At the top portion of the canvas, begin by making brush strokes in the shape of arcs (curve side down). Proceed to cover a good deal of the top-most portion of the canvas. Going to the bottom of the canvas, repeat the arc brushstrokes with the curve side facing up this time. Be sure to leave some white areas towards the middle of the canvas for later.
STEP 2: With your rinsed flat wash brush, mix together equal parts red and yellow to make orange and load it onto your brush. Then, going to the middle portion of your canvas (where it’s white), add your brush strokes following a horizontal arc shape making sure to blend them into the black areas of the canvas as well. Proceed to fill in all the white areas on the canvas.

STEP 3: Once your background is almost dry, go back in with your flat wash and orange color, this time to the intersection of the black with the orange background. It’s pretty stark at the moment, but this can be fixed with more layering of orange. So using the same horizontal arced strokes, proceed to paint over the intersection edge, blending the strokes into the black and into the orange sections. Repeat this step until you get a smooth-ish looking blend.
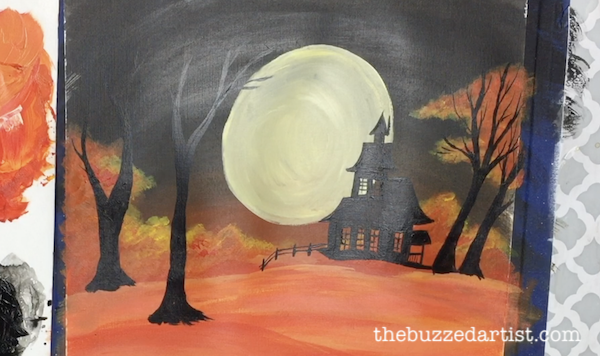
Add in the moon
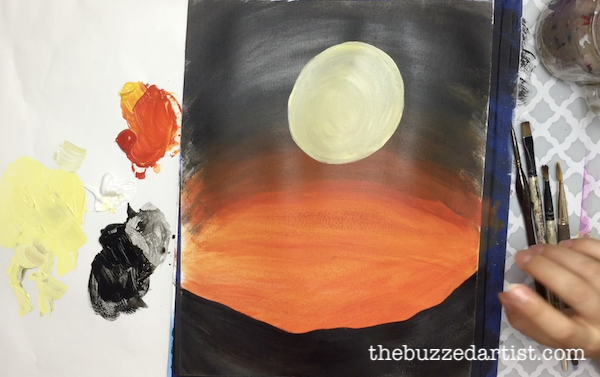
STEP 4: With a clean flat wash brush (or a filbert brush), mix together equal parts white and yellow and load onto your brush. This will be the color of the moon. At about 1.5″ down from the top center of the canvas, paint a circle that is about 3″ in diameter. If you want a bigger moon than this, go for it. Once you got the shape down, fill in the rest of the moon.
Establish the horizon area
STEP 5: With your clean shader brush, mix together equal parts red and yellow and add a tiny bit more yellow to get an orange color. Load the color onto the brush and paint a horizontal line with a slight downward curve about halfway on the canvas -this helps establish the horizon.
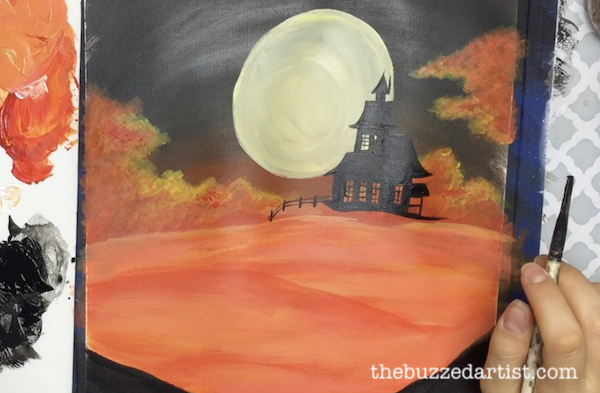
Paint in the Bushes + Tree Leaves
STEP 6: To make the surrounding leaves in the scene, with your brush, repeatedly dab the brush above the horizon line you made – making clusters of “furry” looking shapes. Repeat this several times at various heights. These will be the bushes and leaf clusters of surrounding trees. Be sure to do this on both the left and right side of the scene.
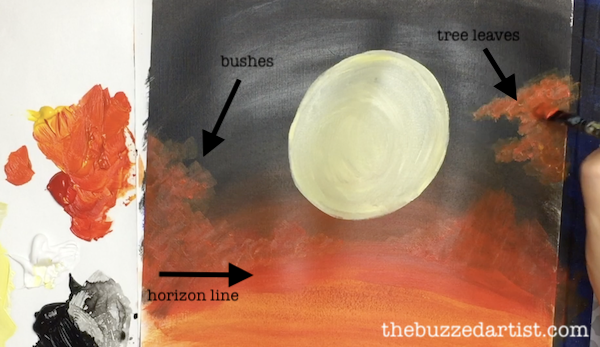
Note: As your paint layers dry, go back and repeat the dabbing technique to intensify the colors and make them more opaque.
Add the Moon Highlights onto the Bushes
STEP 7: With your flat brush dipped in yellow, proceed to add highlights to the tops of the bushes you just painted by dabbing multiple times. For the left bushes, concentrate the dabbing on the top portions and on the bottom portions for the tree leaves. For the right bushes, concentrate the dabbing on the top left portions.
You can always go back to previous colors to help blend things about a bit and simply repeat the brush strokes.
Create Interesting Hill Details
STEP 8: With your cleaned flat wash brush, mix together orange using lots of yellow and a bit of red with a dab of white. This will make a lighter orange color. Then using the tip, add in a few horizontal curved strokes just below the horizon line. As you go further down from the horizon line, continue the stroke direction but also use the brush side to put on more color. This helps create more tonal value to your field.
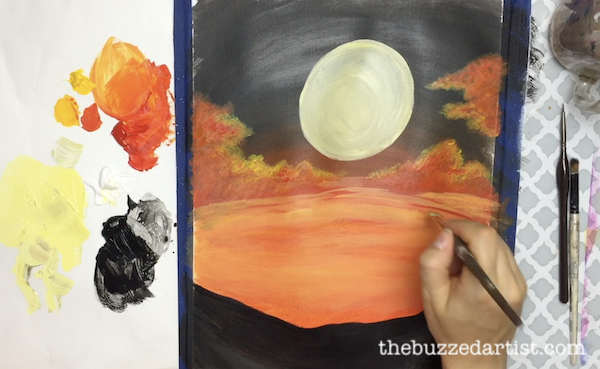
Be sure to vary your lines and not entirely cover your landscape. If you happen to lose some of the previous layers, remix your orange color without white and repeat the same strokes to establish some color back in.
STEP 9: To paint in some hills on the field, simply make a darker orange color (equal parts red and yellow), load it onto your flat brush and using the tip make some curvy lines to represent the hilly parts. You can add as much or as little as you like.
Paint in the Haunted House
STEP 10: Using your haunted house traceable, place and trace onto your canvas paper. If you need directions on how to do this, read this helpful post on transferring stencils to paper.
Once your entire house has been transferred, proceed to fill it in using black acrylic paint and a detail brush.
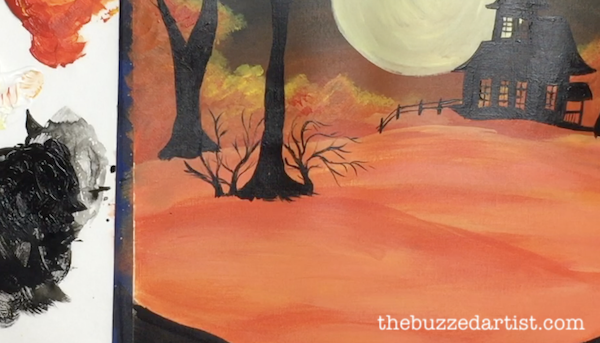
Paint in the Trees
STEP 11: Now it’s time to add our spooky trees. You can choose to paint as little or as many trees as you like. Totally up to you. To paint a tree, grab your flat brush dipped in water and black paint, and place it tip down at a vertical position at the spot your want your tree trunk to begin. Proceed to paint a bit of a curvy line going up and release pressure when you get to the end of your desired tree line height. You just made the first half of your tree.
STEP 12: Repeat this same technique an inch to the left of the first line. This creates the left part of the tree.
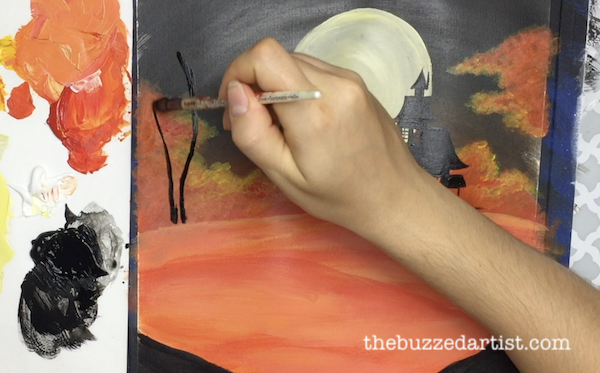
STEP 13: Then fill in the small spot between the two lines to form the trunk. You can also thicken the lines of the tree branches as you do this too. You can also add more branches by angling your brush tip or switching to your detail round brush and lightly creating lines from the base of the first branch out, forming a Y shape.
STEP 14: To make the tree base and roots, angle your brush 45 deg from the base of the tree trunk and create a small curved line until it meets the ground. Repeat this on the other side as well.
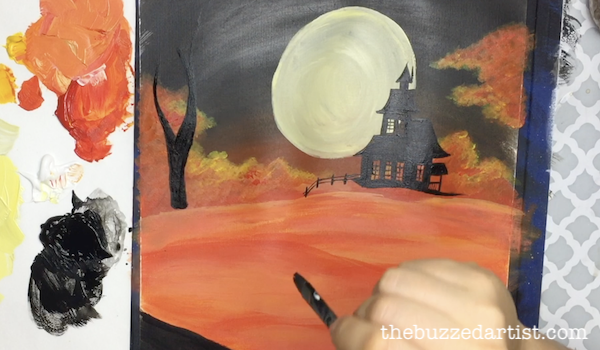
STEP 15: Now that you’ve made your first tree, proceed to add even more trees throughout the scene.
Paint in the Shrubs
STEP 16: Load black onto your wet detail brush and at the base of one of the trees, create a short wavy line going up. From there, proceed to add lots of little wavy branches, using the same techniques as you did with the tree branches, making multiple Y shapes. The curvier the branches get, the better.
Add as many as you like for your scene.
Paint in the Grass
STEP 17: Continuing with your loaded detail brush, add small curved lines along the base of the trees and shrubs to create grass. Be very light with your brush as you do this to get very thin wispy-looking grass. Create as much grassy patches as you like.
STEP 18: In the lower area of your canvas that has the black section, proceed to paint some grass along those areas as well.
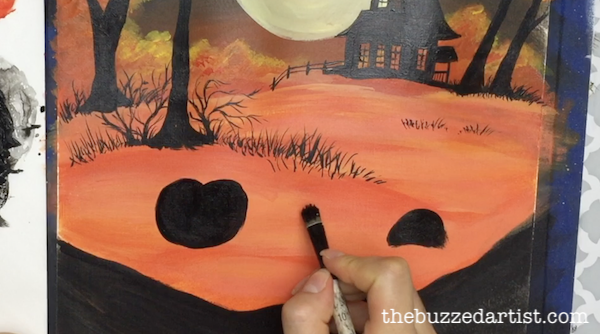
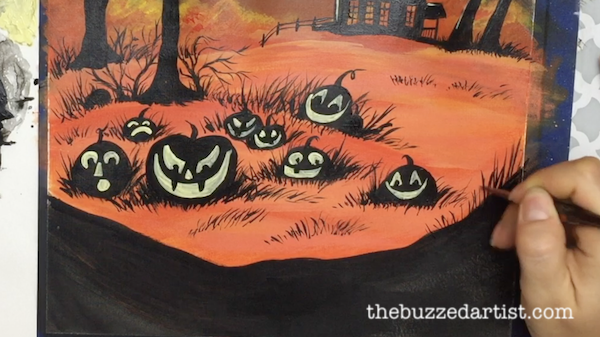
Paint in the pumpkins
STEP 19: With your filbert brush dipped in black paint thinned with water, pick a spot you want to place your pumpkin and make a C shape with your brush and fill it to make it look like a half moon. Repeat this on the other side with a backward C shape and then fill in. If you want to make a half pumpkin (or a pumpkin that looks more nestled in the grass), just paint a half-moon shape. Create as many pumpkins as you like for this scene.
STEP 20: From there, you can go ahead and add varying pumpkin stems using your detail round brush and black paint. You can make short stems, long stems, and even stems that have a curly-q on the end for an added whimsical look.
Details Details Details
STEP 21: With your detail round brush, add more grass around the pumpkins to make them appear more nestled in the landscape. Have fun with this – the more grass patches you can add, the better.
STEP 22: Once you got all the pumpkins painted, it’s time to paint in their ghoulish jack-o-lantern faces. Using white mixed with a bit of yellow and a detail round brush, paint in the eyes, nose and mouths of your pumpkins. I decided to give each of my pumpkins different expressions, from happy to spooky.
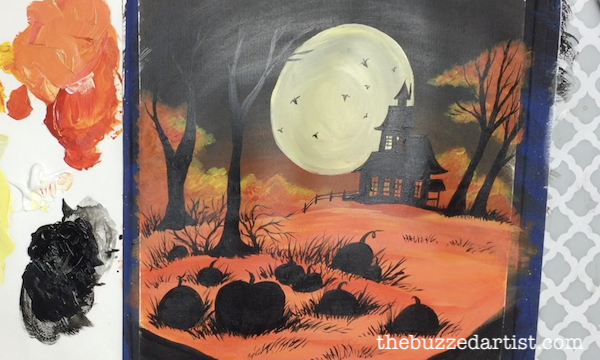
STEP 23: I even went ahead and added bats to the moonlit scene as well as some white highlights to the tree trunks, branches and portions of the haunted house to really show off how bright the moon is. To top it off, I added white dots all over the dark sky to create stars.
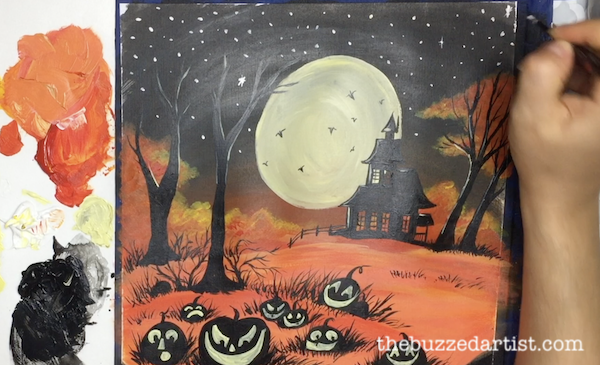
When you’re satisfied, step back and admire your work!
Want the Full Tutorial + Traceable stencil (with no ads)?
If you want to get the entire step-by-step painting tutorial (without ads), printable supply list and stencil, check out this painting printable here in my shop.
Enjoyed this? Make more Halloween paintings!