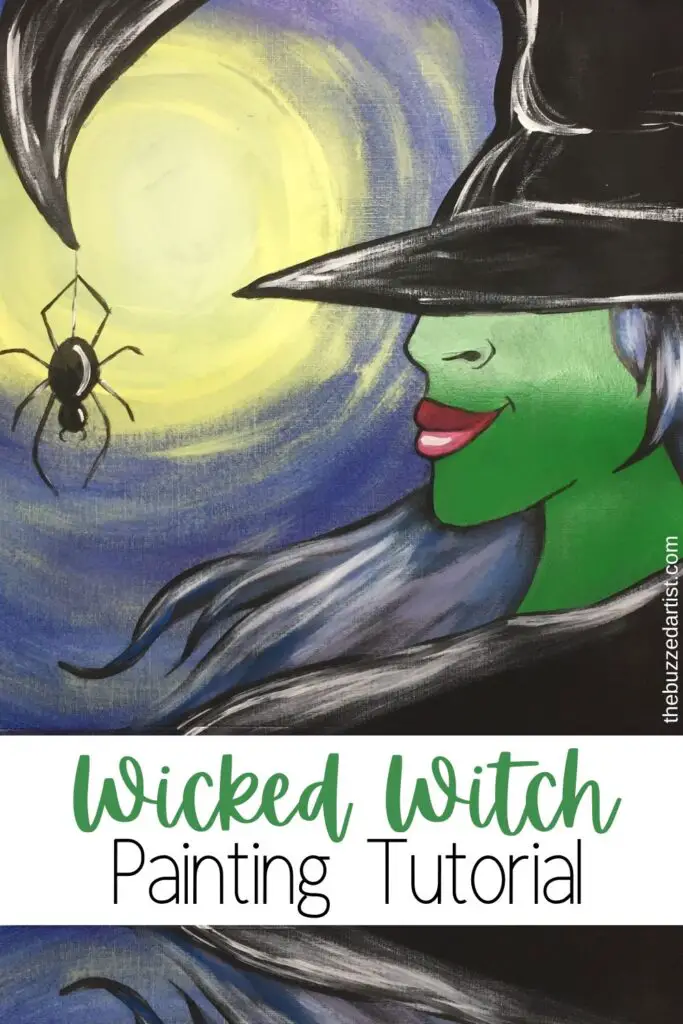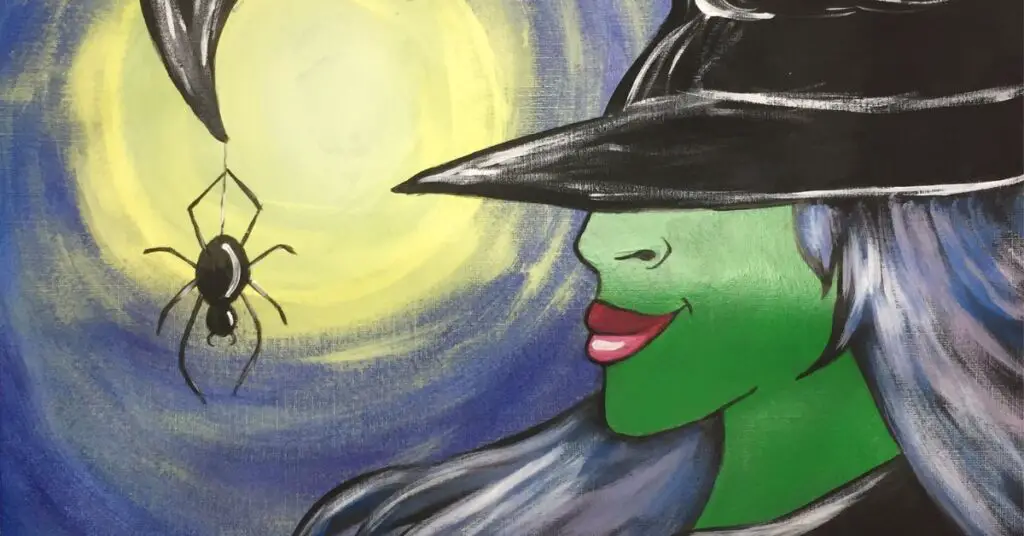
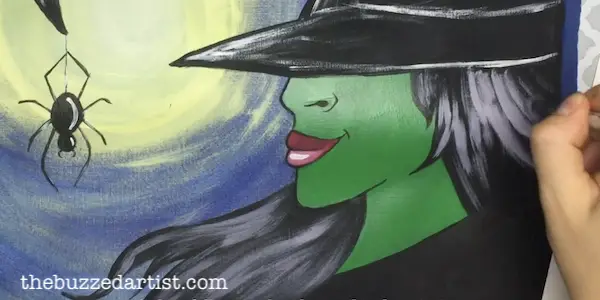
I always secretly loved the wicked witch of the west from the Wizard of Oz movie. She’s a total wildcard, plays by her own rules and has a special fondness for brooms, floppy hats, and those glittery red shoes. So obviously, she was the perfect subject to paint.
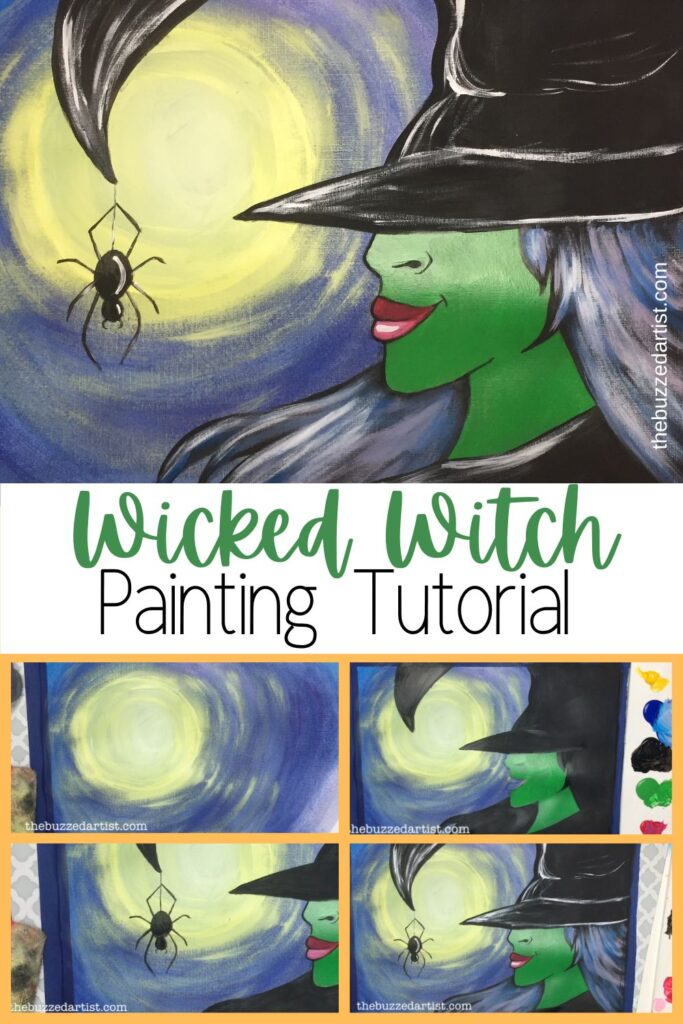
If you’re looking to add a little something cool and creepy to your home, this wicked witch of the west painting is just the thing. Learn to paint a smiling witch wearing a floppy hat covering her gorgeous wavy locks – and her little spider pal hanging form her hat tip, in this easy step-by-step acrylic painting tutorial for beginners.
Disclaimer: some links used in this post are affiliate links, which means I’ll earn a small commission if you purchase using my links at no extra cost to you. I only recommend products I think will be helpful to you and bring you one step closer to creating beautiful acrylic masterpieces!
👉 Want to host a paint party with this tutorial? Here is exactly how you can set up a fun DIY paint party at home.
WICKED WITCH OF THE WEST PAINTING SUPPLIES
- 11″x14″ Canvas Paper or 11″x14″ pre-gessoed canvas
- Tracing paper (for transferring stencil)
- Charcoal pencil (for transferring stencil)
- Palette, palette paper or plate for mixing paint
Brushes
Paints
- Mars Black Acrylic Paint
- Primary Red Acrylic Paint
- Primary Yellow Acrylic Paint
- Primary Blue Acrylic Paint
- Titanium White Acrylic Paint
- Cadmium Green Hue Acrylic Paint (optional)
WICKED WITCH OF THE WEST PAINTING STEPS
Follow these step-by-step instructions on how to paint your very own wicked witch of the west in all her green glory.
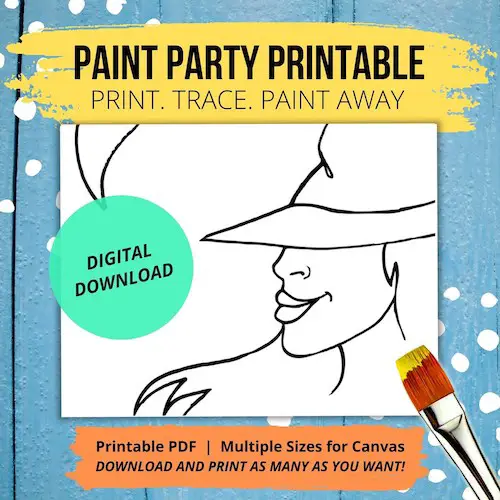
Want the Traceable Stencil?
Download this printable stencil here and let’s get to painting!
Paint the background
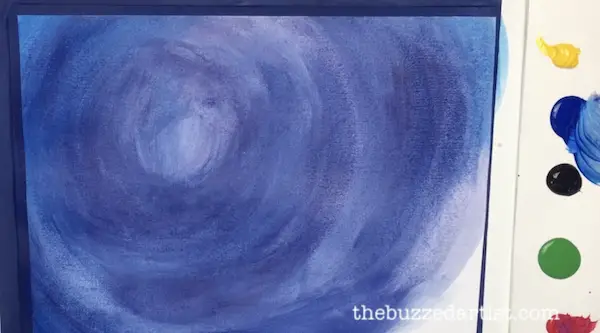
STEP 1: With a flat wash brush mixed with blue with a bit of red to make a light purple, begin by creating a circle about 4-5″ from the left edge of the canvas and 3-4″ from the top of the canvas. From there, continue making that circle bigger and bigger and fill in your entire canvas, making sure your brush strokes follow that circle shape. I went back in with a bit more blue on my brush to add some color accents.
Paint in the Moon
STEP 2: With your rinsed flat wash brush, grab some white and at the center of the circle you created, create a moon. I made mine about 3-4″ in diameter, but you can make this as big or as little as you like.
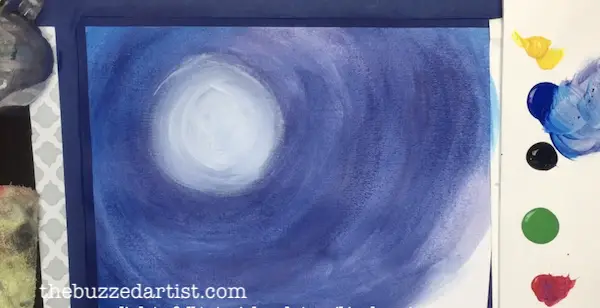
STEP 3: Then using the same brush, grab a bit of yellow and mix it with white. Go back to your moon and fill it in using the same circular brush strokes. I made this circle about 4-5″ in diameter.

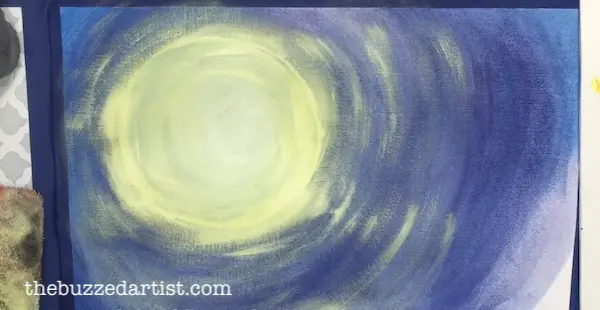
STEP 4: Once you’ve completed the moon, using your brush tip without adding any water, lightly dry brush on lines emanating from the moon, following the moon shape. This creates a haunting glow.
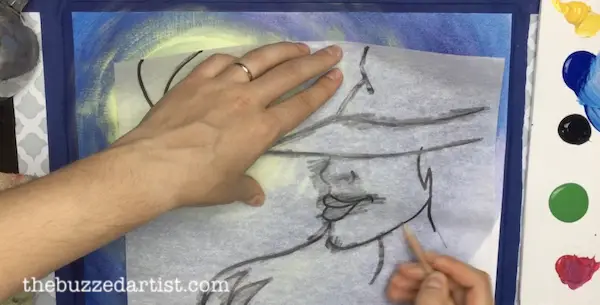
Paint in the Witch
STEP 5: Using your wicked witch traceable, place and trace onto your canvas paper. If you need directions on how to do this, read this helpful post on transferring stencils to paper.
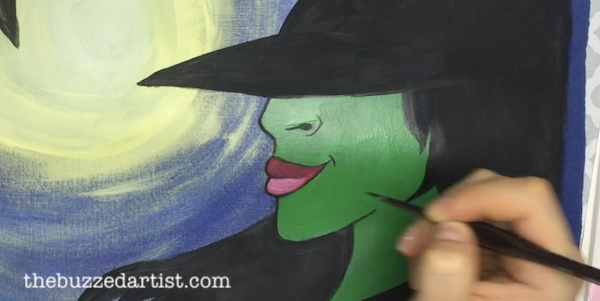
STEP 6: With your filbert brush, grab green or mix equal parts yellow and blue to make green and block in her skin color.
STEP 7: With your rinsed filbert brush (or flat brush) loaded with black, block in the rest of the witch including her hair, tunic, and hat (but not the lips).
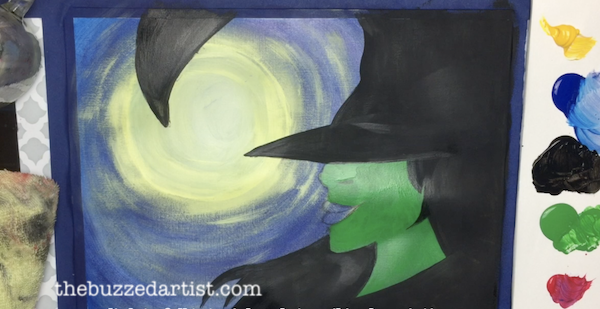
STEP 8: Using your detailed round brush, mix together red with a bit of white to make the lip color. Load onto your brush and block in the lips. Go back and mix a bit more white into the red mix to create a pink color, load this on your brush and block in the lower lip.

STEP 9: With your rinsed detail round brush dipped in black, start outlining the facial features, including the jaw line, lips, nose, and nostrils.
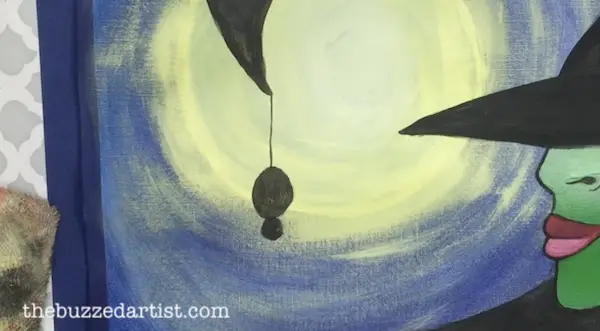
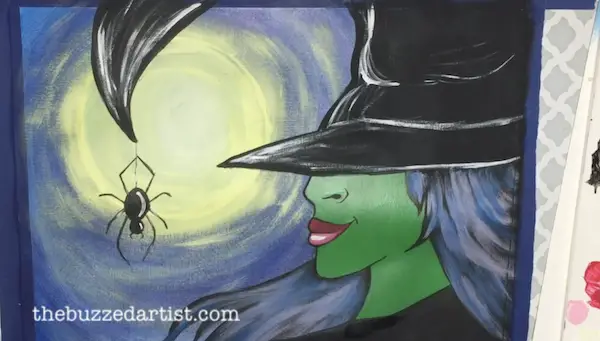
Paint in the Spider
STEP 10: With your detail round brush loaded with black, make a 3″ vertical line going down from the tip of the witch hat. Then create an oval shape (2″) and a smaller circle (1/2″) under it using your filbert brush. This is the body of the spider.
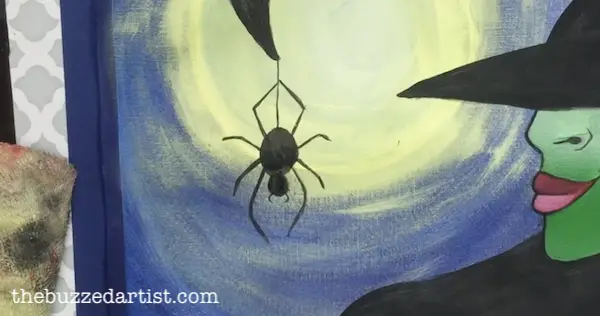
STEP 11: Then with your detail round brush, create 8 lines coming out of the spider to represent the legs. Two are holding onto the spider thread, two at the front, and 4 on either side of his body. I also added two little pincers at his head.
Add Highlights
STEP 12: Using your rinsed detail brush loaded with white, add some highlights to the spider body, the witch hat, and lips, making sure to follow the shapes.
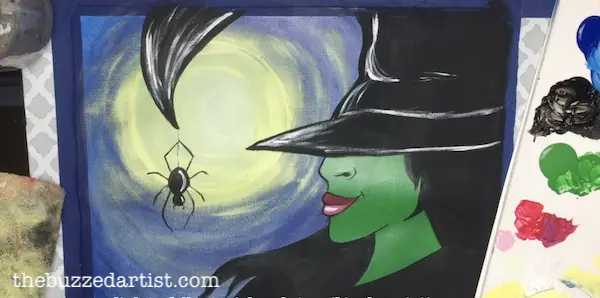
STEP 13: Then using a filbert brush and your choice of color, add several strokes in witch’s hair to create some depth and texture. Be sure to follow the overall shape of the hair to create a wavy look. I ended up using a combination of lavender (blue with a bit of red + white) and light blue (blue + white).
Final Touches
STEP 14: Finally, with your rinsed filbert brush loaded with white, add in white highlights to portions of the hair and her tunic to create more dramatic contrast.
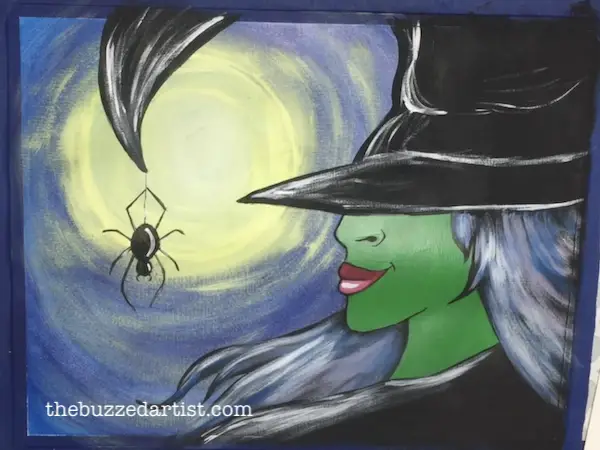
Once you’re happy with it, sit back and admire your work.
Want the Traceable Stencil?
Download this printable stencil here and let’s get to painting!
Enjoyed this? Make more Halloween paintings

Pin it for later! ⤵