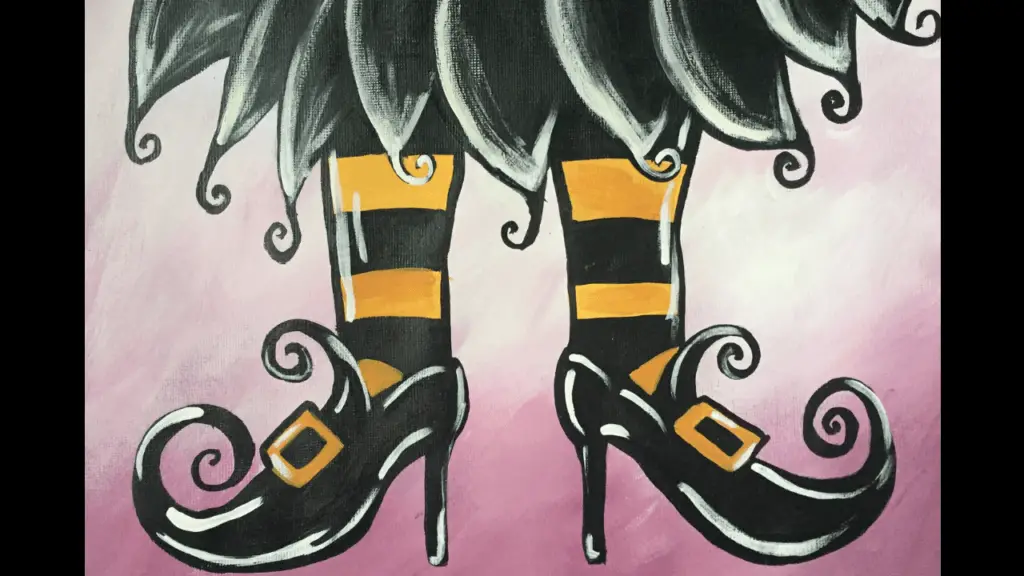
Witches have always been mysterious and otherworldly beings that love to frequent the Halloween season – so we HAVE to paint them!
In this easy tutorial post, we’ll be painting a pair of witch’s shoes that’ll bring a spark of whimsy and old-fashioned spooky fun to your home. Moreover, this tutorial is perfect for artists who love painting Halloween-related stuff and want to learn some new techniques in the process.
If you fall into any of these categories then keep reading and pay close attention because you’re about to discover something brand new today.
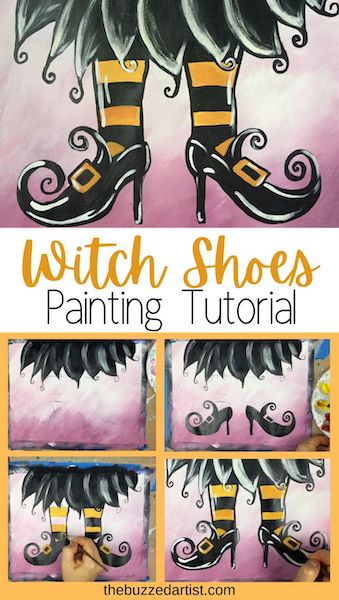
Pin it for later! ⤵
Disclaimer: some links used in this post are affiliate links, which means I’ll earn a small commission if you purchase using my links at no extra cost to you. I only recommend products I think will be helpful to you and bring you one step closer to creating beautiful acrylic masterpieces!
👉 Want to host a paint party with this tutorial? Here is exactly how you can set up a fun DIY paint party at home.
WITCH SHOES PAINTING SUPPLIES
Brushes
Paints
- Mars Black Acrylic Paint
- Primary Red Acrylic Paint
- Primary Yellow Acrylic Paint
- Primary Blue Acrylic Paint
- Titanium White Acrylic Paint
- Acrylic Paint Basics
WITCH SHOES PAINTING STEPS
Follow these step-by-step instructions on how to paint your very own witch shoes & stocking painting.
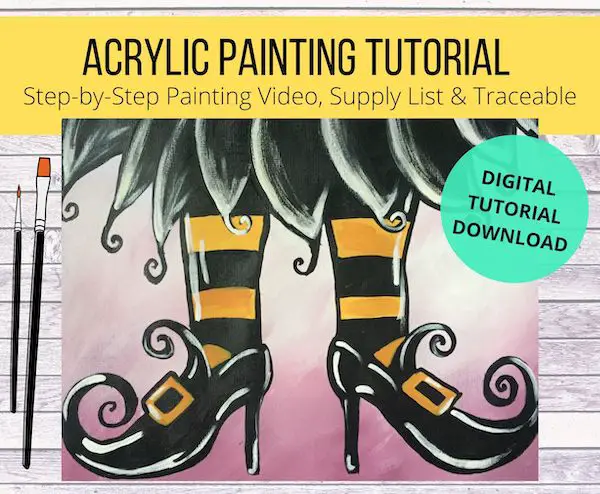
Want the Full Tutorial + Traceable stencil (with no ads)?
If you want to get the entire step-by-step painting tutorial (without ads), printable supply list and stencil for 3 standard canvas sizes, check out this painting printable here in my shop.
STEP 1: Using your witch shoes traceable, place and trace onto your canvas paper. If you need directions on how to do this, read this helpful post on transferring stencils to paper.
STEP 2: Grab a sharpie or black paint with a detail brush – and outline your stenciled drawing. This will help you to see where everything is after you paint in your background.
STEP 3: Mix equal parts red and blue to make purple- then mix in a bit of white to lighten the color to a light violet. Using your flat wash brush, paint on your canvas paper using a mix of diagonal strokes. Be sure to cover your entire canvas.
STEP 4: Without washing your brush, grab a bit of white and paint using diagonal strokes on the center portion of your canvas. This will be the “highlight” focus of your painting.
STEP 5: Once your paint is dry, it’s time to fill in your witch’s outfit! Mix yellow with a little bit of red to make an orange color. With a flat brush, fill in some of the stripes on the stockings as well as the shoe buckles.
STEP 6: With a combination of your filbert and flat brush, grab your black paint and fill in the witch skirt, shoes, and remaining stocking stripes.
STEP 7: Once your black paint is dry, it’s time for detail work. With your detail brush and black paint, go over the lines of the entire drawing – this will help clean up the painting and give it a cartoony-whimsical look.
STEP 8: Wash your detail brush and using white, add in highlights onto the skirt, stockings, shoes, and buckles. To create the highlights on the skirt, make sure to not have too much paint on your brush and wipe off any excess on your palette before painting. This will help give your brush stroke a bit more subtlety and shade.
STEP 9: Step back and admire your work.