The easy 3-step guide for creating smoother, gradual blends with acrylic paint
When it comes to blending with acrylics, the very idea can seem utterly intimidating. No matter what you do or what brush you use, you keep running into the same problems over and over again: splotchy uneven paint strokes that blend in as well as a donkey in a dress at a dinner party.
How can you possibly create beautifully blended gradations that work SO WELL together? Is it magic? God-given talent?!
Lucky for us, the art of blending with acrylic paint is actually quite easy once you understand the techniques. No magic or mind-blowing talent is necessary.
Pin it for later! ⤵
When it comes to creating smooth blends and gradations with acrylics you need to keep three simple rules in mind:
- Colors need to cross into one another.
- Both paint colors must be wet (wet-on-wet)
- Layers! Layers! Layers!
Once you master those 3 rules, you can use this to blend all sorts of acrylic colors together to create a beautiful smooth gradient of color that will create that extra oomph in your painting. So let’s dive into each one and explain it a little further.
1. Blended colors need to cross into one another
The crossing of colors is a core concept I teach in my Paint Slapping Magic class (which you can try free for 1 month by clicking this link) because many artists hardcore struggle with letting go of their paint boundaries. They feel that every color needs to stay in its respective spot and not cross over into another color region.
Try this Class Free for 1 Month ⤵

If this is you….
stop that. Now.
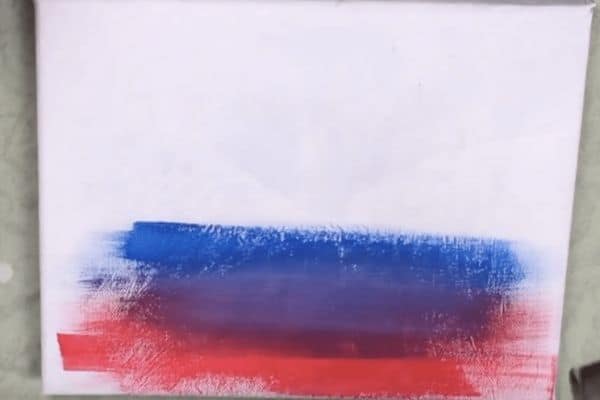
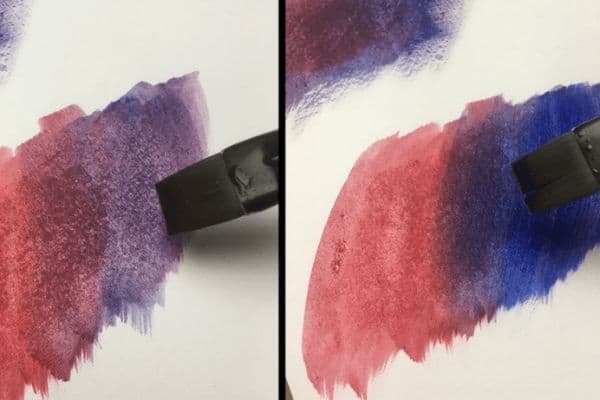
If you are looking to blend, two colors need to cross over into one another at some point before transitioning to their full colors. For example, if you have a red painted region but want to blend it into a blue region, you need to carry some of that red paint over into some areas of the blue region.
By doing this, the remainder of red paint on your brush mixes with the wet blue paint creating a slight color change (purple) that lends to the transition color.


Now I do want to make a big note about this: be cautious with the amount of paint you load onto your brush when blending.
Blending doesn’t require a lot of paint
Working with a blend does require a bit of finesse and gradual light applications of paint at a time. And this makes sense because you want to add bits of color at a time to help create gradual blends. But what I have seen from many beginners is the opposite.
They will load a huge glob of paint onto their brush and attempt to carry over that huge mass onto the other color region and start complaining their color blending is not happening. It just looks like a big splotchy mess.
Read More: My #1 Mixing Trick to Stop Paint From Turning Muddy Brown
Well, yeah of course it looks like a mess. You loaded waaay too much paint on that brush. That blend never stood a fighting chance. So, please please please don’t do that.
Instead, focus on working with a little bit of paint on your brush at a time. This may take some practice and self-control on your part, but you’ll be surprised at how much easier it will be to actually achieve a smoother blend transition.
2. Both paint colors must be wet for optimal blending
Often referred to as “wet-on-wet” blending really cannot happen unless both colors you are looking to blend together are wet. Plain and simple.
Considering the nature of acrylic paint and its drying time, you don’t have a lot of time to blend, and this is important to remember.
Related acrylic paint blending articles:
For example, if you painted a red region on one part of your canvas, worked on another area for 30 minutes, and then went back to that area to create a blend, you won’t be able to create a smooth transition to another color because that red layer of paint has already dried.
Paint cannot be blended when dry. The perfect time to create smooth gradations is when paint is wet.
What I usually like to do is work in small areas at a time, making sure the blends I want to make are done right. This may require a bit of planning on your part, but you will definitely save yourself a lot of time, paint, and headaches by working this way.

3. Use multiple layers for more natural, gradual blends
This is probably one of my most favorite things about acrylic paint – using multiple layers to create gorgeous smooth-as-silk blends. Yet, the very concept of creating more than just one layer seems to boggle so many beginners artists.
- Why would you want to create multiple layers?
- Aren’t you wasting paint?
- I already did this part. Why do I need to do it again??
The answer is simple: To create depth and realistic color blends.
Many artists create multiple layers playing off the colors from previous layers to create richer, vibrant color blends and transitions.
Even if you’re just working on a simple gradient, reworking the blended areas with layers is a great way to really nail down that transition area. There is nothing wrong with making multiple layers. In fact, I encourage it.
Let go of those preconceived notions and think about what is best for the canvas and then do it.
Can you use water to blend acrylic paint?
Yes! In fact, this is the perfect alternative to the knee-jerk reaction of wanting to add globs and globs of paint and smearing it like frosting on your canvas.
Using water can both help you regulate the amount of paint your are using and can also help you create much more subtle blends that you can build layer by layer.
Related: How to dilute your acrylic paint for better-looking colors
Depending on the amount of water you add, you can create varying paint opacities which can create different blending results.
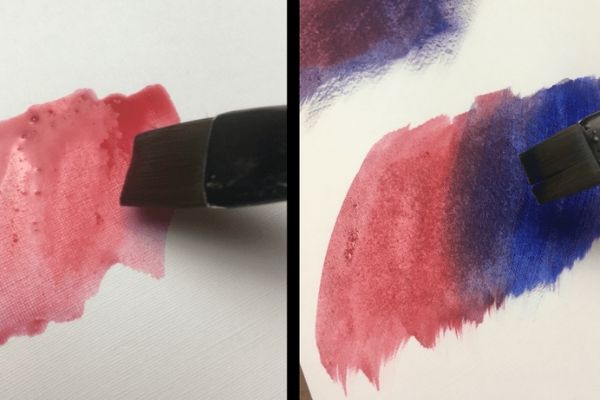
For example, let’s say you want to create a blend between red and blue.
If you are working with a semi-transparent color of red but using a transparent blue pigment, you can water down the red painted area to dilute it and then carry it over to the transparent blue region. Doing this creates a more subtle blended area.
Are there different rules when using water to aid in blending?
Nope, using water still follows the same three rules above; you just get the added benefit of better control. If you want to see a demonstration of how to use water to blend, be sure to refer to my acrylic painting video at the beginning of this post.
Are there better color blends than others?
Try this Class Free for 1 Month ⤵
Why is that?
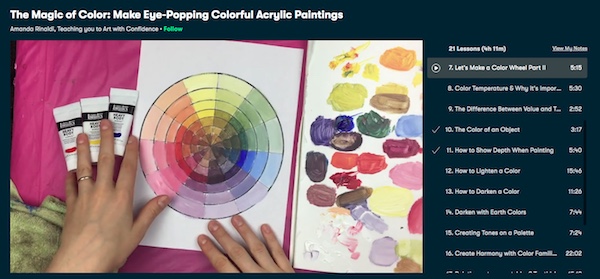
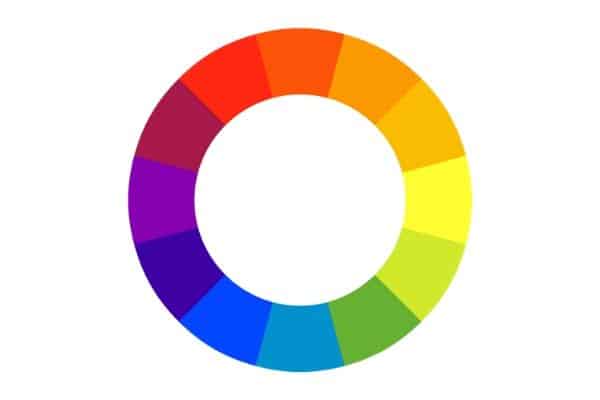
This is because colors that happen to fall on the same side or near each other of the color wheel have a more natural looking transition between one another, thereby creating smoother looking blends. Trying to create a smooth blend between two colors that are a lot further from one another, while possible, can introduce muddier blends, which can be a bit frustrating.
Read More: Best Trick to Avoid Muddy Colors when Painting
So if you’re looking to create optimal gradients that simply blend ever so gracefully from one color to another, consider choosing colors that are close to one another on the wheel.
Want to create head-snapping, colorfully vibrant paintings? Try my
See? That wasn’t so bad, right?
My final thoughts on blending with acrylic paint
Now that you know the rules and techniques behind creating good-looking blends, be sure to practice and put these into action. I will guarantee you will still make some mistakes, but that’s ok!
Blending does have a bit of a “feel” to it, which ever artist eventually learns and masters with practical application. Try painting a sunset background or making various color swatches in your art journal and take note of what worked and didn’t work, what paints you liked, what blends worked better, etc.
You’ll totally surprise yourself with what you will learn in the process.
What do you think of my blending tips? Did you learn something valuable? Comment “yes!” below and let me know!
More Art Related Content You Might Like:
5 Reasons Why Paint by Numbers for Adults Is Great for Sharpening Precision and Focus
Why Every Artist Needs to Do Reverse Coloring (and Finally Defeat Art Block)
7 Easy Tips to Improve Your Art Skills (and Make Better Art Fast)
Pin it for later! ⤵