Nothing excites me more than seeing those cute orange squashes glorifying the front porches, windows, and lawns every October. Pumpkins are simply magical – and Jack-o-lantern pumpkins bring that extra sense of whimsy to an already amazing spooky holiday. So obviously, we’ll be making our own pumpkin you can use every single Halloween.
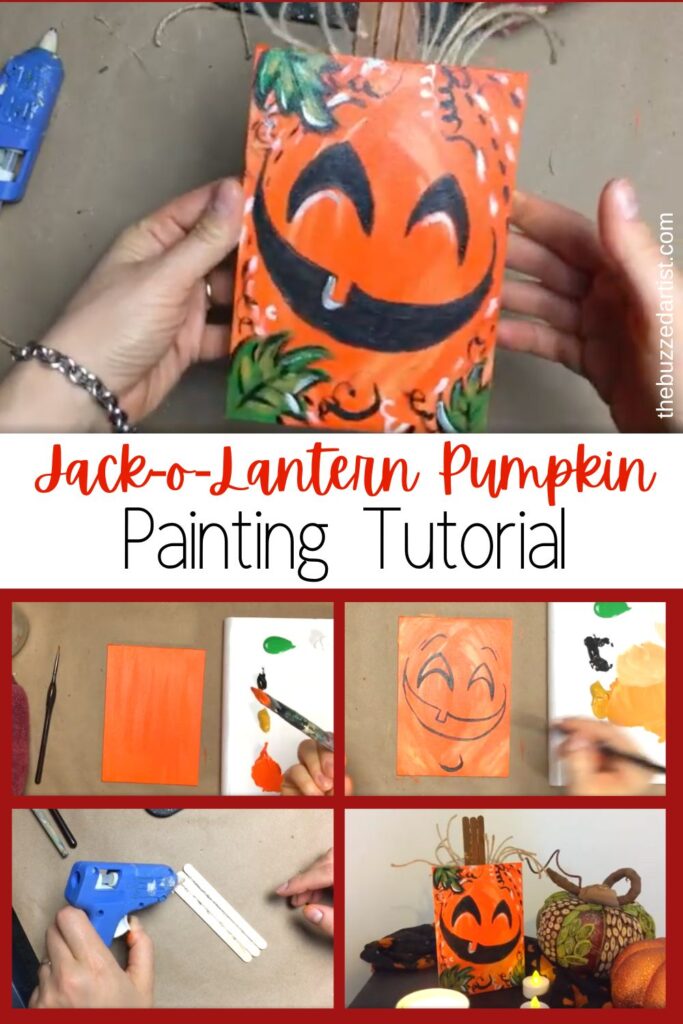
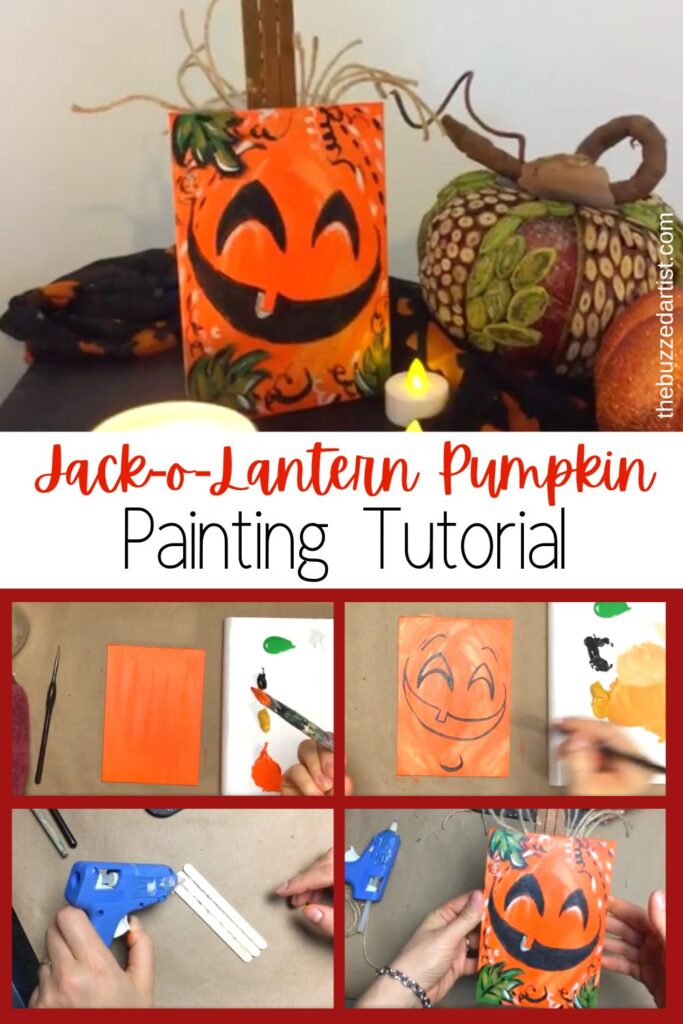
If you’re looking to add a little something cool and creepy to your home, this jack-o-lantern pumpkin painting is just the thing. Learn to paint a smiling jack-o-lantern with a large toothy smile and stems, in this easy step-by-step acrylic painting tutorial for beginners.
Disclaimer: some links used in this post are affiliate links, which means I’ll earn a small commission if you purchase using my links at no extra cost to you. I only recommend products I think will be helpful to you and bring you one step closer to creating beautiful acrylic masterpieces!
👉 Want to host a paint party with this tutorial? Here is exactly how you can set up a fun DIY paint party at home.
JACK-O-LANTERN PUMPKIN PAINTING SUPPLIES
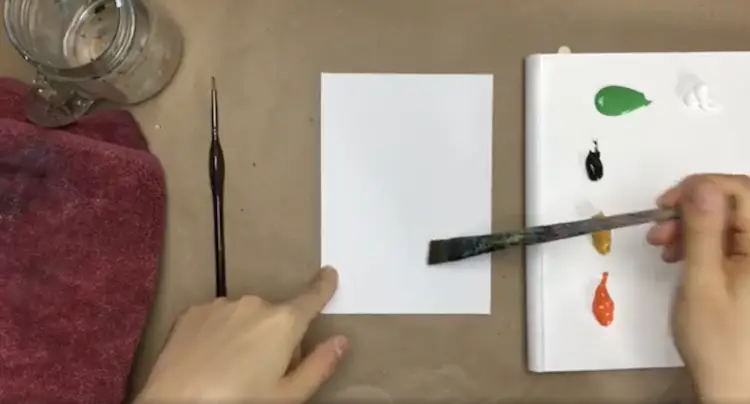
- 5×7″ Canvas
- 3 popsicle sticks
- glue gun
- Palette, palette paper or plate for mixing paint
- Twine (optional)
Brushes
Paints
- Mars Black Acrylic Paint
- Primary Red Acrylic Paint
- Primary Yellow Acrylic Paint
- Primary Blue Acrylic Paint
- Titanium White Acrylic Paint
- Cadmium Green Hue Acrylic Paint (optional)
JACK O LANTERN PUMPKIN PAINTING STEPS
Follow these step-by-step instructions on how to paint your very own jack-o-lantern pumpkin!
Paint the Pumpkin
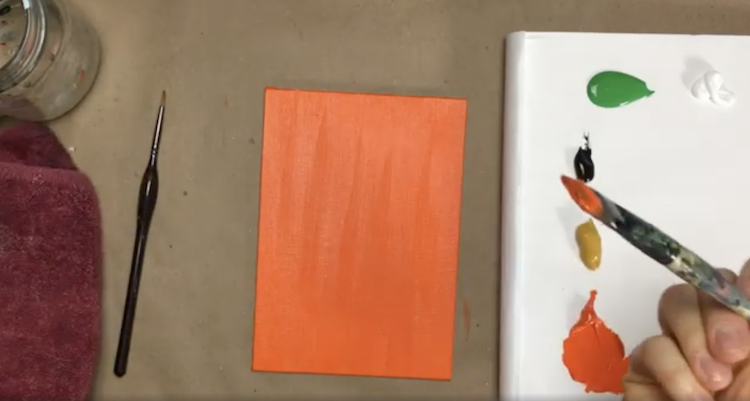
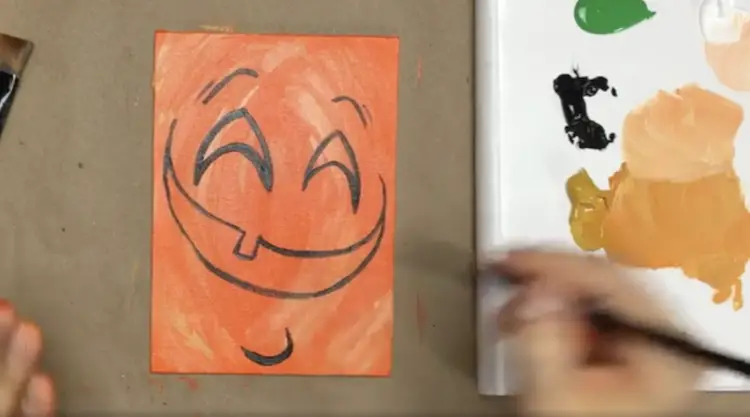
STEP 1: Using a flat wash brush, combine equal parts yellow and red to make the color orange. Then cover your canvas entirely with that color.
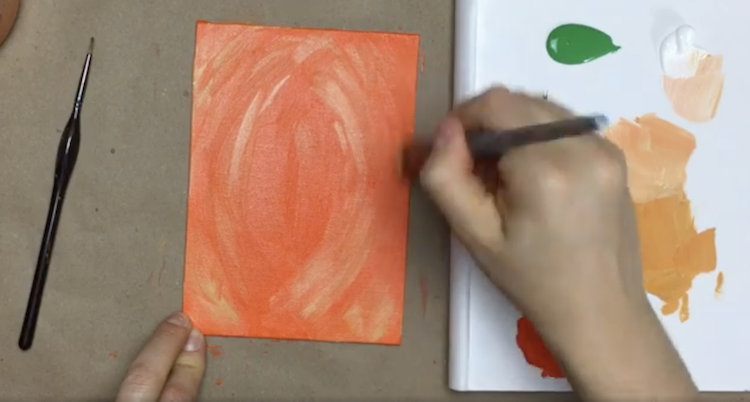
STEP 2: With your rinsed flat wash brush, grab some white mixed with yellow, and create slight curved lines.
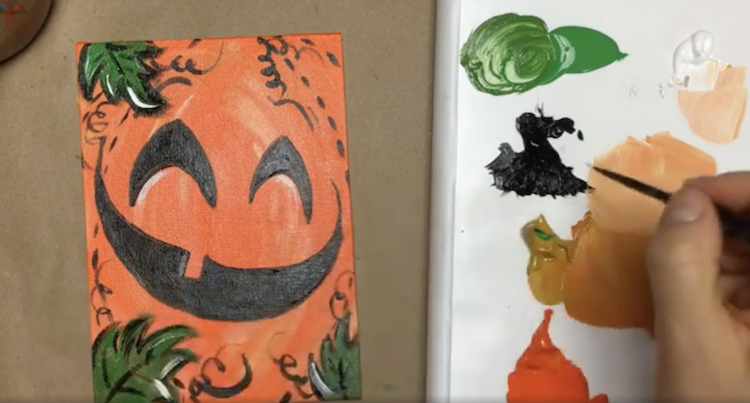
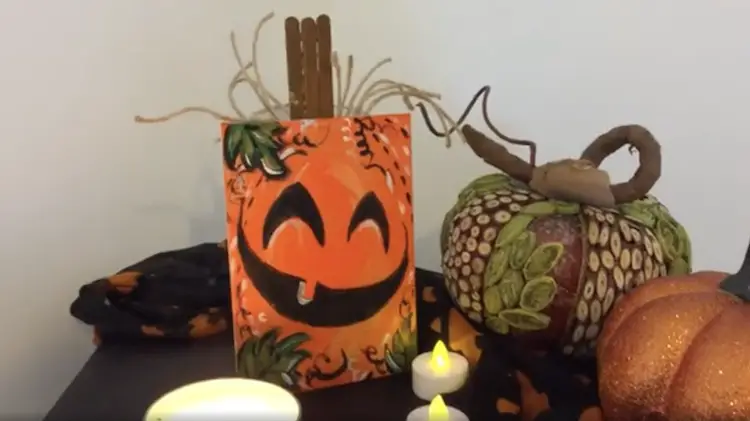
STEP 3: Using a detail round brush dipped with black, paint in your pumpkin face. I painted my jack-o-lantern with a big toothy smile with chin and rounded eyebrows. Have fun with this part and remember to keep those expressions super exaggerated.
I also added leaves and squiggly accents to give more depth and detail to my pumpkin.
Create the Pumpkin Stem
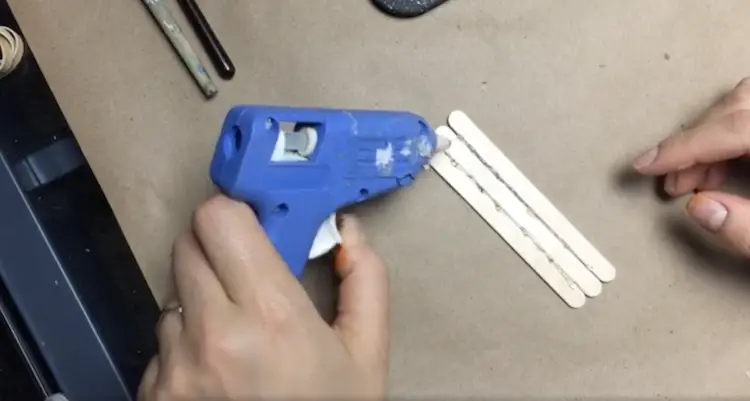
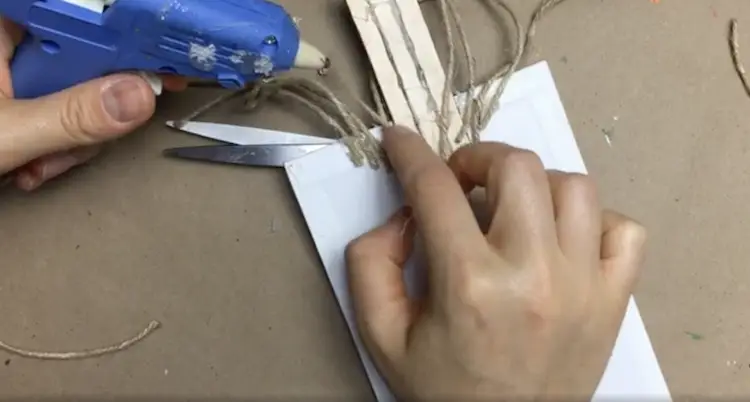
STEP 4: With three popsicle sticks, glue them together to create the stem of your pumpkin.
STEP 5: Using brown paint (or red+blue+yellow together), paint the popsicle stick stem.
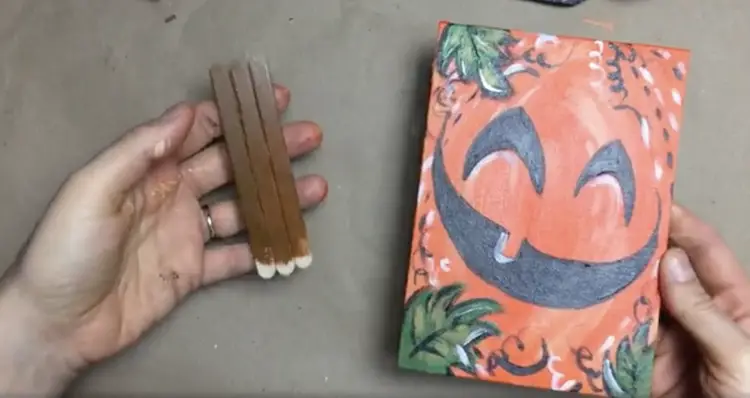
STEP 6: Hot glue your pumpkin stem (and any additional items like pieces of twine) to the top back of the canvas.
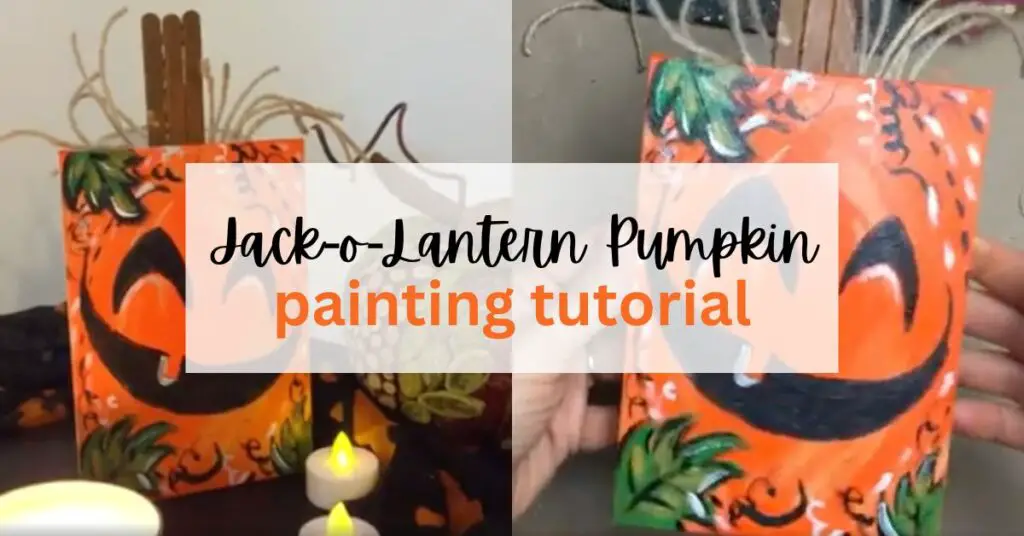
Admire your Pumpkin Creation
Once you’re happy with your cute jack-o-lantern pumpkin, sit back and admire your work.
Enjoyed this? Make more Halloween paintings

Pin it for later! ⤵