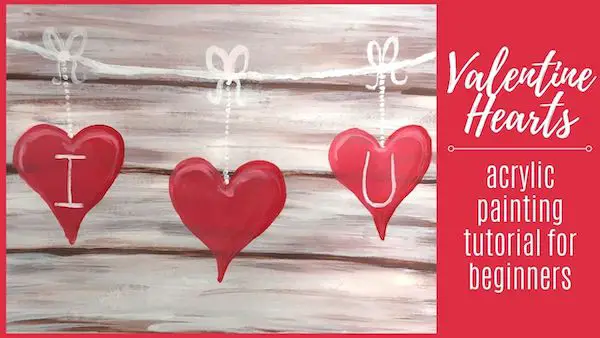
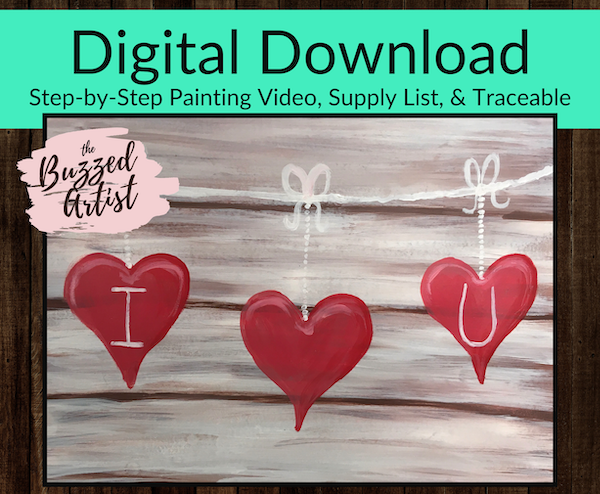
The beginner’s step-by-step guide to painting a string of valentine hearts against a rustic wood background using acrylic paint
When I think of anything related to Valentine’s day, my 3rd grade memories of bringing home a big paper bag full of candy and notes come flooding back. The little notes from my crushes featuring pink and read hearts always made my own heart go a-flutter.
With that in mind, this painting tutorial is the perfect homage to the valentine hearts and notes- set against a rustic plank background that gets my Fixer Upper itch scratched.
Seriously, my obsession with aged wood is near worrisome at times. But it looks sooooo good.
Related: Valentine Vase & Hearts Acrylic Painting Tutorial
And don’t be intimidated by the colors or techniques. We are only using 2 colors plus white (heck yes!) and just 3 brushes. Plus, i’ll walk you step-by-step through this entire process; all you have to do is bring a winning attitude and some paint.
So grab your paint supplies and let’s dive in.
👉 Want to host a paint party with this tutorial? Here is exactly how you can set up a fun DIY paint party at home.
Some links mentioned below are affiliate links which come at NO extra cost to you, my darling Queen Bees! If you wish to support this website and send me an extra thank you, be sure to use the links below.
Valentine Hearts Acrylic Painting Supplies
- 11″x14″ Acrylic paper 400gsm
- ART1st Tracing Pad
- Carbon Pencil
- Sketch Pencil
- Cup of water
- Table cloth
- towel
- palette paper
Brushes:
Paints:
Pin it for later! ⤵
Easy Valentine Hearts on String Acrylic Painting Tutorial

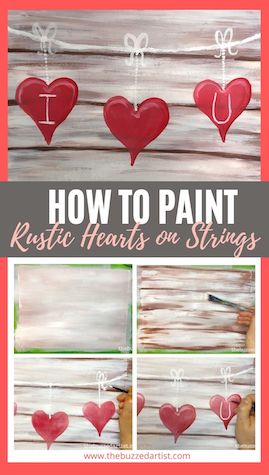
Step 1: Create the background color
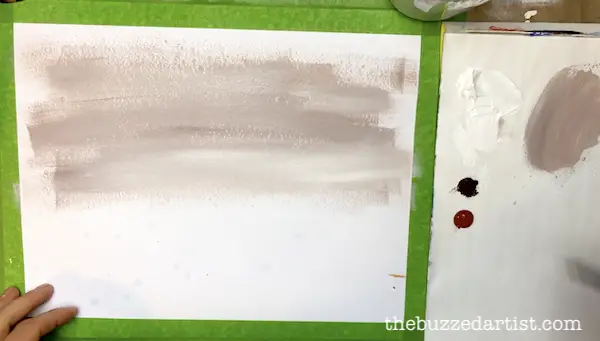
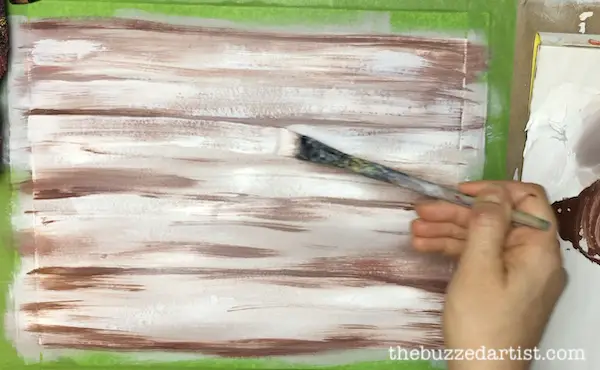
With your flat wash brush dipped in water, mix burnt umber with a bit of white and paint horizontal lines across your canvas. Make sure to dip and reload your brush to keep your paint flowing and smooth. As you are creating your background colors, dip your un-rinsed brush into titanium white to add some white highlights to the background for extra depth.
Be sure to paint the entirety of your canvas and have it look a little something like this.
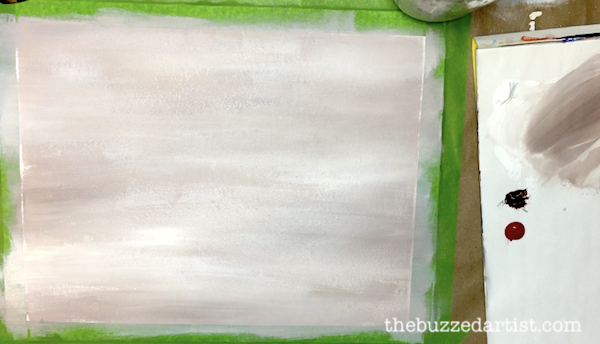
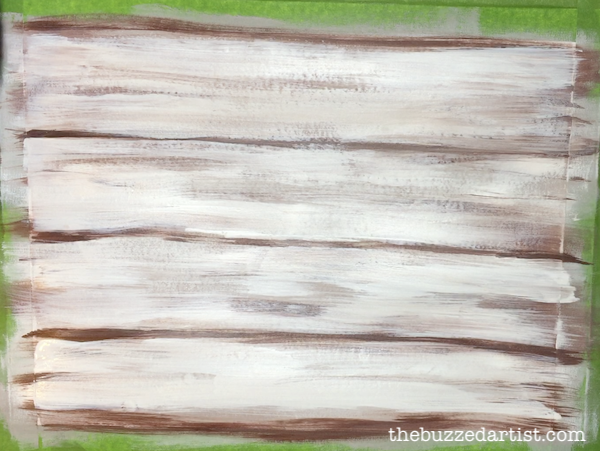
Step 2: Add White Streaks to Background
With your un-rinsed flat wash brush dipped in white, dry-brush white horizontal lines across the entirety of your canvas. This helps to create a more “imperfect” wood panel look; so be liberal and loose with your application.
As an added tip, make sure your brush does not have an excessive amount of paint on it so it helps create a better dry-brush effect that looks more organic.
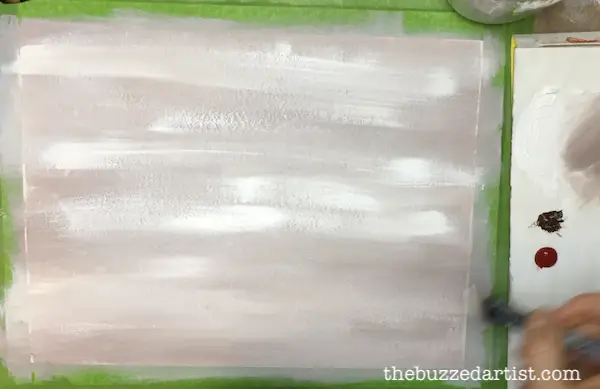
Step 3: Add in Paneling Lines
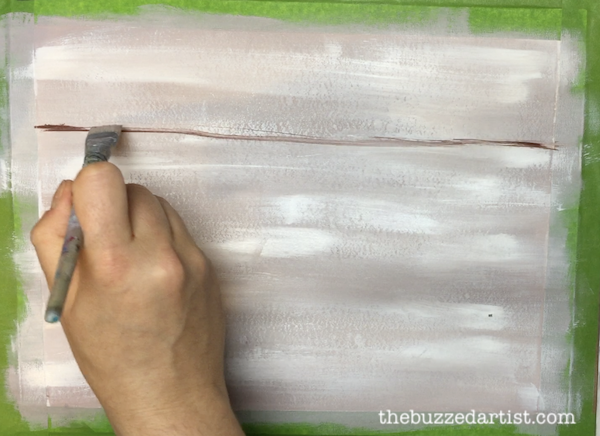
With your rinsed flat wash brush dipped in burnt umber, position your brush 2-3″ from the top of your canvas. Use the tip of your brush and with gentle pressure, create a series of horizontal thin lines running from the left side of the canvas to the right (or reverse if you’re left handed). I made sure to keep each line about 2-3″ apart.
You can also add more lines at the very top and bottom portions of your canvas to create wood continuity.

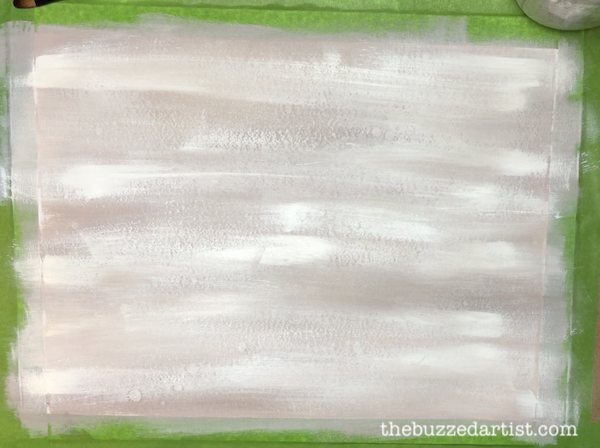
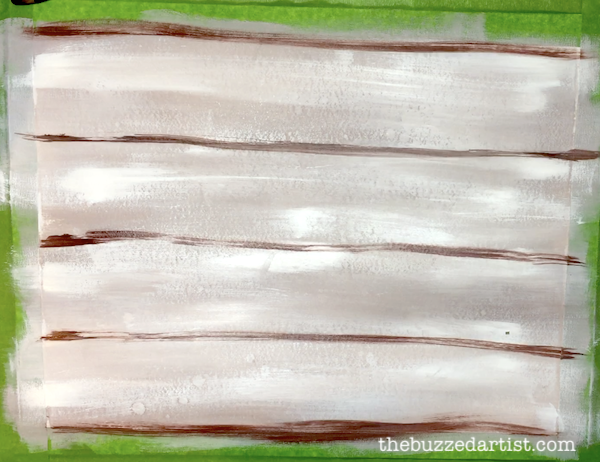
Step 4: Add in the Wood Imperfections
Using the tip of your flat wash brush and a bit of burnt umber, create a set of tinier, thin horizontal lines across various portions of the wood planks. Be sure to use gentle pressure on your brush tip to help keep the lines a bit more faded.
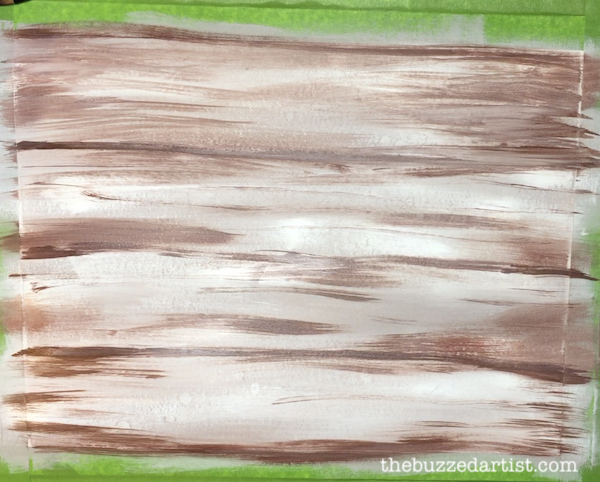
Continue dry-brushing your burnt umber throughout, especially concentrating the lines at the canvas edges (left and right).
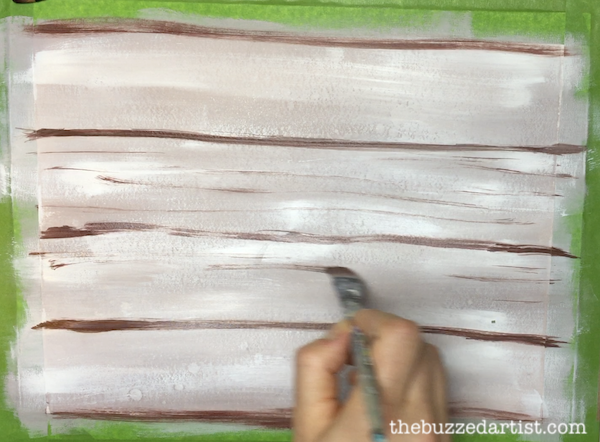
Step 5: Paint in the White Streaks
With your rinsed flat wash brush dipped in titanium white, dry brush the color over the wood panels. The trick here is to keep your brush loaded but not sopping with paint. If that is the case, be sure to dab your brush with a towel before applying it to canvas.
To help create a more organic look, slightly paint over the paneling dividing lines to both thin them out and create more depth.
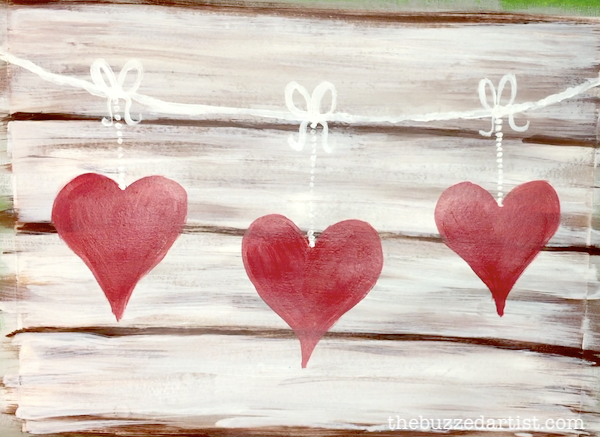
Step 6: Add the Valentine Heart String
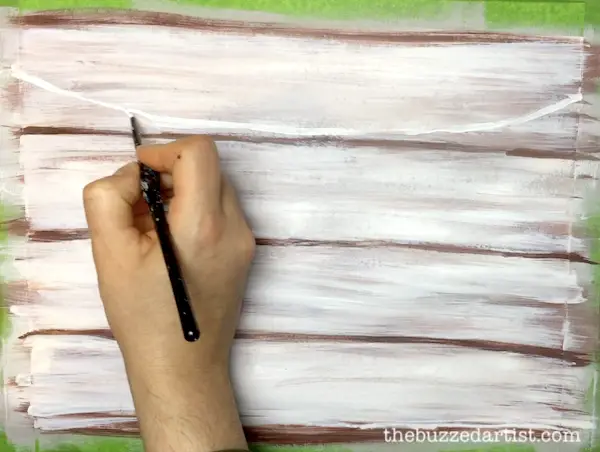
With your detail round brush dipped in water and titanium white, create a slightly curved line starting from the left and ending on the rightmost portion of the canvas. Start the line about 1-2″ from the left or right top most portion of the canvas.
Step 7: Paint the Valentine Heart
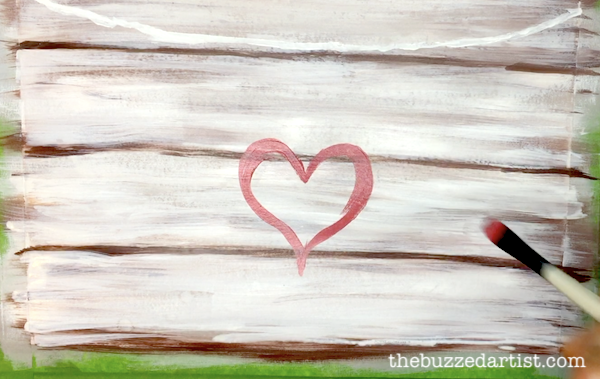
Next comes the cute valentine hearts! So, let’s begin with the center heart.
Using your filbert brush dipped in water, mix red and a tiny bit of white.
Find the center of the string and measure about 3-4″ down from that point. This is where you’ll place your first heart. Using the tip of your filbert brush to create the line work (and as a bonus, use the broad size of your filbert to create a rounded edge).
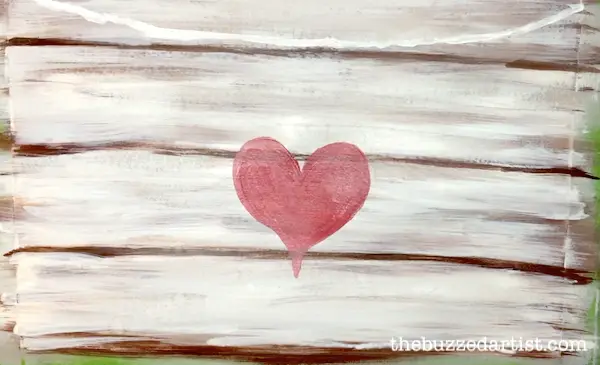
Once you have your heart painted in, fill it completely with the red color. If you are not very confident on free-handing your hearts, you can simply get the stencil from my shop here or click the banner below.
Step 8: Paint in the other 2 hearts
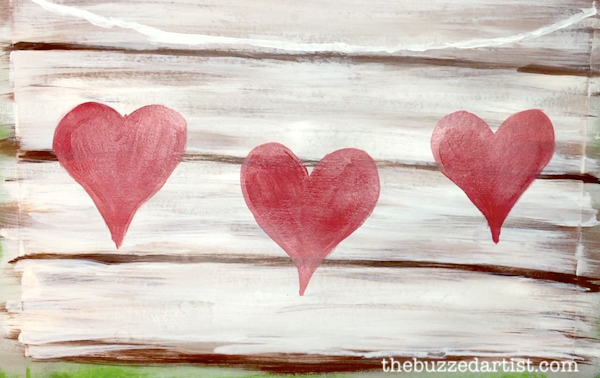
For those that are free-handing the other two hearts, place the other two hearts on the right and left of the first heart, spaced about 3-4″ apart.
Step 9: Connect the Hearts with String

With your rinsed detail round brush dipped in white, create a series of dotted lines going from the cusp of the heart (aka the butt of the heart lol) vertically up to the string. Repeat this for all the hearts.
Step 10: Add dot to string
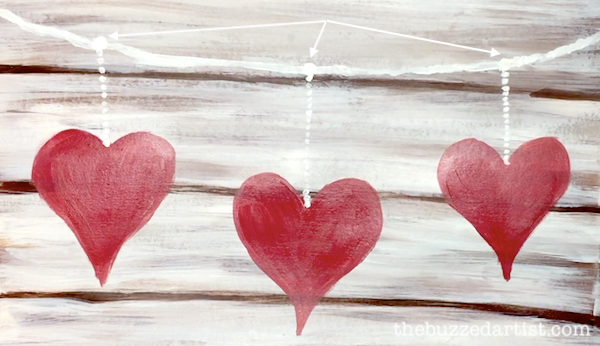
Add a slightly larger circle connecting the series of dotted lines to the string for all three hearts.
Step 11: Paint the first bow
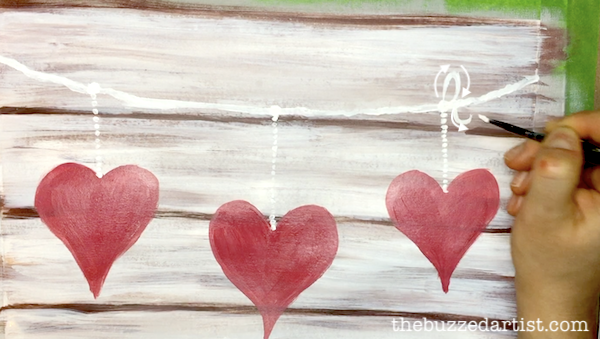
With your detail round brush and white, create a slightly angled oval that starts and ends at the larger dot on the upper part of the string. This will be the upper portion of the bow that holds the valentine hearts to the string. From the larger dot once again, create a slight “U” shape on the bottom portion of the string. This will be the tassel of the bow.
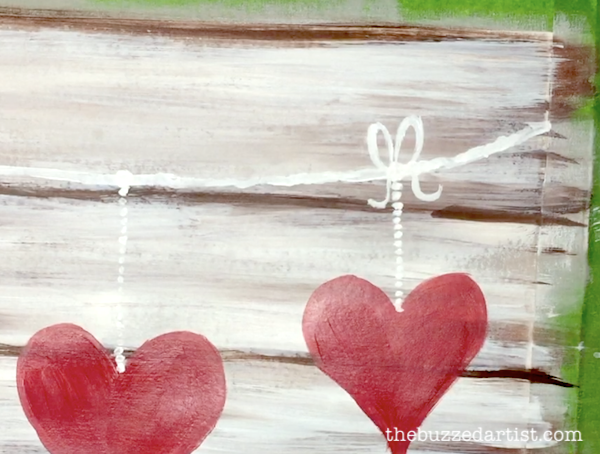
Repeat the same process for the other side of the bow, making sure to angle the bow and tassel to the left.
Step 12: Paint the remaining bows
Step 13: Paint in Heart Shadow
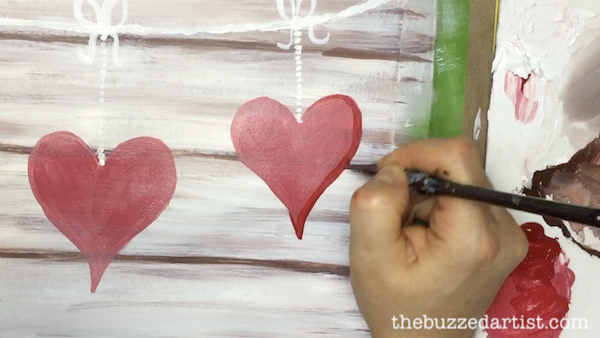
With your rinsed detail round brush loaded with just red, paint an line following the rightmost portion of the heart. This will set up the shadow look for the valentine heart. Be sure to repeat this for the other two hearts.
Step 14: Blend the Heart Shadow

Before the first line dries, dip your detail brush in water and pull the painted line towards the center of the heart. This will help great a better blended shadow.
Step 15: Paint Heart Highlight
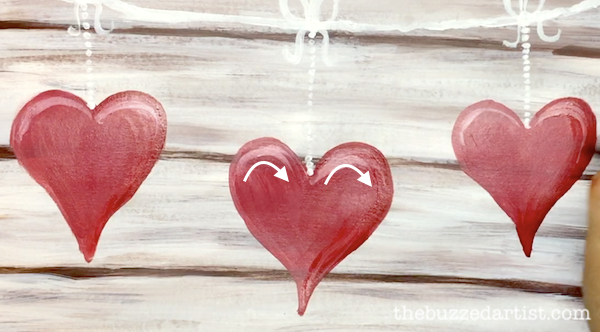
With your rinsed detail brush dipped in white with a bit of red, create highlights at the heart humps (aka the heart butt hehe), making sure to follow the thicc curve.
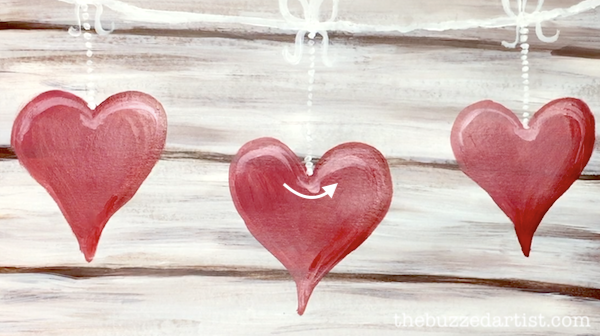
Create another highlight just under the heart cusp with a “u” shaped line.
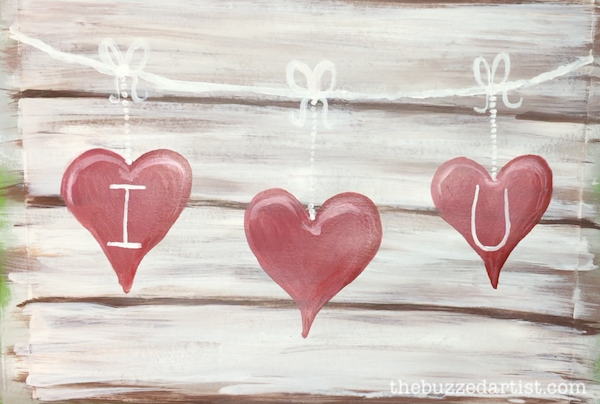
Step 16: Customize and Add Letters
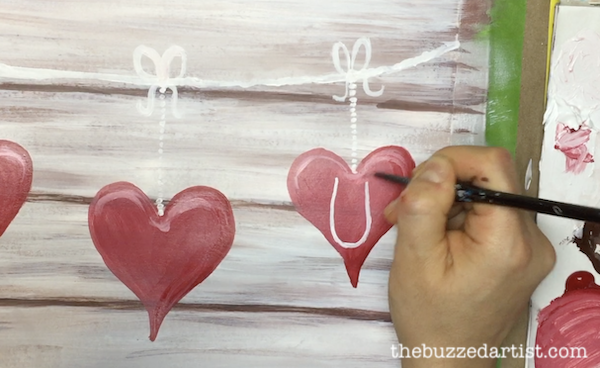
This is always the best part of any painting -the customization potential. Because this valentine-themed painting has lots of hearts in it, you can totally paint in or write in special unique messages that you can personalize for yourself or as a gift for a special somebody (hubba hubba).
In my case, I decided to use my detail round brush dipped in white and paint “I” and “U” on the left and right heart.
Step 17: Step back and Admire your Work, Queen
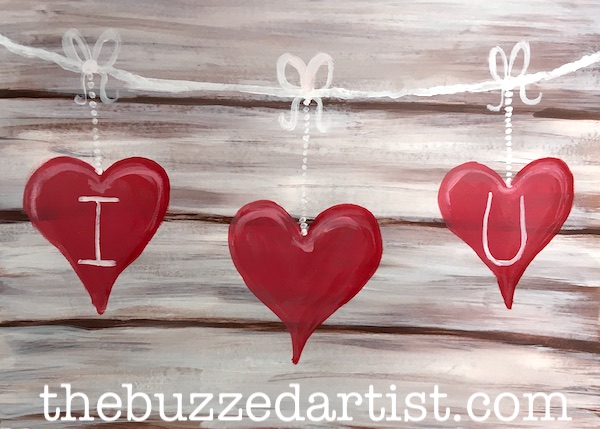
and there you have it, a cute Valentine-themed string of hearts set against a rustic wood panelling background. Call in Joanne and Chip Gaines, because you are serving some boho country chic that rivals the Magnolia duo.